

Texas Bluebonnet Photos 2021
Every year we make Bluebonnet photos a big thing! Here’s our how 2021 family bluebonnet photo session went along with some helpful hints and tips!
For many of us here in Texas, spring is just about one thing - waiting for the perfect time to go get those family bluebonnet photos! There are so many factors to consider - location, time of day, what to dress the kids in, etc. For us, we don’t actually take a lot of family styled photos of our kids, but bluebonnet photos are the one annual thing we do. And to be honest, I stress about it every year.
Getting the Perfect Bluebonnet Pictures
If you haven’t already, go check out my previous blog post, that gives a lot of tips and trick on how to get great bluebonnet pictures. Click Here to check out that post! There are a lot of great tips there that will help you get really fantastic photos. Here’s what I did this year to try to up my bluebonnet photo game!
My Camera
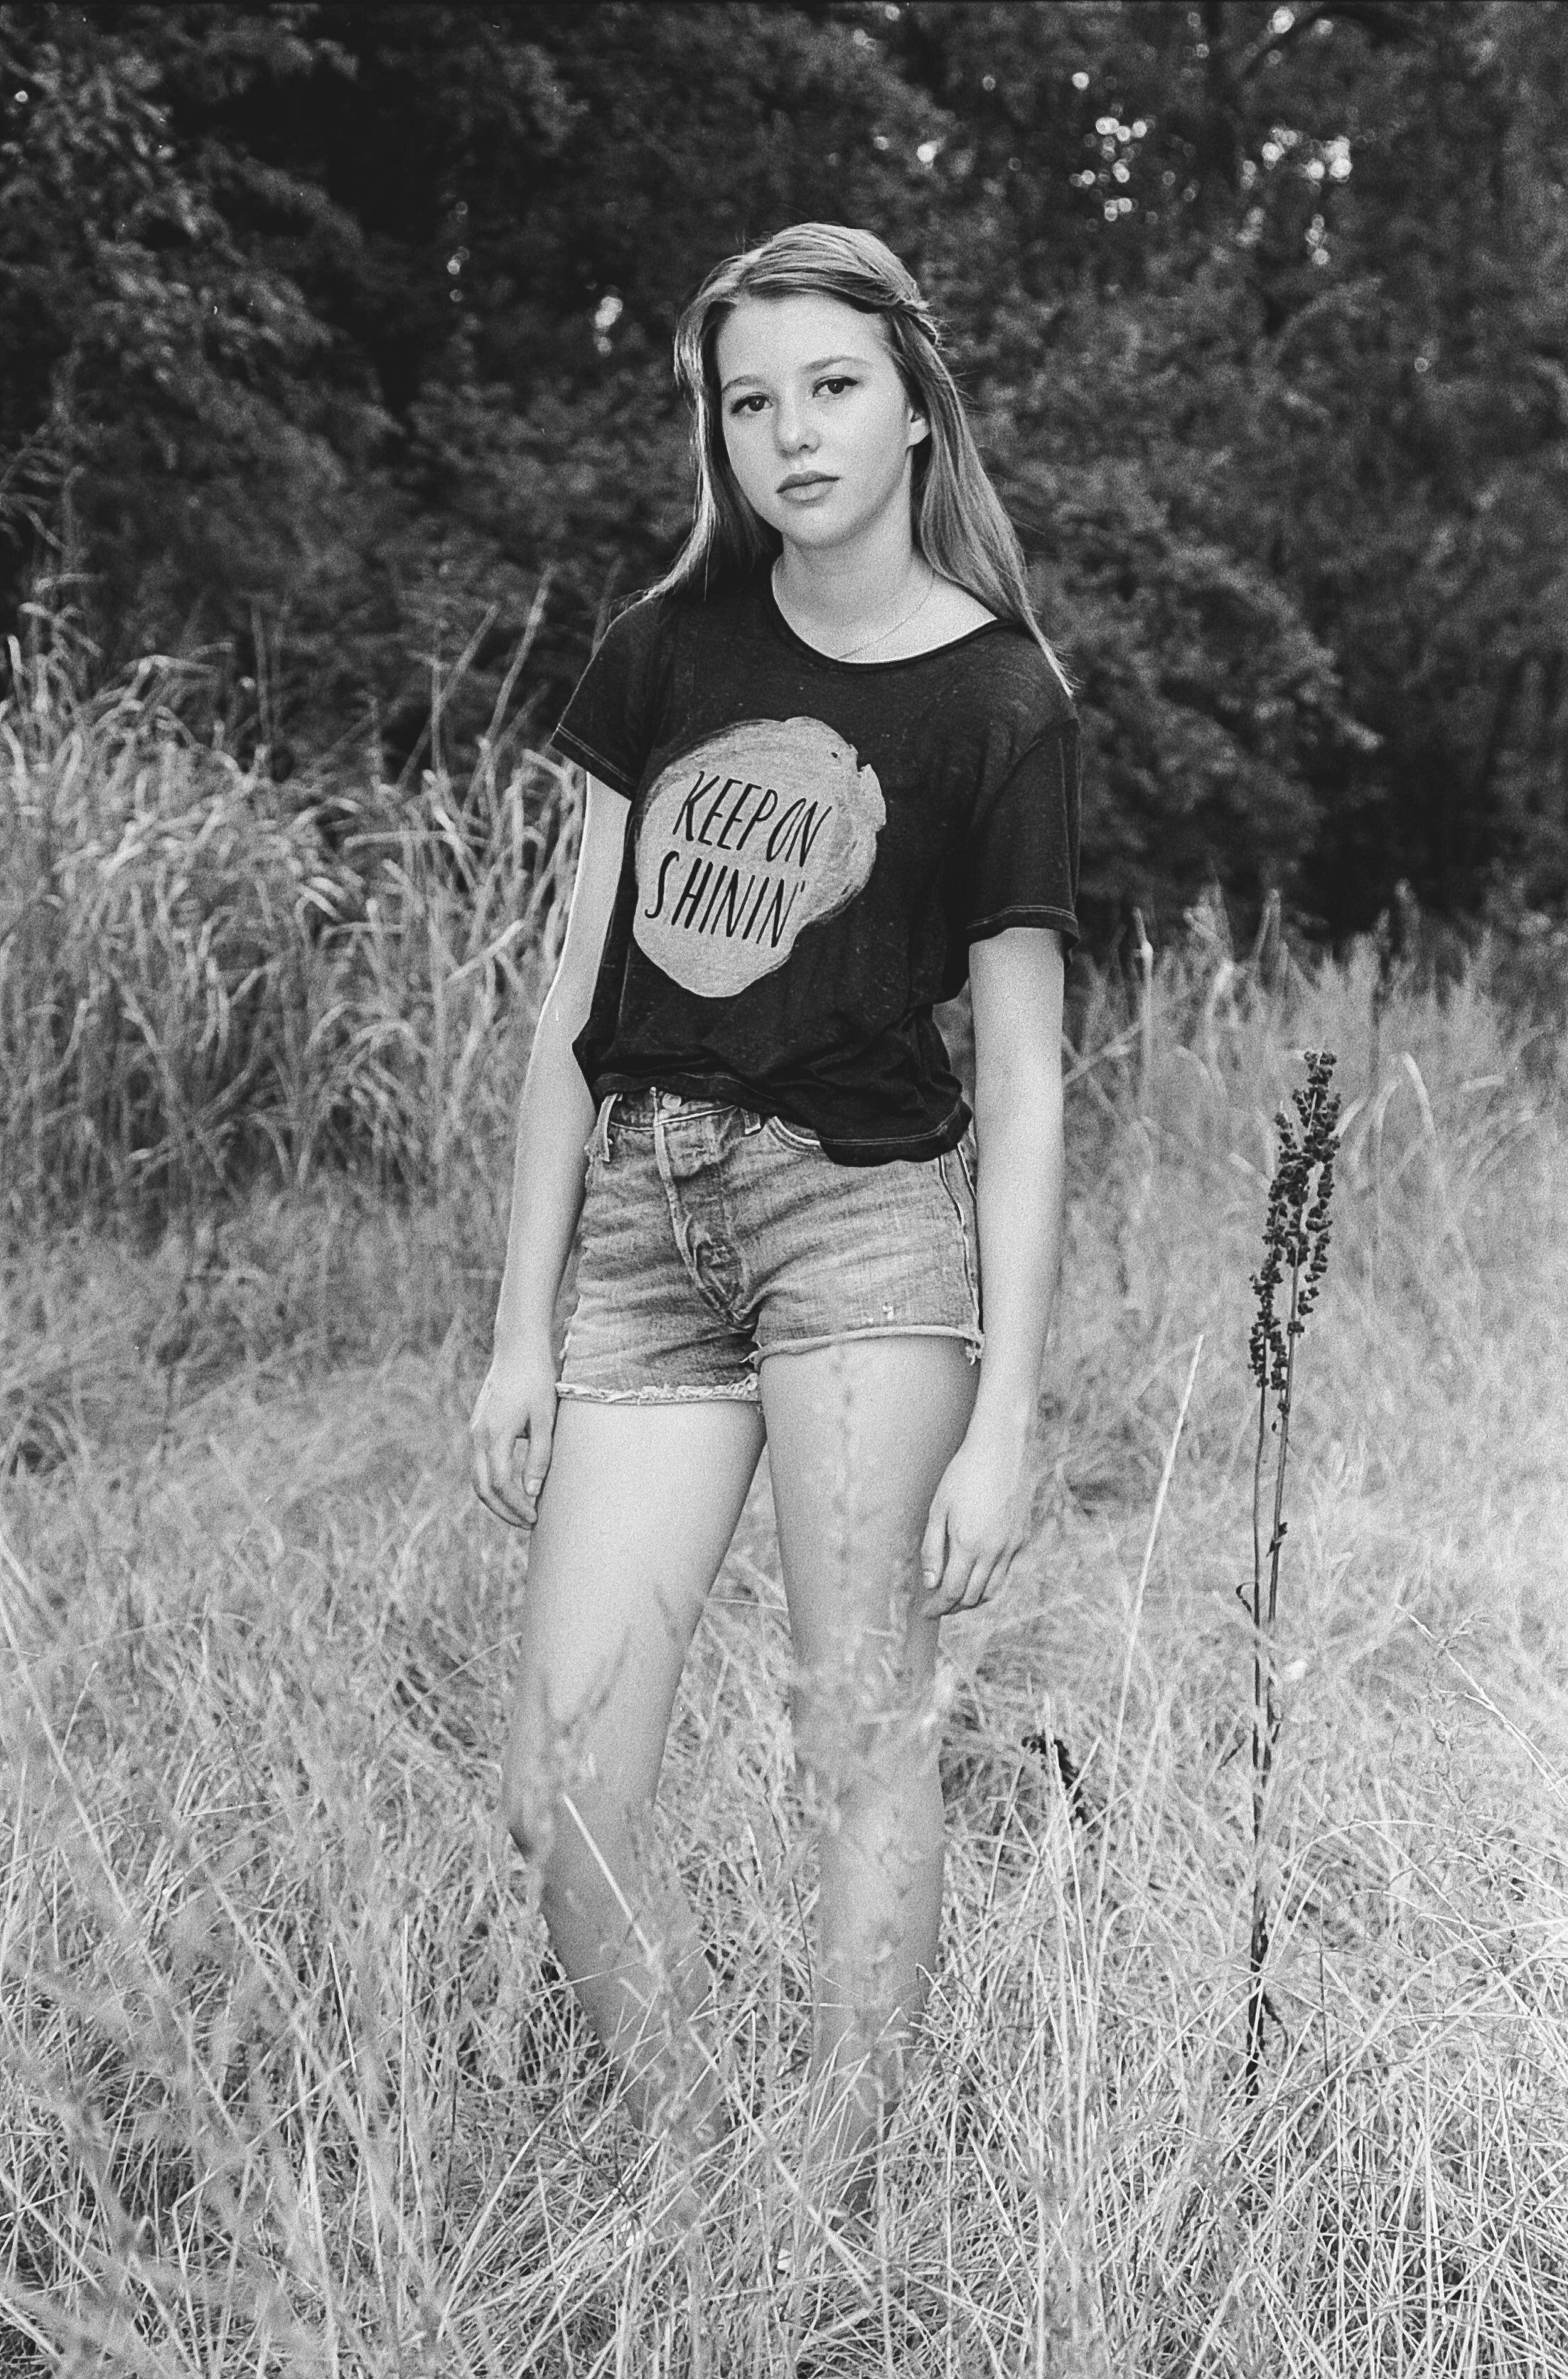
This year, for the first time in a few years I decided to go back to film for our family bluebonnet photos. Last year during the middle of Covid season, I just snapped them with my digital. The previous year, our kids were really little and so I knew there was no way I was going to get them all to sit still and behave so there would need to be a lot of editing and photoshopping. But this year, I thought I had a chance to get a decent shot of my three younger kids. I loaded up my Hasselblad 501cm with the 80mm lens attached and headed out! The 501cm is an amazing camera, its fully manual but its fast for a fully manual camera. Plus, I just really wanted to use this camera. I mainly keep it in the studio, but I felt a trip to the bluebonnet fields would a fitting exercise for my latest camera acquisition.
My Film
I’ve known for like 4 months what film I was going to use for this shoot. I’m not kidding when I say that we take these photos very seriously each year. I’ve literally been planing these photos since winter started. For this shoot, I decided to go with Kodak Portra 400. I’m using a medium format camera so I used the 120 version of the film but you can also get it in 35mm. Portra is great for skin tones and that’s what I really wanted to focus on this time around. I loaded up two rolls (24 exposures) and hoped I could at least get one decent photo out of 24…. But there was no way to be sure that would even happen.
One trick that I have learned from shooting with Kodak Portra 400 is to shoot it at ISO 200 instead of 400. This means, you are essentially overexposing the image, but the over exposure actually brings out some of the best qualities of Portra and it can be easily corrected in the scan/print process.
Lighting Bluebonnet Photos
We were traveling back from College Station after visiting our oldest at Texas A&M and we were adding this photoshoot on to the end of a very busy weekend. There are several amazing locations in Ennis, TX for bluebonnet photos, which was on our way back to that’s where we planned to stop. If you’re looking for a great location for bluebonnet pictures - Ennis is it for North/Northeast Texas! Unfortunately, the time we were going to be in Ennis was not going to give us the best lighting, so I had to improvise.
I positioned my family in a little patch with their right sides facing the mid-afternoon sun. The shadows were harsh. I metered for the bright sunlit side of their faces and then I pulled out my strobes to fill in the dark shadows on their faces. I metered the shadows first and discovered that they were 4 stops below the light side. Which is harsh for sure. If you are looking for a meter, I use the Sekonic L-478D-U. Its an incident meter but it works great and has been a very handy tool to have in my camera bag for years. I set up my lights to try to compensate for the shadows. I had brought with me my Profoto B2’s (these aren’t made any more sadly - the Profoto A1X is a good replacement) and a Profoto 2’ Octabox to help control the harshness of the flash. The octabox from Profoto has two diffusers inside so it really really softens the shadows a lot and fills very nicely. I positioned the flash about 5 feet from my subjects at a 45 degree angle to fill light from the left side.
Posing for Bluebonnet Pictures
While I had several great picture poses in my head, we had to just go with whatever my kids would do that day. As you can see form the photos below, it was kinda a mess. Make sure you get low and get lots of bluebonnets in the shot and in the background. We were positioned on a hill so being lower also meant I could cut out all of the people that were on the other side of the hill taking photos also.
Processing the Film
While I normally process my own film, I’ve been swamped lately with weddings and events so I sent my photos off to done at Richard Photo Lab. These guys are absolutely amazing! Their prices are reasonable and their customer service and attention to detail is unmatched! I went ahead an ordered prints as well and have been so very pleased with the results!
The hard part about film, especially when you send it off is waiting. Richard Photo Lab is very prompt and it doesn’t take very long to get your images back, but when you’re really excited to see if they turned out, it might was well take forever lol.
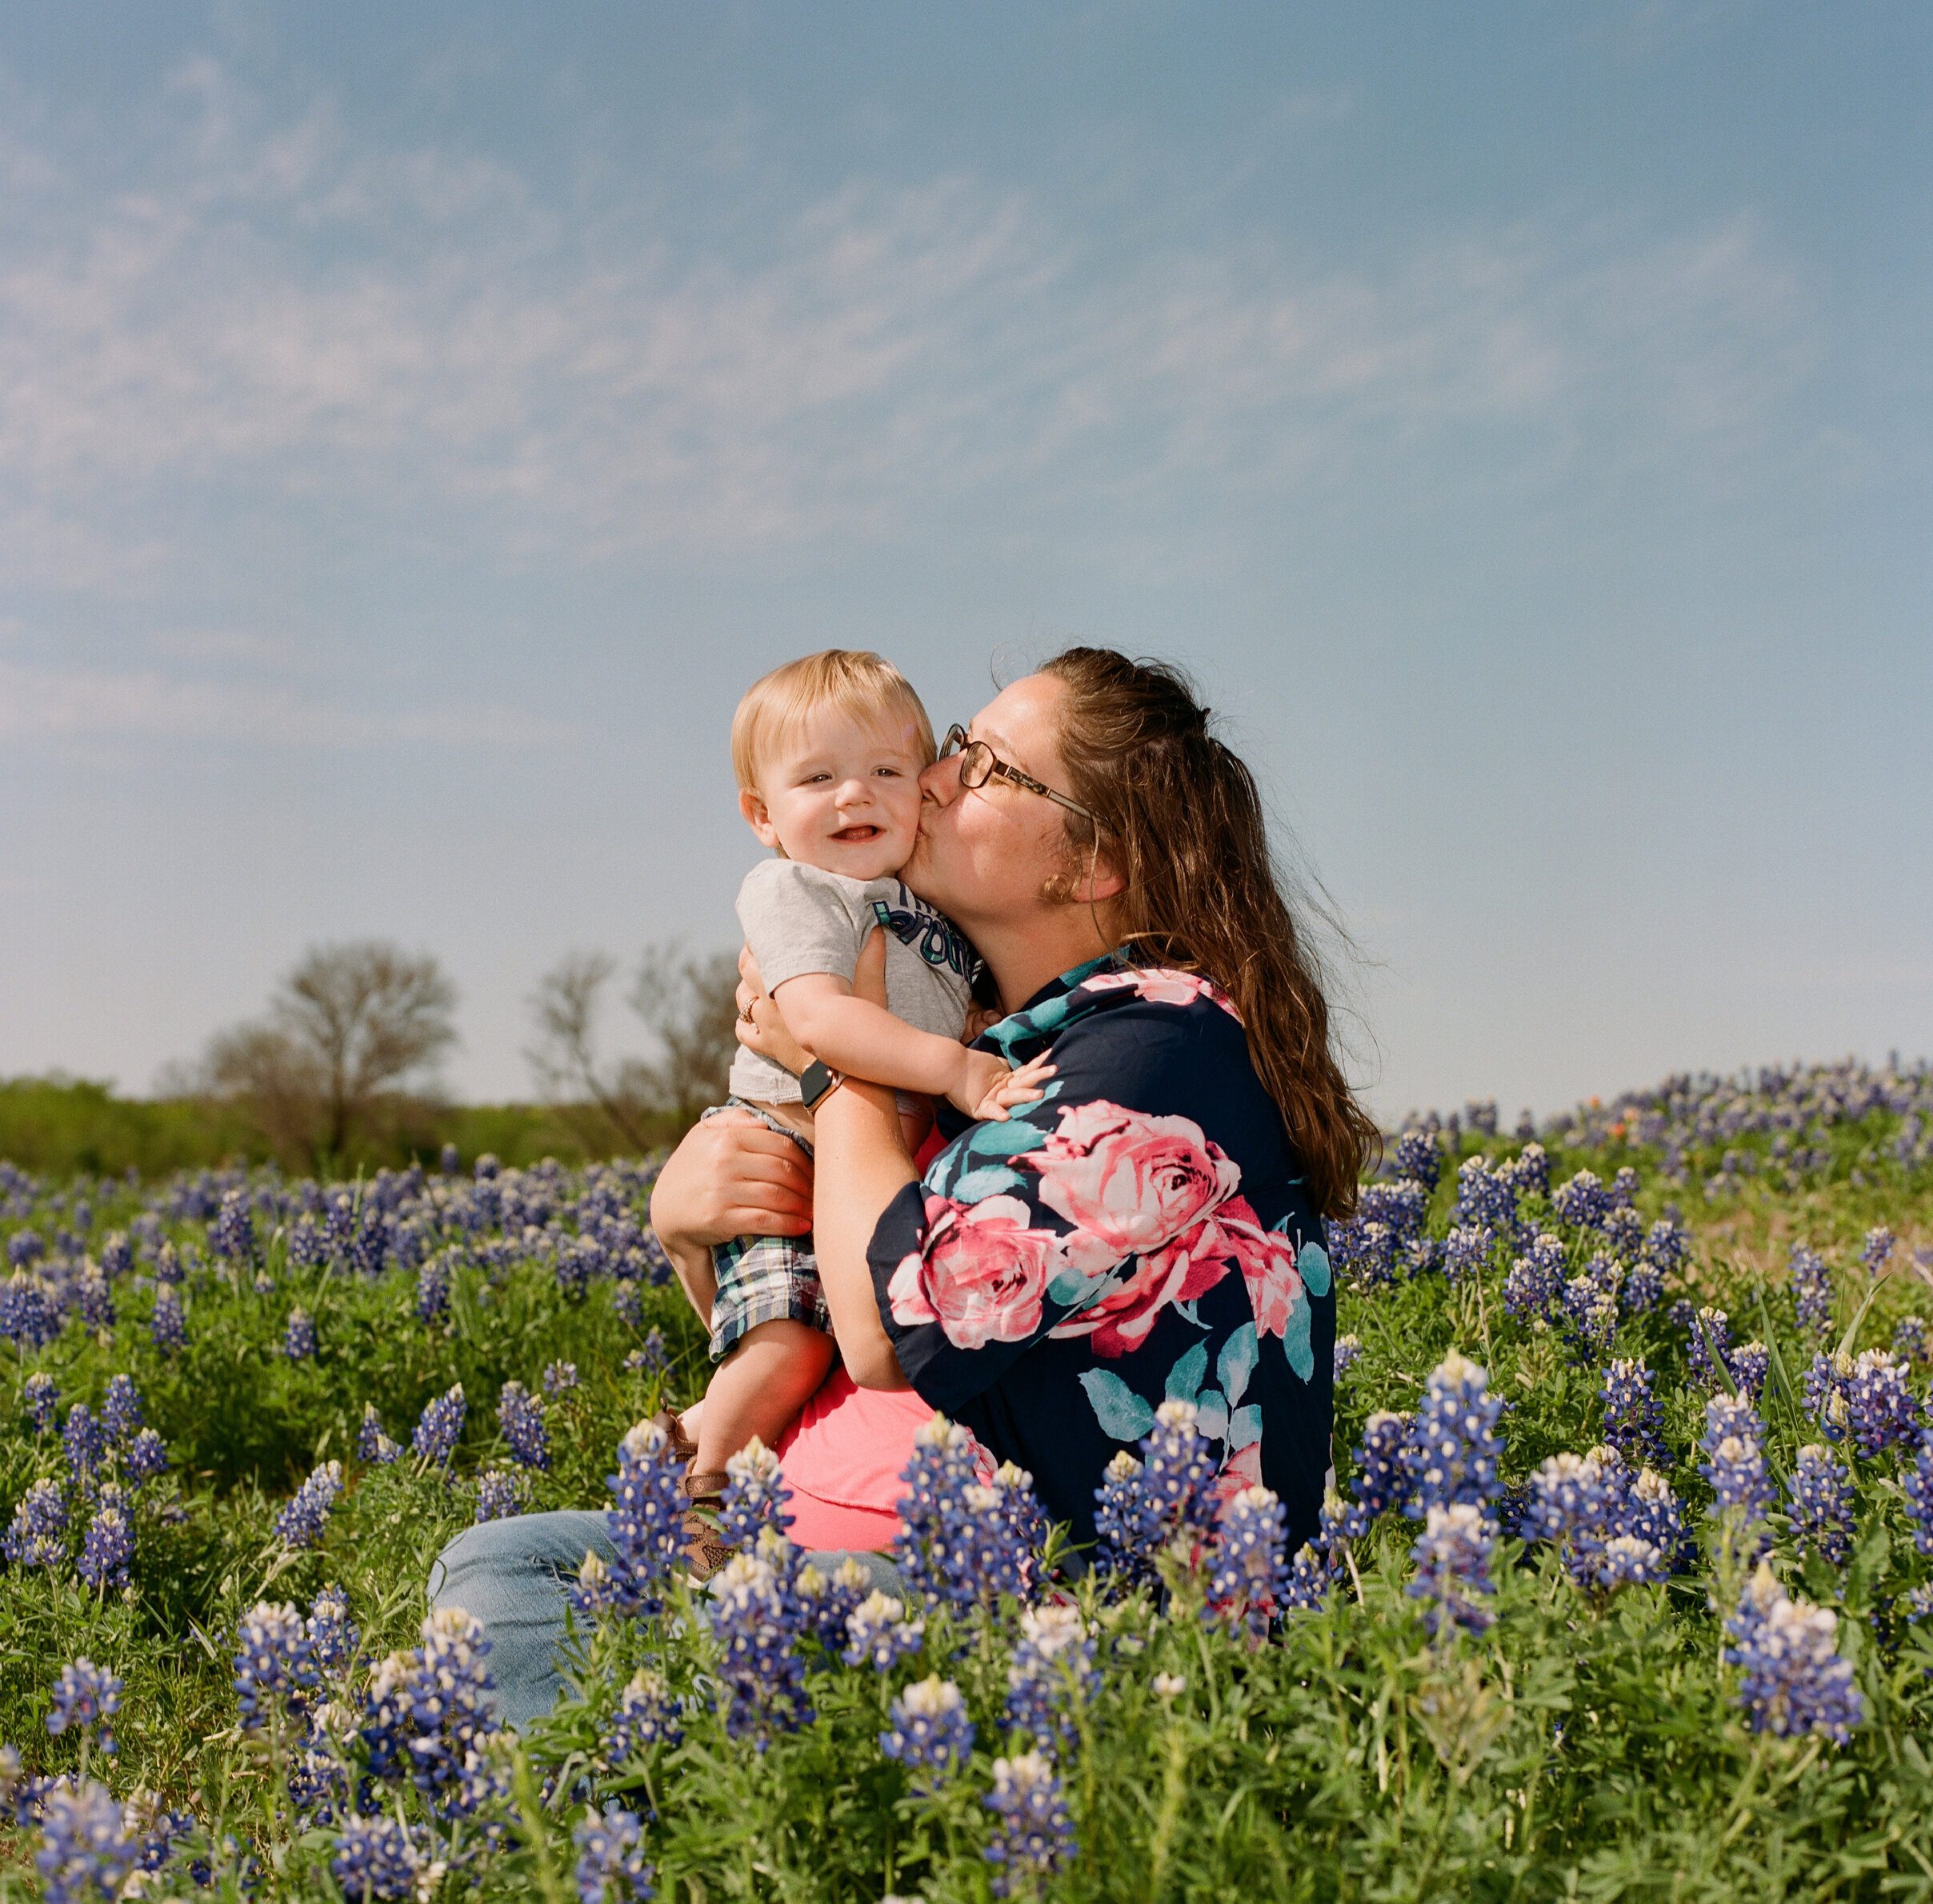
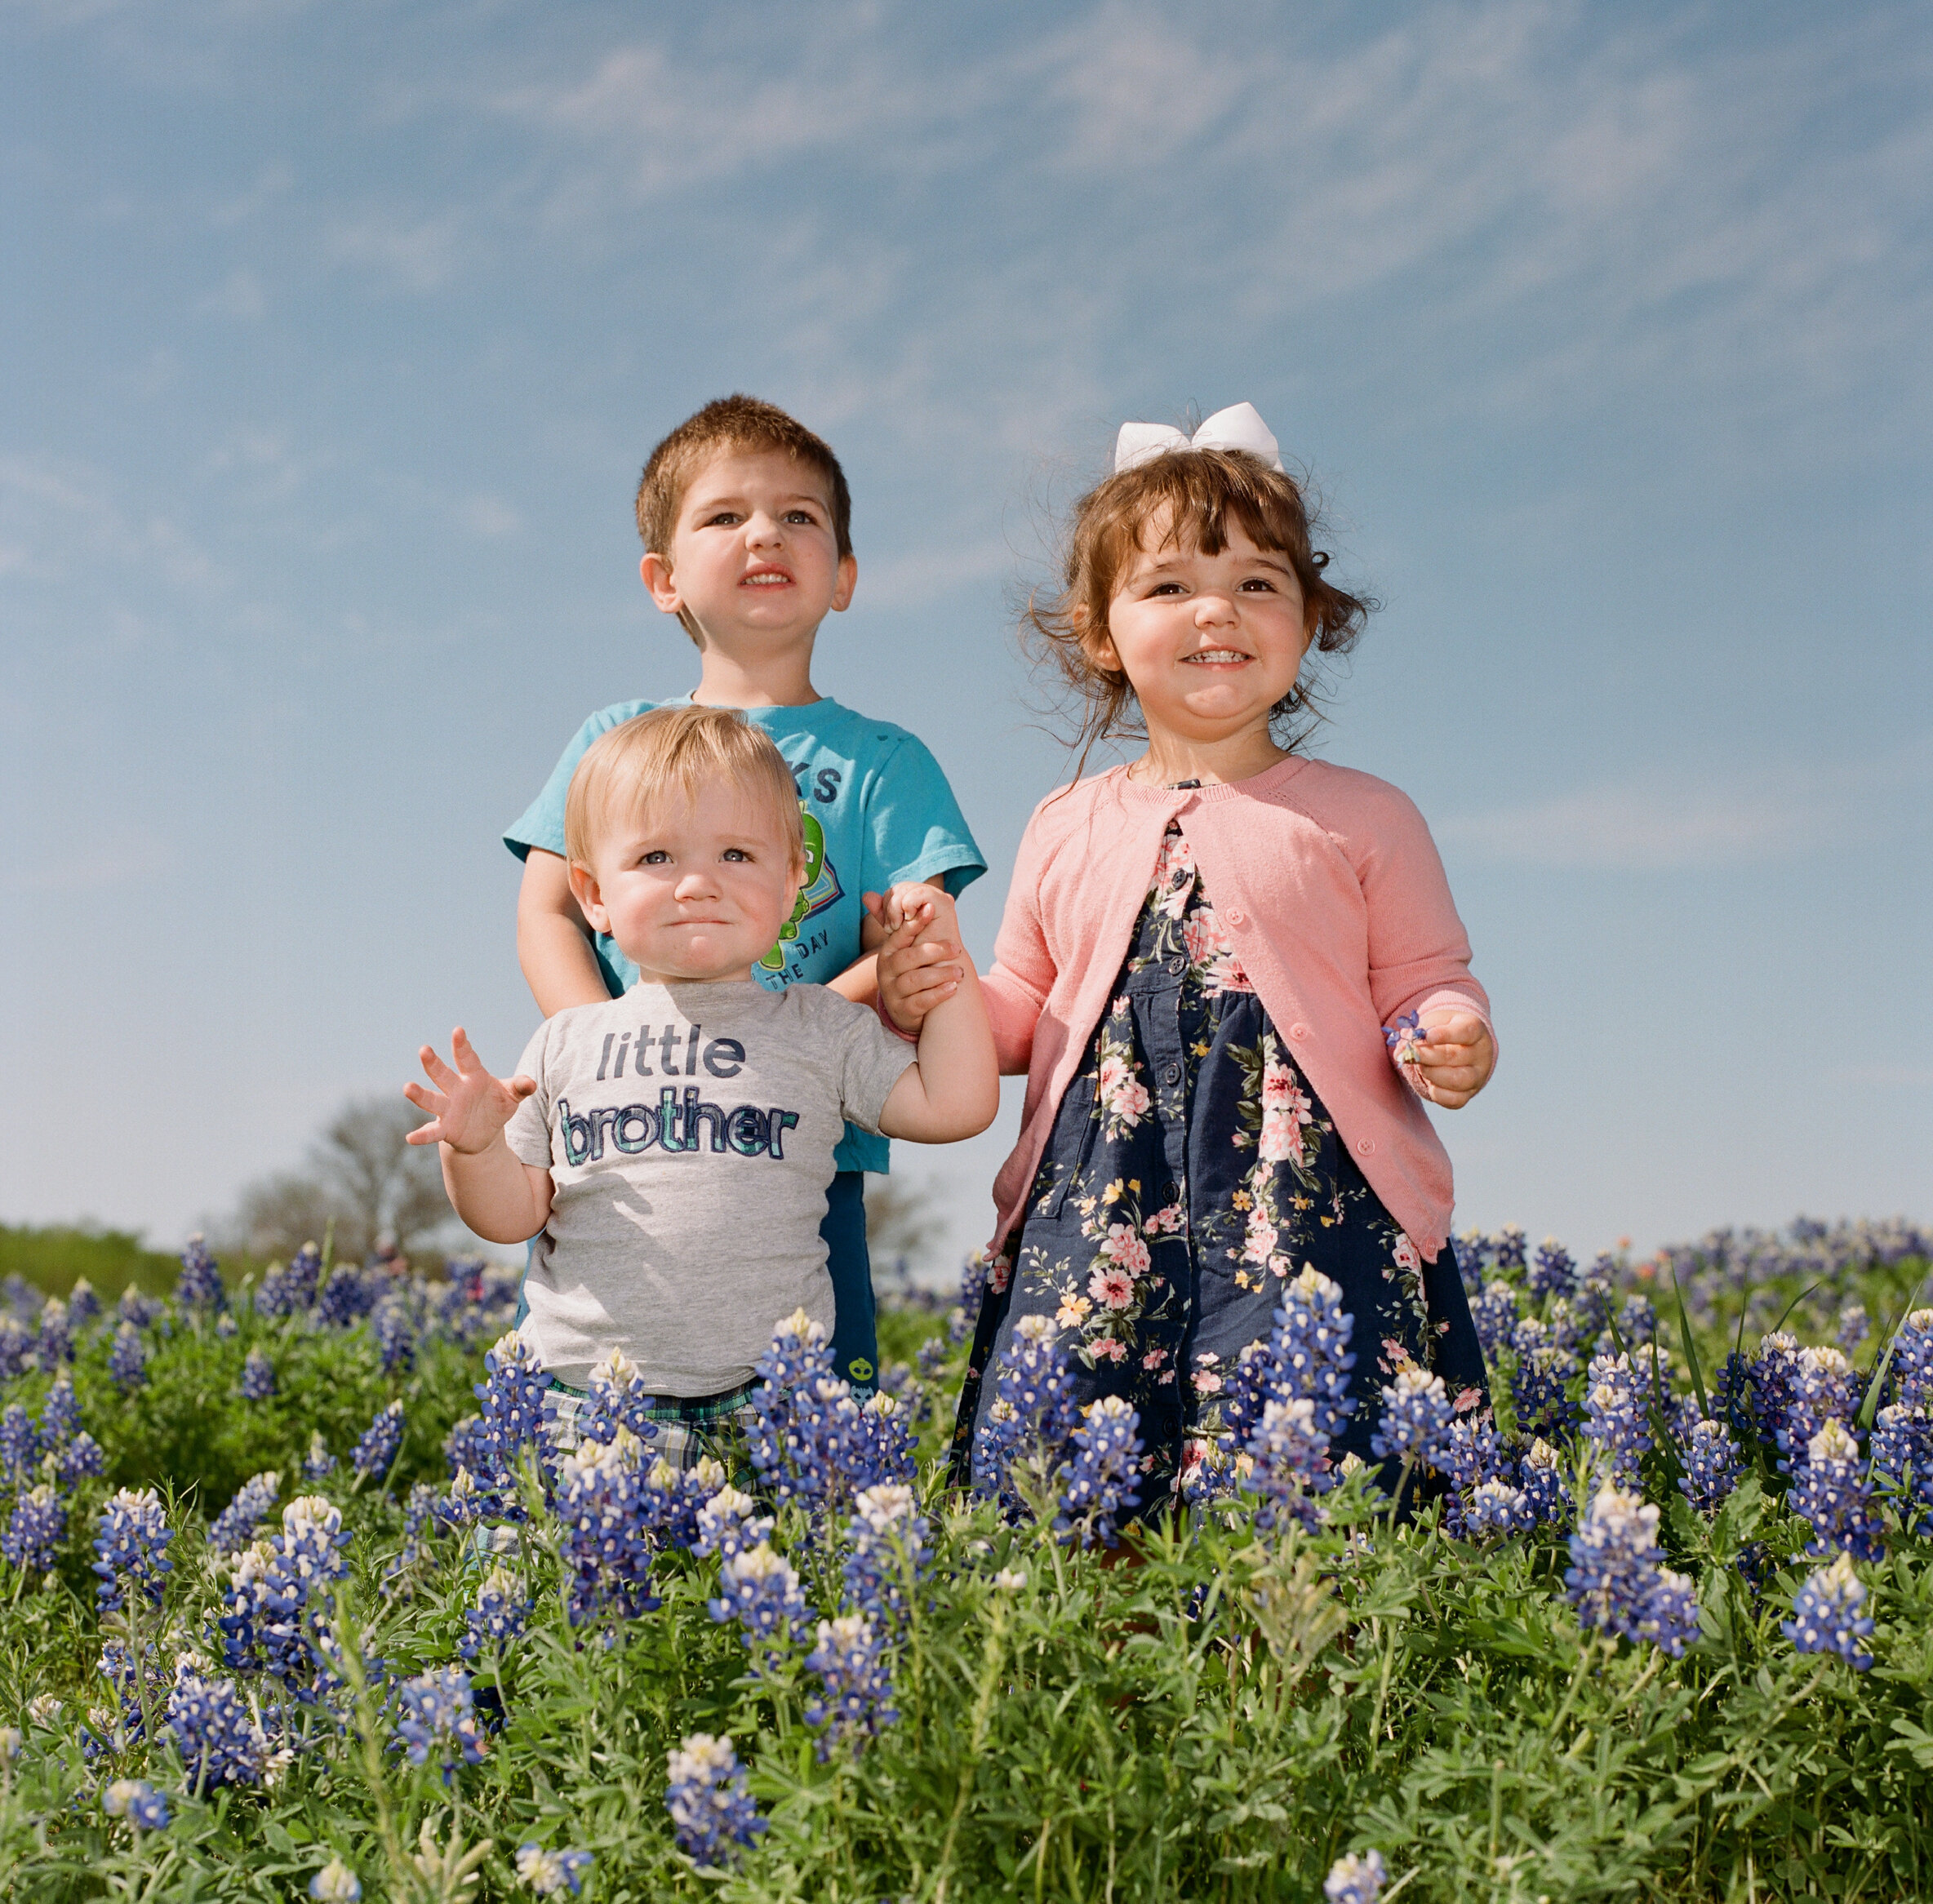
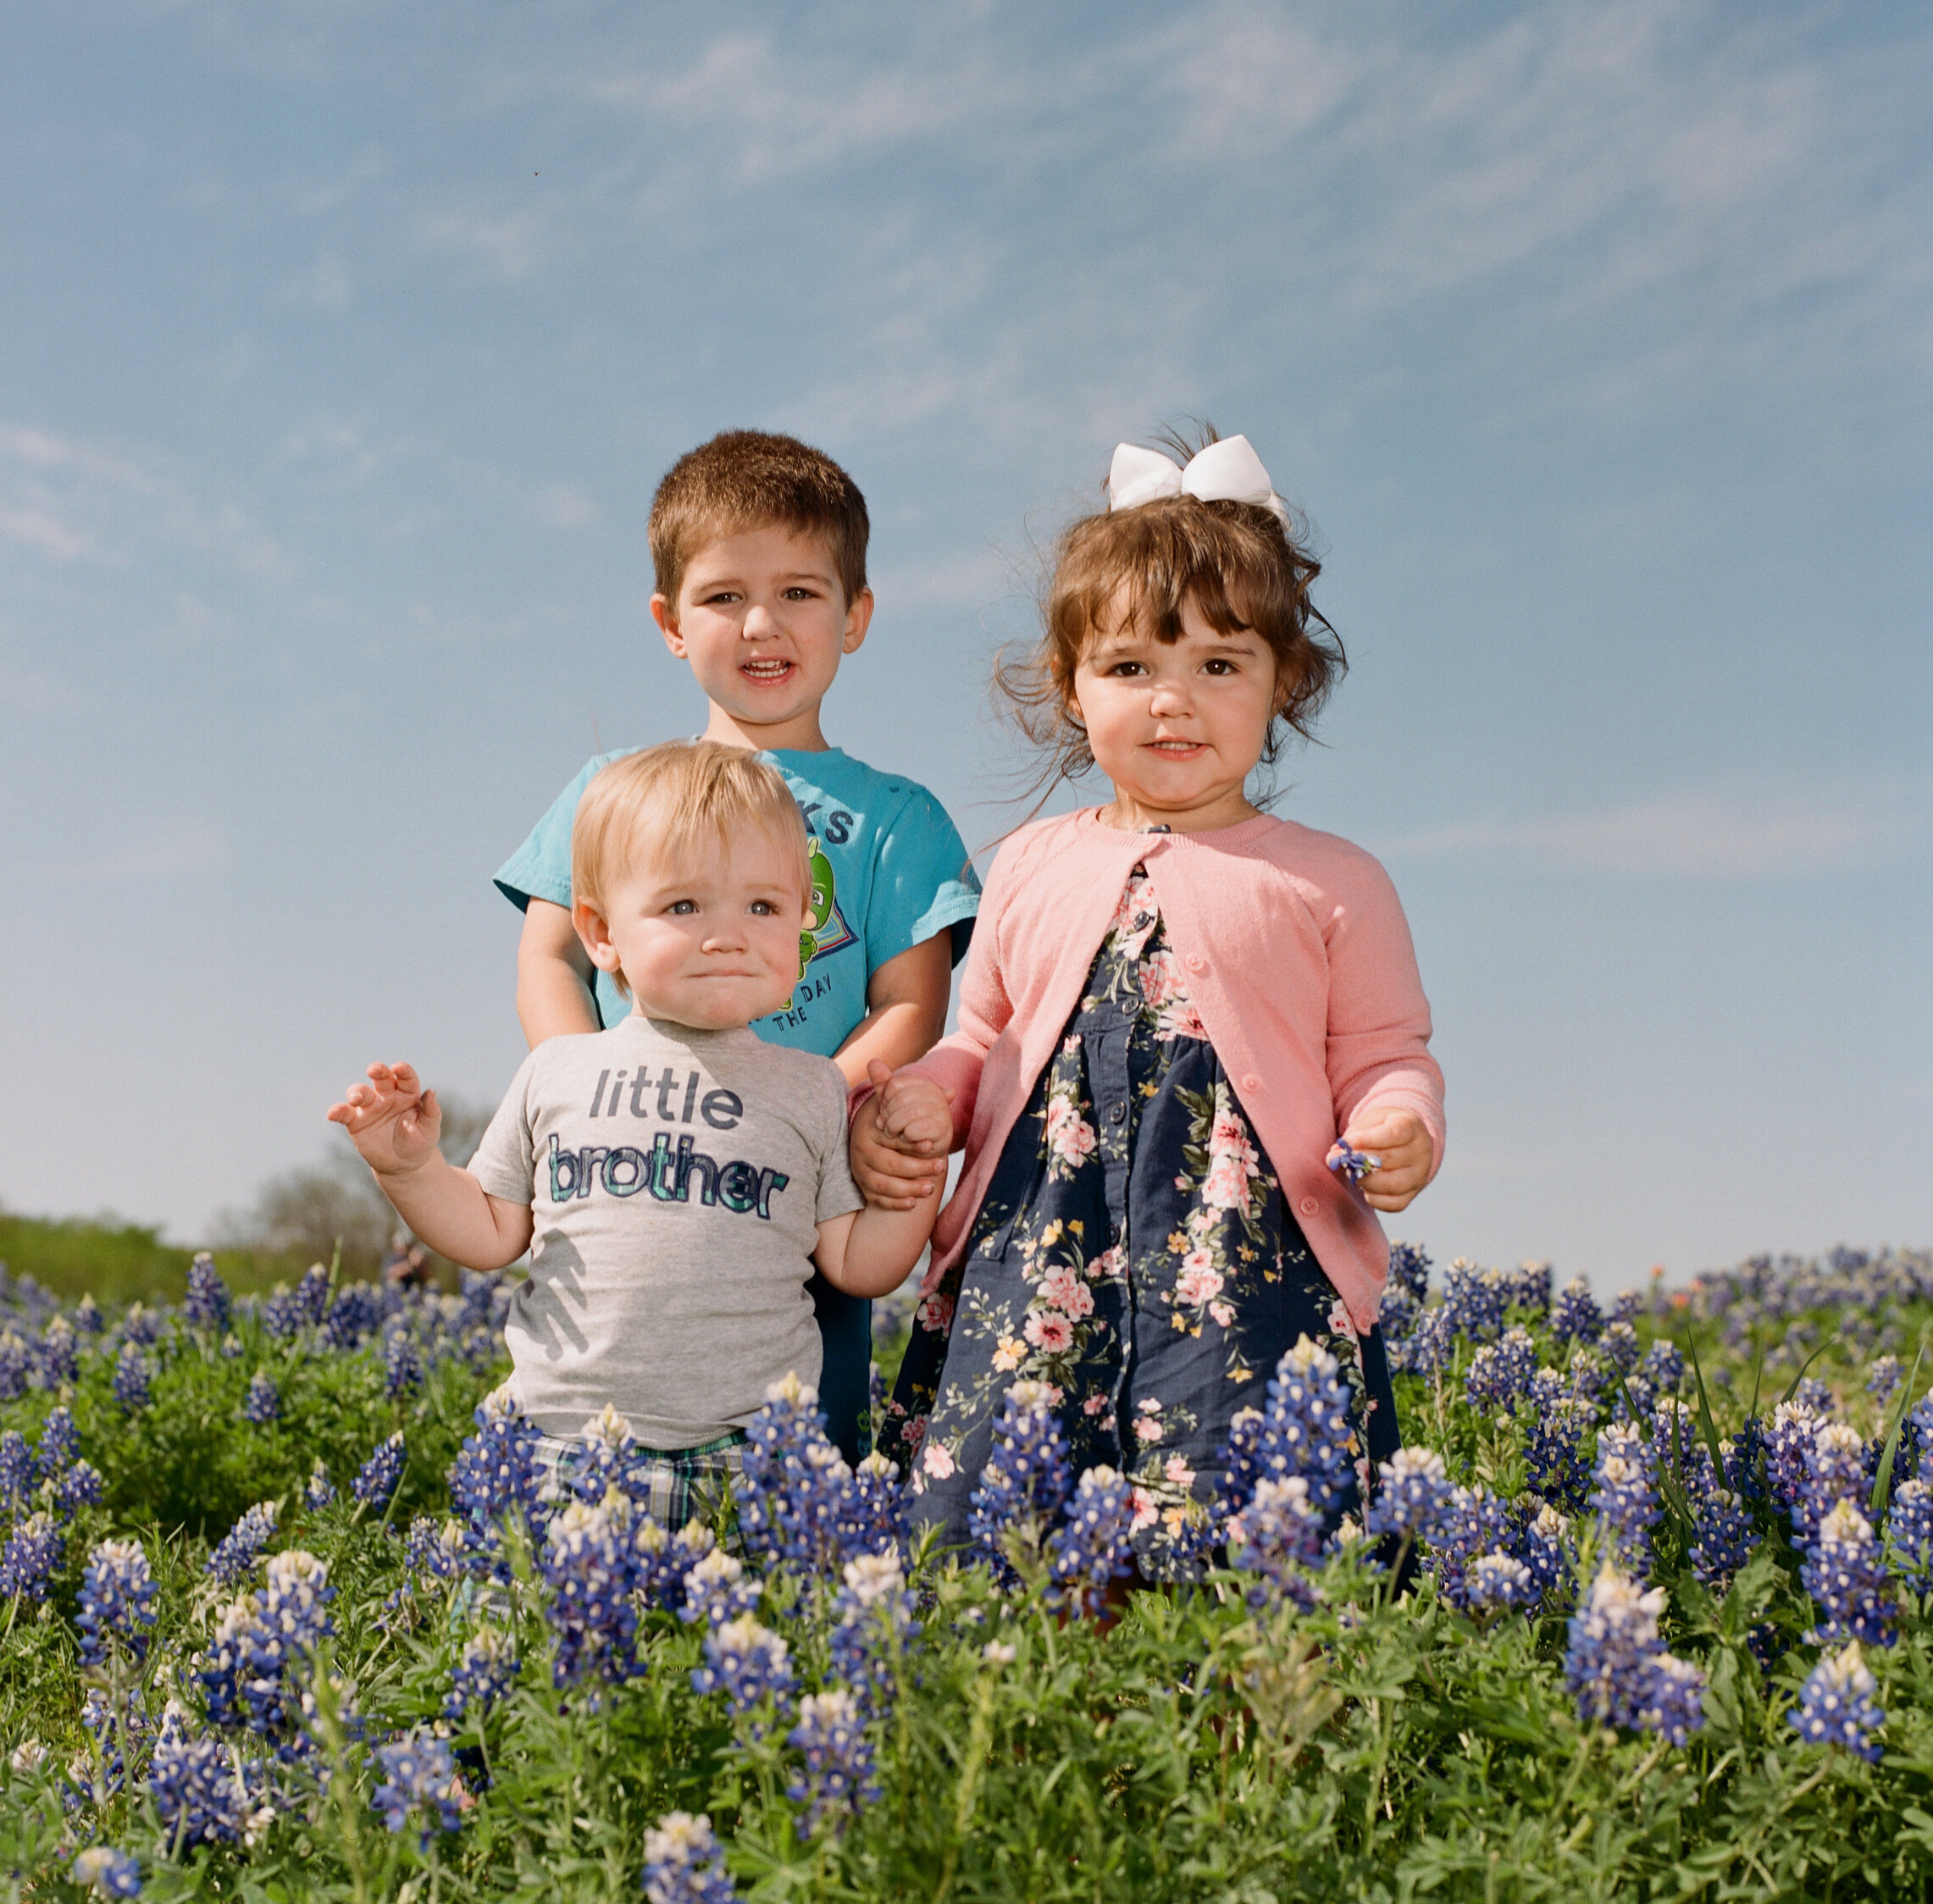
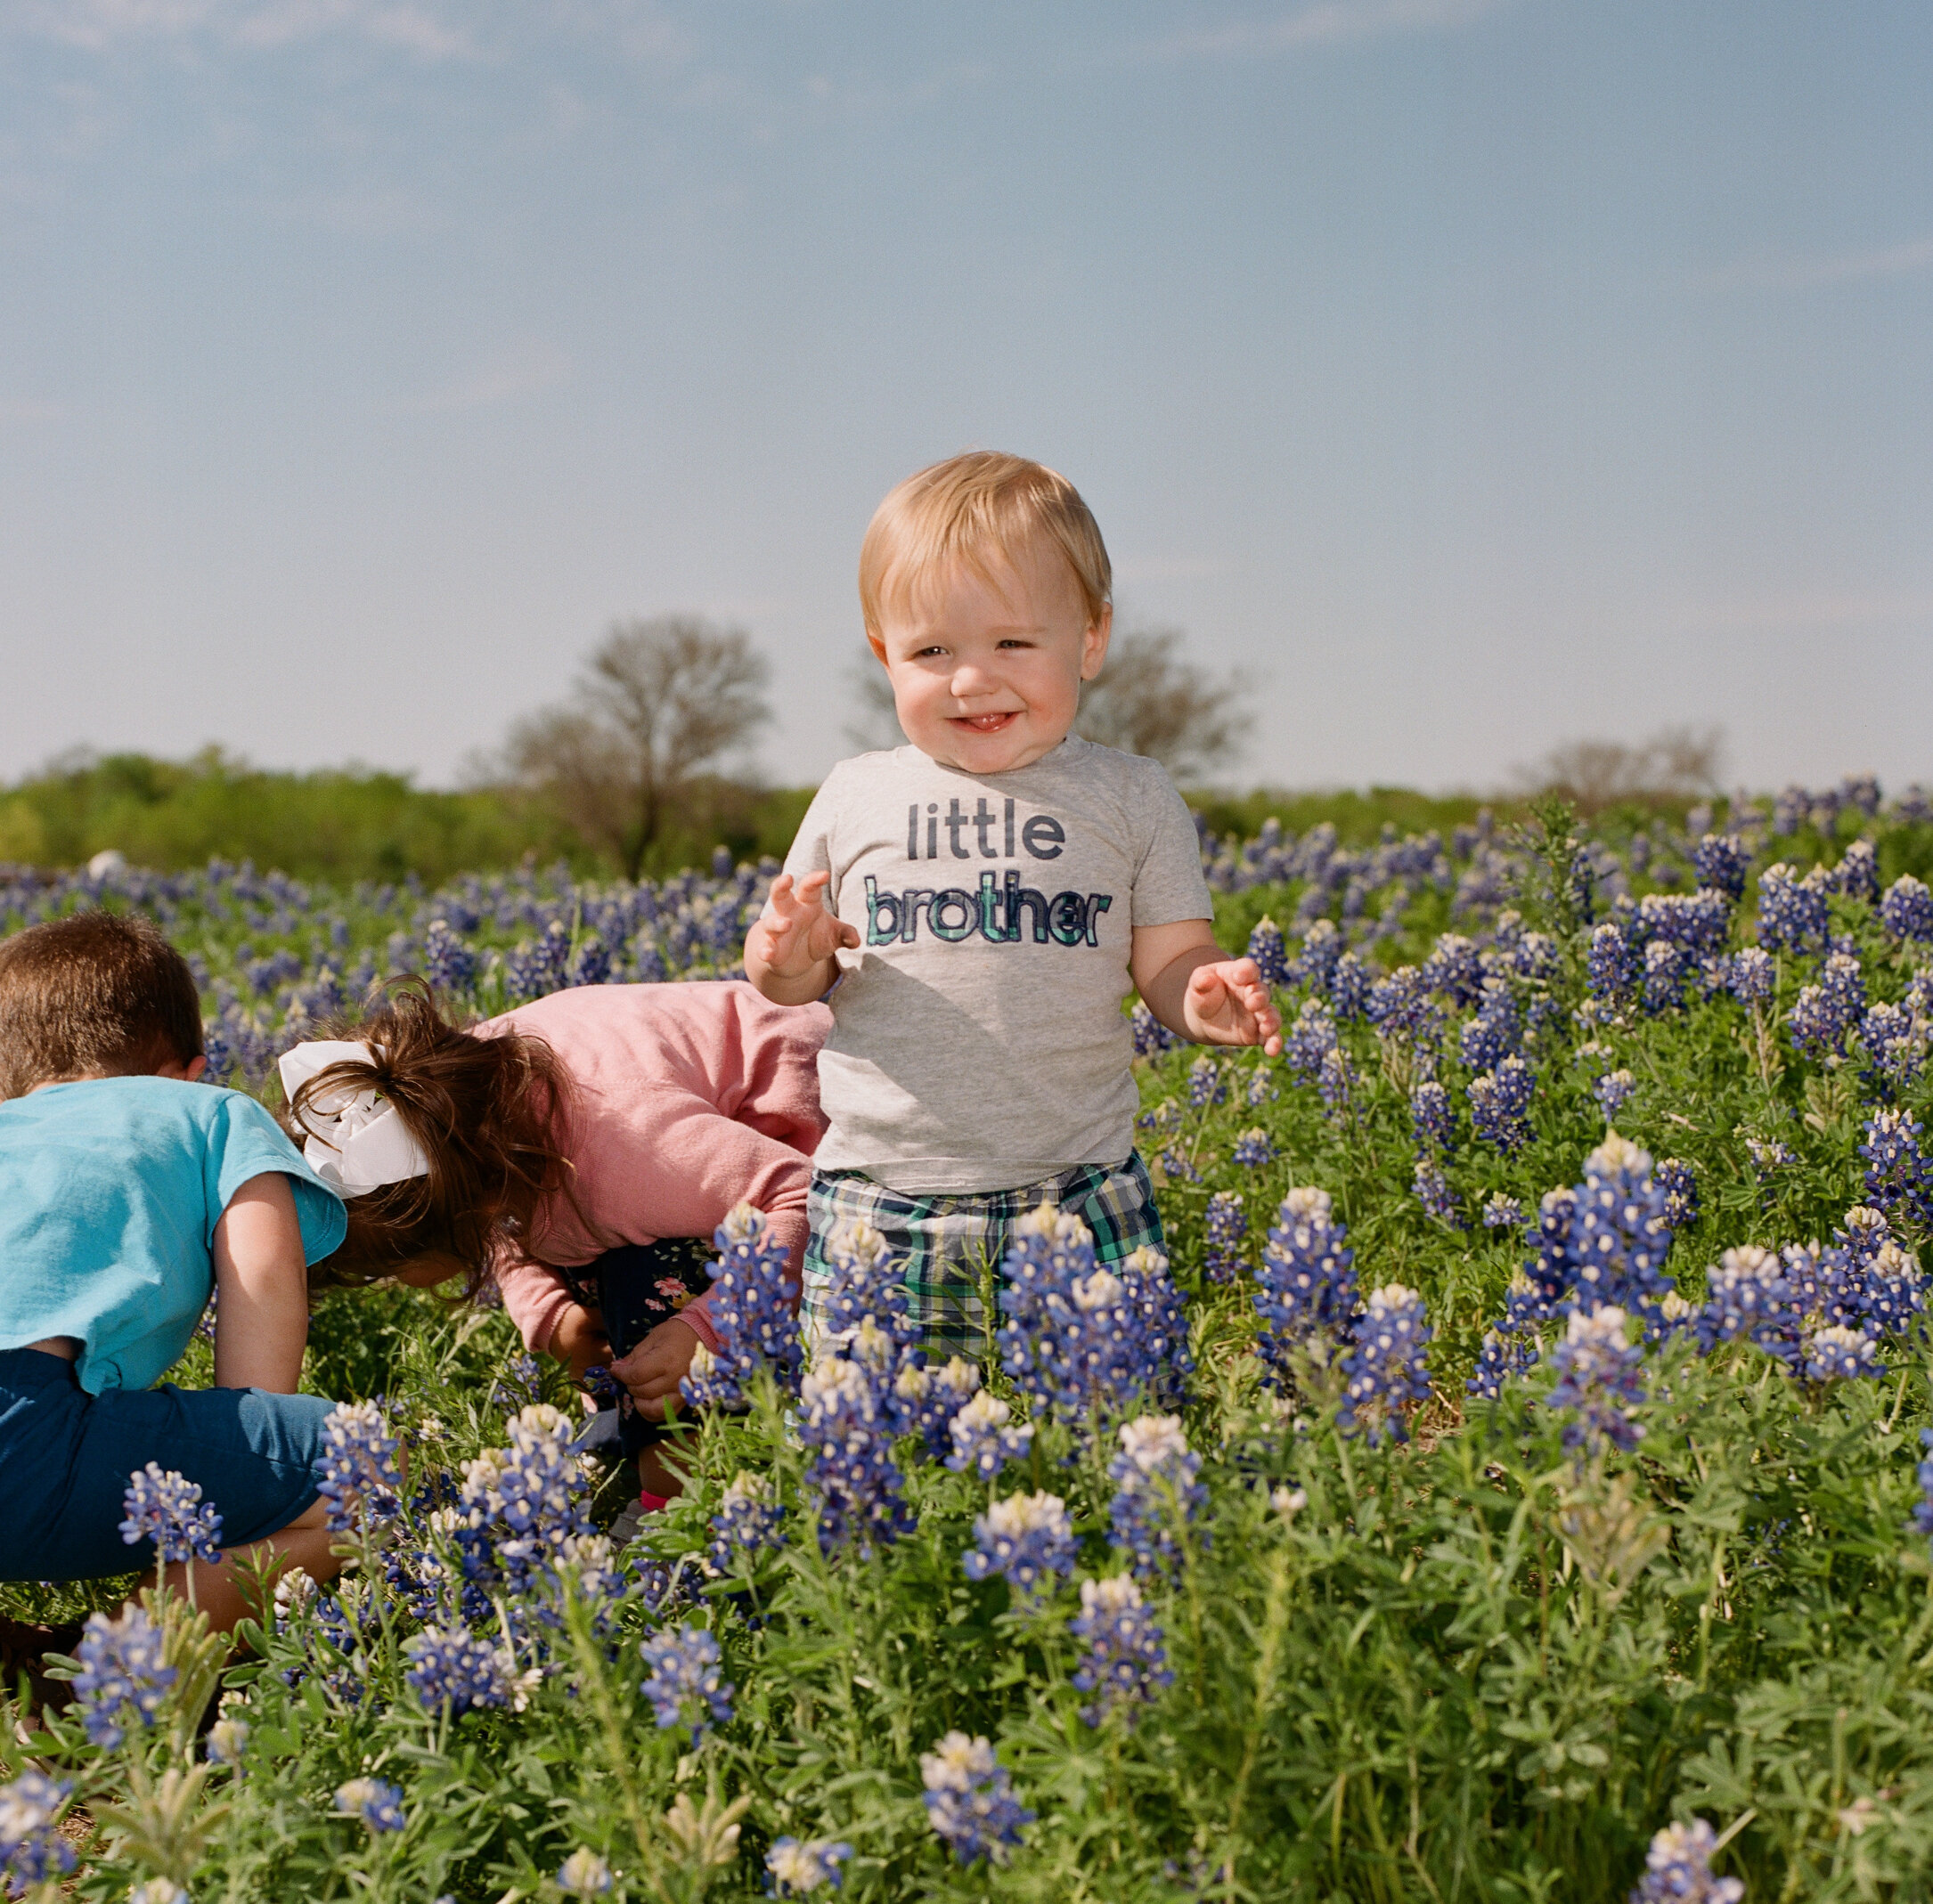
With out further delay, here are our Bluebonnet Photos for 2021!
Bluebonnet Pictures


Book Us for Your Bluebonnet Photos!
If you would like photos of yourself or your family in the beautiful Texas bluebonnets, we would be happy to shoot them for you! Our sessions are always flexible, affordable and fun! Click the button below to book your bluebonnet photo session today!

Polaroid Go

What is the Polaroid Go?

The Polaroid Go is an instant camera, made to be much more portable than other Polaroid instant cameras. Copy on their page calls the camera “portable, wearable, and take-anywhere-able” which definitely gives us an idea of Polaroid is going for here. This much smaller camera is 5.9” x 3.3” x 2.4” and weighs-in at a little over a half pound (.53lbs). Here’s a quick glance at the technical specifications:
Polaroid Go Tech Specs
Camera:
Pocket-sized Analog Instant Camera
Dimensions: 5.9 x 3.3 x 2.4 in (105 mm x 83.9 mm x 61.5 mm)
Weight: 0.53 lbs (242 grams) (without film pack)
Color: White
Battery: High performance lithium-ion battery, 750mAh, 3.7V nominal Voltage, 2.7Wh, rechargeable via USB.
15-pack battery life
Outer shell: Polycarbonate + ABS plastics
Lenses: Polycarbonate resin
Shutter speed: 1/125-30sec
Aperture: f/12 and f/52
Focal length: 34 mm (35 mm equivalent)
Field of view: Diagonal 65.1°, Horizontal 48.1°, Vertical 49.1 degrees
Automatic flash (with override)
Flash system: Vacuum discharge tube storage
This camera is plastic with a plastic lens so its definitely designed more for the consumer and younger crowd. The pre-order price, which includes film is only $114 so the lower price point will definitely be attractive for many.
What Kind of Film does the Polaroid Go Use?
It obviously uses a much smaller film, designed to compete with the Fuji Instax line with its smaller camera and smaller film. Polaroid Go film is 2.632” x 2.122”, including the frame. The image size is 1.851” x 1.811”, producing an almost square image. The sensitivity of the film is ASA 640 and takes 10 to 15 minutes to develop, just like its much larger, older sibling Polaroid film. Also like the larger Polaroid instant film, it comes in an 8-pack.
Can the Polaroid Go compete with the Fuji Instax?
That’s a good question and I guess only time will tell. Instax is already very well established brand and format and is beloved by many. The film develops much faster and comes with 10 photos per pack. While the new Polard Go is competitively priced, it is going up against an almost immovable force with the instax brand.
If you’re interested in learning more about instant photographer, go check out some of my previous posts, like this one on Where to Buy Polaroid Film, or this post exploring Polaroid Instant Photography all together.

A Beginners Guide to Kodak Film in 2025
Kodak film has been around for years, but after filing for bankruptcy, is the film they produce today still an industry leading product? The answer is a resounding YES!
Kodak is a company that forever changed the world with its vision of making photography accessible to everyone. While the company has had its ups and downs in the past, they are currently producing some really great products for professionals, hobbyists, and general consumers alike. In today’s post, we are going to take a brief look at all of Kodak’s current film offerings for photography. This short Kodak Film guide will hopefully be helpful to anyone that is new to film and curious about what Kodak has to offer.
Now, just to be clear, Kodak Alaris is currently the company that holds the license to produce and sell Kodak film. Kodak photographic papers and films are still produced by Eastman Kodak, which is a completely different company but sold by Kodak Alaris. All of this came about after Kodak filed for bankruptcy in 2012 and gets very confusing. If it weren’t for the creation of the Kodak Alaris company, we wouldn’t have the Kodak films we have today, especially Kodak Ektachrome which was killed off and then only recently brought back.
Kodak Film
A range of films are produced and sold by Kodak. Kodak produces roll film in 35mm and 120 and sheet film in 4x5 and 8x10 inch sizes. You can even customer order sheet film if you need something sized a little differently. Kodak’s films come in color negative, slide (color positive), and black and white. There are a wide range of speeds of film (ISO’s) available from 100 to 3200. To be successful when shooting with film, you need to know the look you’re going for as well as the lighting you’ll be working with so that you can get the best result. Besides the obvious differences in color and black and white film, each type of film has its own grain structure, contrast, and saturation characteristics that need to be considered.
If you’re a hobbyist or a casual photographer, other factors such as lighting or even pricing might play more of a role in helping you decide which Kodak film stock is right for you.
Kodak Slide Film
A slide film is a film stock that produces a positive image rather than a negative. These used to be loaded into those old carousels and displayed at family parties on projector screens. While we don’t use the carousel projectors any longer (well I mean technically there are a lot of them still around and you can still do that if you choose), slide film still brings some amazing characteristics and colors to play with!
Kodak Professional Ektachrome Film
Color slide film is such a small market, Kodak only produces one film stock. Commonly just referred to as Ektachrome or E100, Kodak’s slide film produces vibrant and punchy greens and lots of contrasts. Rated at ISO 100, it loves daylight. In my experience, the more light, the better for this film stock.

Remember the Alamo! I didn’t roll my 120 Ektachrome up tight enough and so I got a light leak across this shot. Ironically, you can see the Kodak branding from the paper in the light leak!
Processing your Ektachrome film requires a different chemistry than color negative film. Kodak Ektachrome has to be processed in E-6 chemistry. While most photographers have no problems tackling home development of their CN-41 film, most film photographers are a little more hesitant to tackle E-6. There are a lot of great labs out there that will handle your Kodak Ektachrome film developing for you however!

A rare self portrait of me. The focus is really soft on this photo, but its because I was using a really cheap range finder that was not terribly accurate.

Beautiful and rich blues and higher contrast shadows are the basic characteristics of Ektachrome E100 film.
Kodak Color Negative Film
Kodak has a much broader selection of color negative films for you to choose from. From some inexpensive consumer films, which I talk specifically about HERE, to some really great professional quality films with different contrast and saturation levels. Before you choose a color negative film from Kodak, you really need to have an idea of the look you are going for as well as how the film behaves. Below you will find all of the Kodak Professional Film available to purchase.
Kodak Professional Ektar 100 Film

Ektar is an amazing daylight color negative film. It has good contrast and more vibrant colors. The grain is fine and great for scanning and darkroom printing. Rated at 100 ISO and balanced for daylight, Ektar produces rich looking images with colorful highlights and still holds lots of information in the shadows. I’ve used Ektar in both daylight and with strobes in the studio and gotten some really great results! Very early on, Ektar was my absolute favorite film type and I used it for everything. I learned very quickly that it does have its limitations. It is not as versatile as Portra and in low light, it does not perform or push as well as some of Kodak’s other films do.
Ektar has been around for a while and there are a lot of great tips and tricks out there for Ektar users. If you’d like to take a look at the technical specs for Kodak Ektar, click HERE to check out or to download the pdf. Everything you need to know about the film is contained in that .pdf.
| Film | ISO | Format |
|---|---|---|
| Kodak Professional Ektar 100 | 100 | 35mm |
| Kodak Professional Ektar 100 | 100 | 120 |
| Kodak Professional Ektar 100 | 100 | 4x5 |

Kodak Professional Portra Film

Kodak Portra 400 Self-Portrait
Portra is Kodak’s most popular color negative film and a favorite for most photographers. This film comes in three different speed ratings and is a much more flexible film that can be pushed and pulled beyond the box speed. Portra is also less saturated and offers less contrast than Ektar, but is no slouch when it comes to image quality. You can get an amazing light and airy look by shooting Portra film one stop under box speed (shoot 400 at 200 and overexpose). From using Portra Film for years I can tell you that it can produce a wide range of results and is more flexible in scanning and printing than Ektar. The grain is fine and this film scans beautifully!

While I originally thought that Kodak Ektar film was the greatest thing ever made, I have since shifted pretty dramatically to team Portra. Primarily, the skin tones are what caused me to switch but since I’ve been shooting a lot more Portra film of all sorts, I’ve really come to love it for a lot of other reasons. One of the secondary reasons I’ve grown to love it more is that its a lot more forgiving that Ektar if you over or under expose. To date, I used this film in every kind of situation imaginable and I’ve been consistently pleased with its results. There is still a pretty decent learning curve with this film, especially if you’re looking for some very specific results, but if you’re picking up a Kodak Professional Film to start with, I’d begin with Portra, specifically Portra 400 in the format of your choice. I’ve gotten some really amazing images out of this film! If you’d like to take a look at the technical specs for this film - click HERE to see or download the pdf!
I could have honestly divided Portra film up into its three different speeds and have done a comparison of each, because each of them do have different characteristics. But I was hoping to avoid getting too very technical in this post. I will be saving that for a future post!
| Film | ISO | Format |
|---|---|---|
| Kodak Professional Portra | 160 | 35mm |
| Kodak Professional Portra | 160 | 120 |
| Kodak Professional Portra | 160 | 4x5 |
| Kodak Professional Portra | 160 | 8x10 |
| Kodak Professional Portra | 400 | 35mm |
| Kodak Professional Portra | 400 | 120 |
| Kodak Professional Portra | 400 | 4x5 |
| Kodak Professional Portra | 400 | 8x10 |
| Kodak Professional Portra | 800 | 35mm |
| Kodak Professional Portra | 800 | 120 |
| Kodak Professional Portra | Custom |
Kodak Black and White Film
While Ilford black and white film seems to be a lot of people’s go to black and white film, I prefer Kodak’s selection of black and white films over Ilford, any day of the week! Kodak actually offers a nice selection of black and white films, which cover every possible range of your needs. Just like with the color films, you will need to know what sort of look and lighting you are going for to select the right film.
Kodak Professional TrI-X Film

This is my absolute favorite Kodak film. I’ve shot hundreds of rolls of this stuff. To me, it seems to be a little grainier and grungier that the T-Max films. This film can be pushed and pulled like crazy and is really really easy to develop and print at home. Its great in bright light as well as dark rooms and even when you have bright/hot spots from using a flash indoors, it doesn’t totally lose the information from the darker corners in the image. I’ve pushed this stuff to 1600 and gotten really great results in really dark rooms. Tri-X has a more editorial/documentary kind of look to it, it doesn’t have as artsy of a look to it.
If you’re looking to use Tri-X, you basically get one speed, but the film can be pushed and pulled so easily that you don’t really need any other speeds. If you’re using 35mm or 120, you get the film in 400 but if you’re using 4x5 or 8x10 sheet film, the speed is 320 (not a real difference). You can also purchase Kodak Tri-X 400 in 35mm in 100 foot rolls, just in case you want to roll your own!
| Film | ISO | Format |
|---|---|---|
| Kodak Professional Tri-X | 400 | 35mm |
| Kodak Professional Tri-X | 400 | 120 |
| Kodak Professional Tri-X | 320 | 4x5 |
| Kodak Professional Tri-X | 320 | 5x7 |
| Kodak Professional Tri-X | 320 | 8x10 |

Kodak Professional T-Max Film
The final Kodak Photographic film we are going to talk about in this post is Kodak T-Max film. The T-Max film family boasts a really fine and very scannable grain. The images have slightly less contrast and are not as punchy as Tri-X films. You get beautiful prints and scans out of T-Max with a lot of range. T-Max comes in a wide range of sensitivities also. Ranging from 100 to 3200, you can do a lot with T-Max. I’ve only used it occasionally but the results have always been pleasing. I’ve shot about 3 rolls of 3200 and the results from those rolls have been spectacular considering the super low light conditions I was shooting in. With the P3200, you are actually pushing the film, so there’s a few things to take into consideration when using that particular speed, but its not hard to use at all.
| Film | ISO | Format |
|---|---|---|
| Kodak Professional T-Max | 100 | 35mm |
| Kodak Professional T-Max | 100 | 120 |
| Kodak Professional T-Max | 100 | 4x5 |
| Kodak Professional T-Max | 400 | 35mm |
| Kodak Professional T-Max | 400 | 120 |
| Kodak Professional T-Max | 400 | 4x5 |
| Kodak Professional T-Max | P3200 | 35mm |
Where can I buy Kodak Film?
If you’re looking for Kodak’s cheaper consumer films, then I’ve got a blog post for you! You can pick up most of this affordable consumer film at Walmart.com, Target, as well as at Amazon. If you’re looking for the good stuff, Kodak Professional film, when then you’re going to have to more than likely ordering it online. B&H Photo, Adorama, several other online retailers carry it. Amazon carries it too. Unless I find a retailer that’s having a sale, I normally just buy all of mine from the same place as the pricing does not vary much from one retailer to the next.
Where Can I Buy Kodak Film Locally?
You should definitely check around to see if there are any camera/film stores near you. Some major cities have retailers that keep stock on Kodak professional film. If you’re in the Dallas/Fort Worth or East Texas area and want to pick up some Kodak Film to try out - contact me and see if I have any extra in stock - I do sometimes keep stock on a lot of different professional Kodak films that I do not advertise on my online store.
Remember friends, life is short - shoot film!

Why are Wedding Photographers So Expensive?
While the sticker-shock can be intense, there’s actually a lot of value provided by your wedding photographer that makes the price well worth the investment!
You’ve just spent $8,000 on the venue, $2000 on the cake, $2800 on the wedding dress, the flower cost is going up every minute, you’re thinking about serving chicken nuggets and kool-aid at the wedding reception to save money and then you start getting pricing information back from the photographers you reached out to…
Why are wedding photographers so expensive?

Just like the cake and the dress and the catering and the flowers, the wedding photos require skill, specialized equipment, time, and expertise to create. While most couples only see the photographer working the day of the wedding, the photographer actually spends significant time prepping their equipment, loading and unloading, photographing, paying assistants and second shooters, before the ceremony even starts. After the happy couple has departed, the photographer has to sort and cull images, edit and touch-up the keepers, create galleries, upload images, communicate constantly and keep the process moving. Outside of the wedding day, a photographer might spend 40 to 120 additional hours working on photos for each wedding.
Here are a few things to consider when asking yourself “why do wedding photographers charge so much?”
A professional camera is usually around $4000
Lenses run around $2000 to $3000 each
Data cards to hold pictures often cost $100 to $150 each
Flashes and transmitters can cost as much as $1000-$2000 each
Batteries for all of this equipment isn’t cheap either - usually costing around $100 per battery
Photographers need higher end computers to edit, as well as lots of storage space for photos
There are several software services that photographers have to use to manage projects and communicate with clients. These often run anywhere from $20 to $100 per month
The software the photographer uses costs between $20 to $50 per month
8 hours to shoot the wedding, 2 hours minimum prep, at least 40 hours to edit and sort. Photographers spend anywhere from 50 to 120 hours per wedding in labor.
Assistants and second shooters cost hundreds of dollars per day to hire and are completely necessary for medium to large weddings.
This is not an exhaustive list of expenses, but it does give you an idea of the investment in equipment and time that each photographer makes when booking a wedding.
Let’s Approach Wedding Photography Sticker Shock Differently

As a photographer myself, I knew what to expect when it came to pricing for my wedding a few years ago. But I still found myself begrudging the photographer because we had already spent so much money on everything else. One more expense in the thousands of dollars range was the last thing I needed. But once I began to think of things a little differently.
Besides the Rings, the Wedding Photos are the Only Things That are Going to Last

The cake will be eaten, the flowers will die, you’ll never wear that wedding dress again, and once your scheduled time is up at the venue, you’ll never be allowed to have the run of the place again. But those photos are going to last forever! You’ll see them for the rest of your life and its worth investing more and being happy about knowing that the photography is going to bless you for years and years to come. Think about it, when you die, people will be looking at these wedding photos are your funeral! In 2173, your descendants will be posting on whatever social media exists at the time “look at my great great great grandparents on their wedding day!”. You shouldn’t question the necessity to spend some money on these photos!
Don’t Be Wowed by the Portfolio, Determine what Value Your Photographer is Bringing for Their Fees
I had a friend who booked a very popular wedding photographer and paid $10,000 for their services. The pictures were beautiful, but they only got a few prints and a small photo book for their investment. The very popular photographer then upsold them for another $3000 to get more prints and a few digital images. Most of what they paid went to the photographer rather than giving the newlyweds photo products they could actually enjoy.
Part of the value resides in the skill and craft of the photographer, but they should also provide a product. You as the client/customer have to evaluate if you are getting value that equals the photographer’s fees. We paid $3000 to our wedding photographer and we were given prints, a photobook, all of the digitals on a cute custom flash drive, and the images were beautiful. The value we received was definitely worth the price we paid.
How Much Should I Spend on My Wedding Photos?
It is really going to come down to a balancing act. There are a few factors that are going to have a direct effect on the price you are going to end up paying.
The Reputation of/Demand for the Photographer
The Time/Date of Your Wedding
The Size of Your Wedding
The Products You want to Receive (Prints, digitals, photo books, etc)
All photographers are taking these items into account when they determine pricing. Photographers cannot charge more than the market will bear, so often they decrease products if they are more in demand. Less popular/in demand photographers will often offer more products for a similar price. If you’re absolutely in love with a certain photographer, understand that you may not receive as many prints or copies of the digitals. Or that you might have to buy those after the fact. If you’re more interested in the quantity or products you receive, don’t try to compare a prestigious photographer’s pricing and products with someone who is trying to be in a similar price range by providing more value in their products they offer.

Wedding season gets crazy and the date and time of your wedding might come at a premium if you don’t book in advance. An intimate 10 person wedding is also not going to be as much work as a wedding with 250 guests. There is significantly more work involved in larger weddings, so don’t be surprised if you are having a large wedding and ask for a discount and don’t receive one.
It also helps to know what products you’re wanting once the photographer is done with their work. Most couples just take what the photographer is offering but it can be very helpful to have an idea of what kinds of prints you want, how many copies of the photo book you want. You can often negotiate those extras upfront and possibly get them cheaper than purchasing them after the fact. If you know what you want, communicate that to your photographer and negotiate the price at the beginning. It might save you quite a bit of money!
Photos are Forever

Don’t be a grump about the price you have to pay for your wedding photos! Take charge and know what style of photos you want, the products you want, and the coverage you’ll need and shop around just like you did for the cake and the dress and the catering and everything else. And once you decide, just remember that those images are going to be around for a long time. Probably longer than you will be so rather than begrudging the amount you have to pay for pictures, celebrate the fact you have secured a professional to document your beautiful day and that you will be left with beautiful images to last for generations to come!

Film Photography as a Hobby
Film photography as a hobby? Absolutely! Its fun, affordable and really easy to start!
There are millions of people who enjoy photography. From casual photos of friends and family to more serious and stylistic photos taken just to try to communicate something deep and meaningful and every photo in between, photography is a beloved hobby with several easy and affordable entry points from simple point-and-shoot digitals to Instax to Polaroid. But while digital photography is an easy and convenient hobby to pick-up, is film photography something a hobbyist could into without much cost or a steep learning curve?
Can I Shoot Film as a Hobby?
Absolutely! You do not need to be a professional to be a film photographer. 35mm film is still available in stores like Wal-Mart, Target, CVS, and Walgreens. Rolls of 35mm film come in color negative, black and white negative, and color positive or slide film. Film rolls also come in 24, 27, and 36 exposures (the count of photos you can take on a roll) as well as a variety of ISO’s for taking photos in different lighting. Prices range from $4.19 per roll to $23.95 for high end professional and specialty films. You can check prices on 35mm film at Amazon by going here!
Most individuals avoid film photography because they are inexperienced with the equipment, unfamiliar with how to process their film, and unsure of what film to buy. But a little bit of advice can help you get started and can having you shooting your first roll of film in no time!
What Kind of Film Camera Should I Buy?
This is a difficult question to answer because there are so many factors to consider. Availability, affordability, availability, automation, and ecosystem all need to be considered when it comes to purchasing a film camera. As you consider these factors, weigh them to see which factor is going to be the most limiting for you and you can start from there.

Availability,
There are very few film cameras in production today. Lomography.com still produces a few plastic ‘toy’ cameras. There are several ‘Simple’ use cameras out there as well. All of these are at the lowest end of the quality scale, but because they are new, might come with a higher price tag than some used models.
There are a lot of used cameras on the market out there. 35mm film cameras mostly just were put in the back of the closet and have been sitting. Locally, you can find them for sale on Facebook market place. In my experience, the selection is always limited, but its a great place to start! Ebay is also a great place to look. Ebay usually has a broader selection but you lose out on the ability to inspect the camera yourself before you buy.
Affordability
Let’s be honest, if you have money, you can spend it all on a camera. Setting a budget and sticking to that budget is important, after all, you don’t what spend all of your money on your camera and have nothing left over to buy and process your film! You can expect to spend anywhere from $20 to $200 for a good used 35mm film camera. If you’re just getting into film, get something cheaper. If you’re looking to make this something you do for a while, you may want to shoot for a middle of the road camera. Mainly, inspect the camera for functionality and features and consider what your budget is when buying.
Automation
Unlike modern cameras, a large number of film cameras a completely manual or only offer a few automatic features. You might find a shutter or aperture priority mode, but that may well be it. There are more automated 35mm cameras out there, but usually, their prices are higher because of the extra features. But, it doesn’t hurt to get a manual or almost completely manual camera. its a great way to experiment and learn. Combining the film with a manual camera will force you to think about every shot you take, which is a great discipline to develop while you are starting out. I have found that when I shoot with the more feature rich cameras I tend to think less about things like composition and letting and I get lower quality shots.
Ecosystem
Most cameras fall into an ecosystem of lenses and accessories. If you’re already a Canon shooter, then you should stick a canon SLR. If you’re already using Nikon, definitely stick to Nikon. If you don’t have anything, well then pick one and do a little research as to what other lenses are out there for the camera, does this camera have any cross compatibility with any other accessories or lenses, how durable are these cameras and how repairable are these cameras? Even as a hobbyist, when you buy a camera, you’re buying into an ecosystem.
What Kind of Film Should I Buy?

Kodak UltraMax 400 is a great beginner film!
To be honest with you, I’d go cheap at first. When I was first using film, sometimes I would forget how to do things and would accidentally expose an entire roll of film by opening the camera or forgetting to rewind. Once I forgot to release the film sprockets and I tried rewinding an entire roll with the sprocket lock still engaged. I shredded an entire roll of film. I really love the Kodak UltraMax 400 film for beginners. Its a great film, really inexpensive and produces good color results for a decent price. Its a great daylight film and works well in some shadows too. Inside photos with a flash also produce good results but expect a lot of light fall-off and darkness if objects or people are outside of the flashes power.
We’ve also got a great guide to the 3 Best Kodak Film for Beginners here - it has a lot of great information that could help you make a more informed decision!
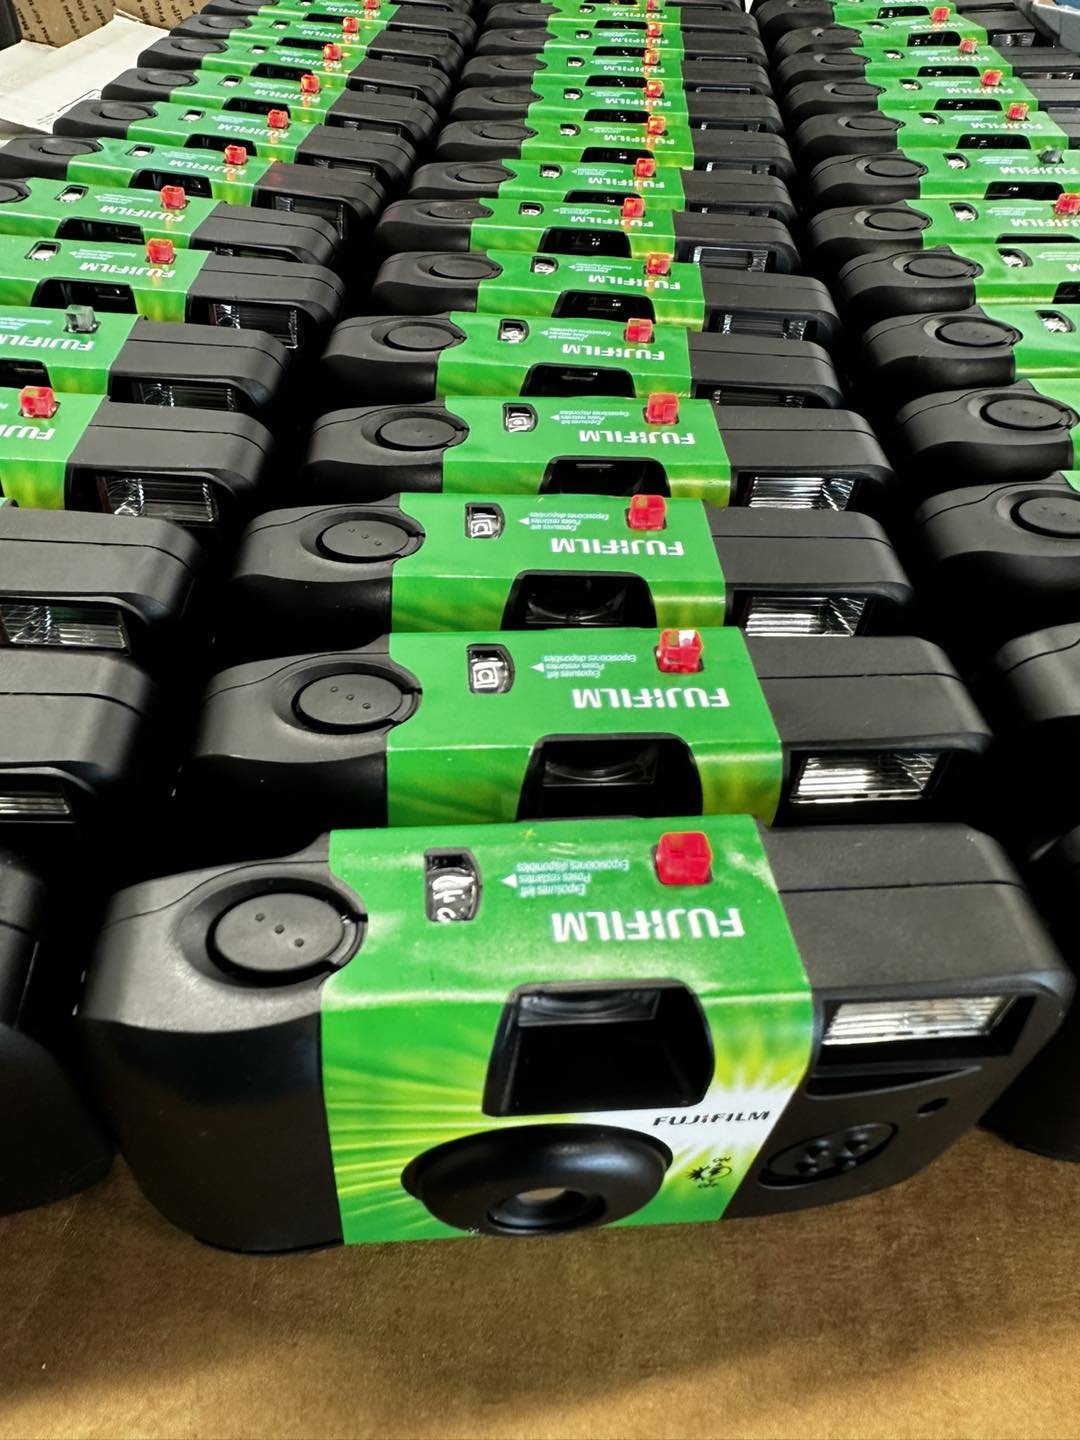
Where can I get my Film Processed?
Processing is the hardest part, in my opinion. Locally, you can get your film processed at CVS, Walgreens, and Walmart, but they will not give you your negatives back. You definitely WANT your negatives back! They will give you prints and scans (usually lower resolution ones) but the negatives get trashed. If you’re local to us (East Dallas/East Texas), we can process your film for you! We offer drop-off and mail-in. Just click here to get the process started!
If you have the patience, you can mail your film into a place. There are several labs out there and most of them are amazing. Richard Photo Lab is a great place and has some amazing prices! The Dark Room is another great lab I’ve used and love their results. There are lots of other options out there, just jump on Google and find a lab that works for you!
Of course, if you’re feeling adventurous, you can always develop your own film at home. This requires quite a bit of equipment and some patience, but it is an option if this is a hobby you plan on keeping up with for a while.
Almost all labs will get you scans and/or prints and many offer online galleries which are great because you can view your photos as soon as they are processed, download them and share them all over the place!
Film Photography is a Great Hobby to Start!
Unlike digital photography, there’s more of a deliberate action with each press of the shutter button when you’re taking film. I don’t know if its the limited exposures, the cost, the time, or what but it forces you to think more about what you are shooting and in my opinion, always produces much better results! With the availability of so many great film cameras at really low prices and the convenience of companies like Amazon and B&H Photography, you can get any film you want delivered in just a few days if not sooner! If you’ve been hesitant to get in to film photography, now’s a great time to start AND we would be happy to help you or answer any questions you might have! We love film photography and in the 35mm film format, we’ve had some of the most fun you can have with a camera! Contact Us if you have any questions and lets get you shooting film asap!
Is Polaroid Bringing Back Peel-Apart Film?
A post on Facebook has instant film fans buzzing with the hopes that the company might be reviving the long-dead peel-apart film!

Ever since Fuji announced that they were going to stop production on the beloved FP-100C instant film, a large segment of photographers’ hearts were broken. Mine included! Peel apart film was amazing and so much to work with and shoot with. Most of us still have our cameras, I know I still have mine, sitting around wrapped and put away in the hopes that someone would one day resurrect the format. But as time has passed, I feel like almost all of us have given up on the return of Peel-Apart Instant Film.

And then today, this popped up on my Facebook feed.
Polaroid seems to be emphasizing the word “peeled” in the last line.
But they have teased us before with new products and then only delivered a special frame or duotone color. Its been disappointing.
But I can’t help but hope that this time will be different!!!!
Maybe, just maybe peel-apart-film will be back!!
Or maybe this is just a clever way to word things to get everyone hyped up.
Is Polaroid bringing Peel-Apart Film Back?
Unfortunately, they are not. Polaroid has posted here in their support pages that the format is unsupported. Several times in the past they have stated that they have no interested in producing peel-apart film. This leaves photographers searching for alternatives to their beloved format.
What is the appeal of Pull-apart film?

For starters, there are a lot of really great cameras still out there that work and are a lot of fun to shoot with. The minute Fuji killed the FP-100c film, we all had to put those cameras away. Beyond the cameras, the film is just a lot of fun. There’s a groove to using peel-part, the timing and the excitement create a really unique experience and you still get an instant photo! While the integral films are fun, they are somewhat prepackaged and neat. Peel-apart film is a very hands-on film and there’s a little bit of mess to it. It just feels more like I’m a part of the process when using peel-apart film.

Also, there’s the image quality. Back with the old Polaroid and later with the Fuji FP-100C, the image quality was really really good for an instant film. You could create a lot of beautiful and fantastic images with peel-apart film that you just couldn’t get with the integral film. The colors seem sharper and more vibrant. The image was crisper. In my opinion, it was just a better product. Sadly, the appeal of the easy to use integral films combined with the rise if digital drove demand for the film down and combined with the decreasing supplies to create the film, it ultimately was discontinued.
What about One Instant from Supersense?
The one-instant film popped up a few years ago and was an indie kind of start-up to revive peel-apart. I actually just ordered my first batch of film and its in preproduction now! From the examples I’ve seen, the images look great! The One-Instant film isn’t mass-produced so it takes time to get and only comes in small quantities for higher costs. As soon as my order arrives, sometime later in 2021, I’ll do a full review and post an update as well as update this post!
Can I Still Buy Peel-Apart Film?
Yes, you can. There are still packs of expiring Fuji FP-100C and FP-3000B out there, but they are expensive. Originally costing around $20 per pack, the packs now cost in excess of $100. There are lots of stock available on Ebay of the FP-100C and the FP-3000B. There was only one listing for the Fuji FP-100C on Amazon and its for a 5-Pack costing $773 but it finally sold and there is no longer ANY FP-100C listed on Amazon.
Keep your eyes peeled…
Ultimately, this was just a really bad choice in copy that sparked excitement in myself and a lot of other photographers. For this campaign, Polaroid ended up only announcing the return of round-framed film. While their round film is fun, it isn’t what we were all hoping for. In the mean time, there’s always one-instant and I think it is time that I gave their film a try! I’m heading over to their sight now to order some!
Update for 2025
Polaroid still isn’t bringing back peel apart film, but a new announcement from Light Lens Lab has brought us all some hope! Find out more HERE!
If you’re interested in reading about some of my other posts about instant film, CLICK HERE!
Check out this article too - which was posted as pack film began to disappear from the shelves.

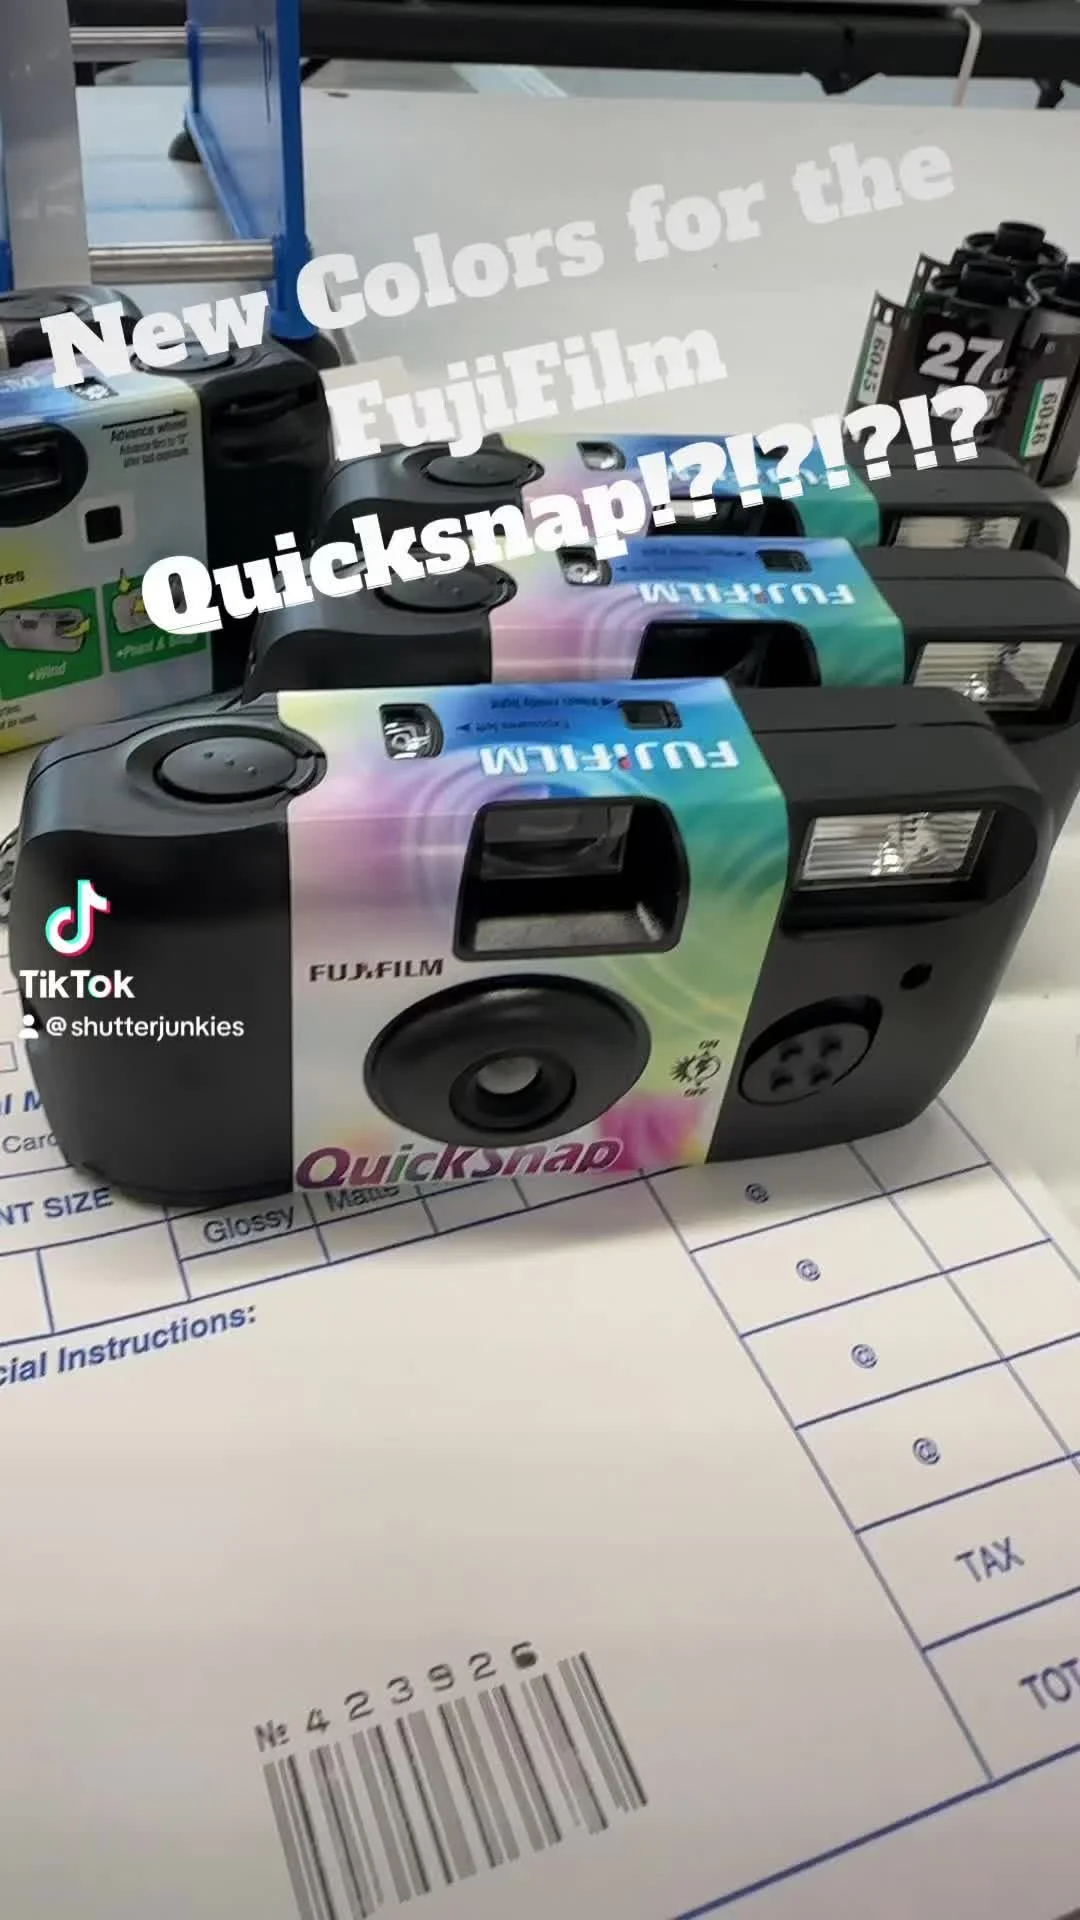
Fujifilm Announces the New Instax Mini 40
The Fujifilm Instax Mini 40 is coming! Here’s a quick preview!
Just in time for Summer, Fujifilm has announced a new camera with a vintage vibe along with a new instax mini film style (Contact Sheet Film)!
Both of the big instant film makers, Fujifilm and Polaroid are constantly releasing new cameras and boarders for films in the hope of boosting sales. What we often see are basic cameras, repackaged with little to no improvements. From all that I’ve read so far, the new Instax Mini 40 camera is just another repackage.
The camera offers very simple operation, really almost bringing to down to the cell phone level of just pointing and shooting and mostly getting a good image. The body is make of plastic and the leather looking surface is just textured plastic.

I look forward to getting my hands on one and giving it a test drive, but from all of the specs I’ve read, it appears to be lacking in new features or functionality.
I am, however, excited about the contact sheet film which draws its inspiration from color contact sheets printed in a dark room. Its a cool look and as long as the price isn’t increase dramatically I’ll definitely be picking up several packs for the aesthetic.
If you’re interested in checking out the new camera - Amazon already has it listed here - Its not available for order yet, but it will be shortly!

Fuji Instax Mini 90
If you’re looking for a Fuji Instax Mini camera with a classic vibe you can pick up today - I really love the Fuji Instax Mini 90. Its a solid camera, I’ve used mine a lot and love it! It also has a similar look as the Mini 40.
Amazon also has a great deal on a 4-pack of colored-frame film - great colors for summer! I went ahead and ordered some for myself, you should too!


3 Best Kodak Film for Beginners
Here are 3 Kodak 35mm films that are great for beginners!
Getting into film can be a scary process. Most of us have been using digital cameras for such a long time that we need to buy all sorts of equipment to make the switch, not to mention the learning curve that associated with all that near gear. I remember when I first decided to get into film, I had no idea what I was doing. I spent a lot of money and rarely got the results I was wanting. It was frustrating and expensive and I went through a lot of rolls of 35mm film before I finally figured a few things out and started getting the results I was hoping for in the beginning.
Today we are going to look at some great Kodak 35mm films that are perfect for beginners and won’t break the bank! That’s right - today we’re focusing on cheap Kodak film for beginners!!!
Kodak Gold 200

Kodak Gold 200
When I’m shopping for a cheap and reliable daylight speed film, I always go for Kodak Gold 200. It handles the daylight really well and doesn’t leave the shadows looking too dull or lifeless. With these more affordable Kodak films, I never try to push or pull, I’m not that brave! I just shoot at the box speed and go for it. That being said, Kodak Gold 200 is great for outdoors and awful for anything too shady or indoors. Even with a bright flash in the shade the results are just not as nice.
This film is honestly just an amazing affordable film to take with you to the lake or camping or hiking or to an outside sporting event or concert. As long as you are in daylight you won’t be disappointment with a roll of Kodak Gold 200.
You can get this film in rolls of 24 or 36 and if you’re just starting out, I would definitely advise going with the 24 exposure roll. Sometimes it take forever to shoot 36 exposures and when I’m outside, I’ve lost the daylight before I’ve finished my roll which basically forces me to waste the rest of my roll so that I can load a faster film.
Kodak Gold 200 can also be purchased individually or in packs, I recommend getting at least a 3-pack or the 24 exposure rolls. The rolls you don’t use immediately can just be placed in the fridge for safe keeping! I shoot and use a lot of professional Kodak film, but I always keep some rolls of Kodak Gold 200 on-hand. We stock and sell rolls of Kodak Gold 200 on our online store for local pick-up - you can shop our film here! Of course, if you aren’t local to us, you can always pick some up from Amazon and get it delivered to your house pretty quickly!
Kodak UltraMax 400

Kodak UltraMax 400 brings more color and darker shadows as well as a little more saturation than the Gold 200.
The second film I recommend is Kodak UltraMax 400. I use the Kodak Gold 200 for daylight, I use UltraMax 400 for almost everything else. This film stock from Kodak holds up a little better under varied lighting conditions that the Gold 200 does. Also I feel that it does a better job or color reproduction. It can become very grainy very fast, but many times, I appreciated that grungy kind of look to my photos. I would never use this as a substitute for a professional film on a paid project, but for personal use, I love this stock! Daylight or flash, the film does well in capturing the image. You don’t need to fear shade or shadows as much with the UltraMax 400 stock. However, the film does fall apart fast if things get too dark. You will get a lot of color noise if you are shooting at night or in really dark spaces. This is a more versatile and faster film that the Gold, but not by much.
Where these more affordable Kodak films really are lacking in their ability to be pushed or pulled. Professional Kodak films usually afford the photographer a lot of latitude where exposure is concerned, but not so much for these two film stocks. But the affordability and fun of Kodak UltraMax 400 makes it a great film stock for a beginner!
We carry UltraMax 400 in our ONLINE STORE for local pick-up, but you can pick it up just as easily on Amazon and have it delivered to your house pretty quickly. When ordering for personal use, I always just buy a three-pack because its always great to have around!
Kodak Tri-X 400 B&W Film
Both Gold 200 and UltraMax 400 are considered to be consumer films, which means that they while they aren’t really designed for the demands of professional use, that they are good for the average user. This last film I want to recommend to you is not a consumer film, but rather is one of Kodak’s professional films. Kodak Tri-X 400 is one of the most amazing and versatile film stocks every produced in my opinion. It can be pushed, pulled, underexposed and overexposed and still produce a decent image. Compared with other black and white films, Tri-X tends to be more contrasty and a little more punchy but it still produces a really great image.
I’ve used Kodak Tri-X 400 for years and have shot hundreds and hundreds of rolls of this film in every type of situation you can imagine. From bright daylight out doors to inside of dark restaurants with a flash, this film is just a lot of fun to use and the results are always interesting! It really is a classic film stock and a great bridge between the consumer and professional film stocks that Kodak produce. It is also a good black and white film to play with. It is, however, not the most affordable, costing a few dollars more per roll, but it isn’t ridiculously expensive either.
We carry Kodak Tri-X 400 in our Online Store if you’re local (we can deliver or arrange for pick-up) or you can purchase a three-pack from Amazon by clicking the link.
conclusion
There are a lot of other really great and really affordable film stocks out there besides these three, but when it comes to Kodak 35mm film, these three are the best for photographers transitioning over to film from digital and also for photographers that are just picking up a camera for the first time and want to start with film instead of digital. This post will get you started with a good film stock, but there is still going to be a lot that you will have to learn! Film photography is a process and it does take a little while to get it figured out. These Kodak 35mm film stocks are fun and easy to use and will help you find your footing in the film world as you learn your own style and develop techniques!
Don’t forget to follow us on Instagram!


Rockwall Youth Fair Photos - Galleries are Ready!
All of the photos for the Rockwall county show are ready!
Thank you all so much for your patience! We’ve worked through all of the images and we are happy to announce that all of the images are processed and ready to view!
The images are sorted into two different galleries. There’s a Backdrop & Buyers gallery as well as a Ring Photos gallery. The Ring Photos gallery is sorted by animal, there are different categories for broilers, swine, cattle, lambs, goats, rabbits, and separate categories for weigh-in photos and sale photos.
** PLEASE TAKE NOTE**
Orders from the two galleries cannot be combined. You will have to select the images you want in one gallery and then check-out and repeat the process for the next gallery. If you are ordering prints, you will have to pay for shipping twice. We understand this is a pain, but there is unfortunately no way around this because of the different pricing and technical requirements needed for each different set of images.
We have lowered our pricing however to give you the best possible deal on print purchases. And while you are having to pay for shipping twice, the photos are printed in a professional lab with very high quality photo paper (no ink-jet printers used here). You are getting a tremendous value, even with the extra shipping costs.
It’s been a pleasure to work with all of you and your students! We are a local photography group and always look forward to working with and supporting amazing organizations like the Youth Fair, Rockwall FFA, and Rockwall 4H. Don’t forget to like our Facebook Page and follow us on Instagram to stay up to date on news and receive some great offers on photography for you and your family!

The Canon EOS 1N
If you’re considering picking up a Canon EOS 1N - this is a great camera to work with!
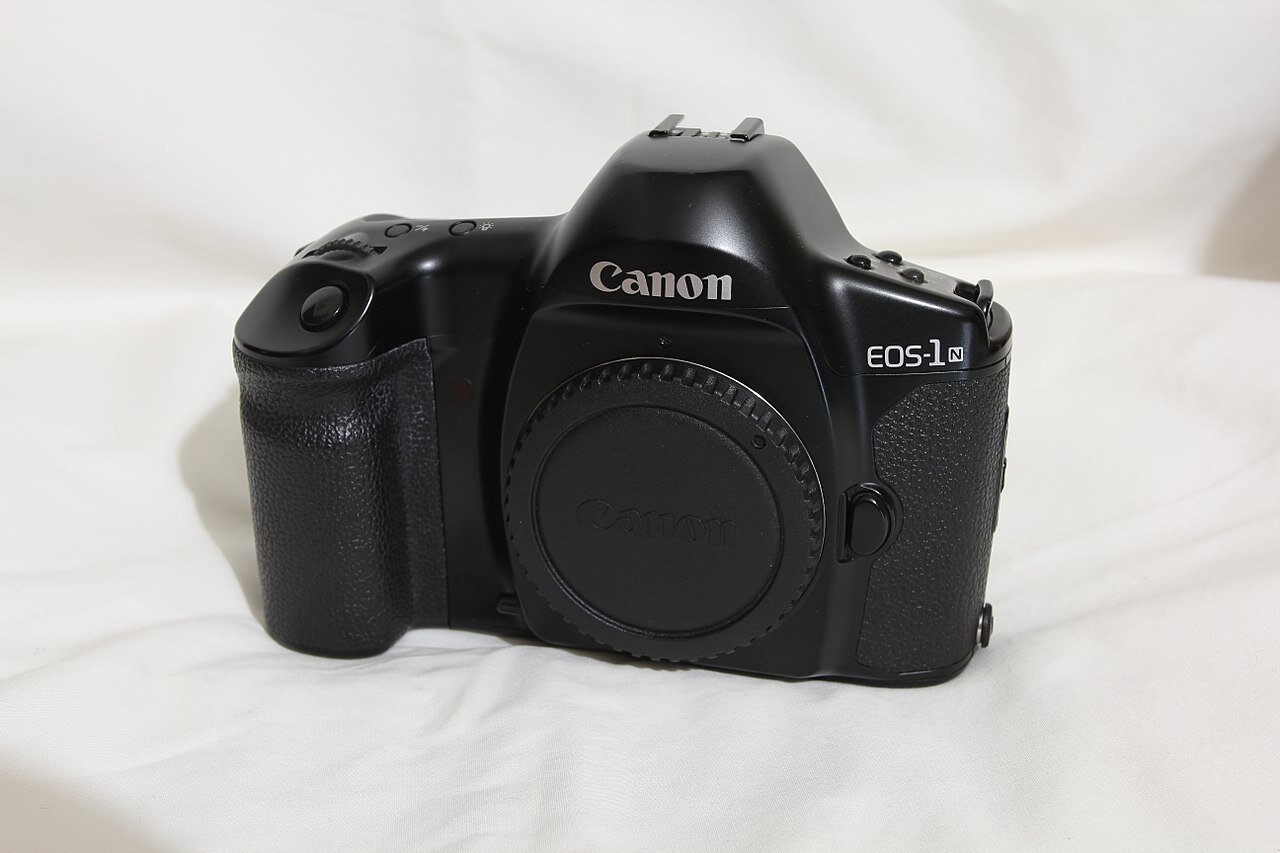
The Canon EOS 1N
I own quite a few film canon film cameras. I enjoy using all of them from time to time, but the Canon 35mm film camera that I used the most is the EOS 1N. The familiar layout combined with the fact it uses all of the lenses I already own make it the camera I reach for first whenever I go out. If you’re considering getting into film or stepping up from an older Canon AE-1, then this is definitely the camera for you!
Canon EOS 1N Questions
If you’re considering a 1N, then you might have some questions. I’m going to start with a few common questions to hopefully help you find the information you’re looking for.
What kind of film does the Canon EOS 1N use?
The 1N is a 35mm film camera and can use ALL 35mm films in a standard film cartridge. Color, black and white, and specialty stocks all work great with this camera. Certain films might not have the ISO data encoded into the film and therefore you might have to set the ISO manually, but the film will still work fine in the camera.
What kind of lenses does the Canon EOS 1N use?
The 1N uses Canon’s very popular EF-mount. EF lenses are still in production and there is an abundance of used lenses out there on the market. Beside the option to buy new or used lenses, EF lenses from Canon also come in a broad range of focal lengths, prime and telephoto, as well as a broad range of glass quality from some very basic beginner lenses all the way up to their L-series glass which boasts some of the most beautiful optics in photography.
What kind of batteries does the Canon EOS 1N use?
The Canon EOS 1N body uses a 2CR5 battery. These batteries are available locally at battery and electronics stores and also available on Amazon. I’ve used the Panasonic 2CR5 as well as the Energizer 2CR5 and have had good results from both.
If you get a 1N with the optional BP-E1 battery pack then you could simply load AA batteries. These battery packs are no longer produced but if you can pick up a used one its a simple addition to your Canon 1N SLR.
Can I use a flash with the Canon EOS 1N?
Yes! All of the Canon branded flashes work great with the 1N. There are also several non-Canon flashes that work great with the camera and are much more affordable. You can pick up an older used flash or buy a brand-new one. The 1N utilizes TTL to help you get a better result while using a flash. I personally recommend the Canon Speedlight 600EX II-RT. It’s a little bit pricey, but the features and build quality make it totally worth the price!
Does the Canon EOS 1N have autofocus?
Yes! It features a 5-zone autofocus utilizing TTL phase detections. The focus zones consist of a series of five little boxes that are placed across the middle of the image. You select with zone you want to use and then place and half-press to focus. The autofocus is a little slow compared to more modern cameras, but it is accurate.
How much does the Canon 1N cost?
You can expect to pay between $100 to $350 for a used Canon 1N according to my research looking at Ebay, Facebook Marketplace, and a few used camera dealers. The condition of the camera affects the pricing the most.
Canon EOS 1N Review
I bought this camera as a compromise. I actually wanted a Canon EOS 1V, but the prices of the 1V were outside of my budget. I spent quite a bit of time looking at used camera sites and Ebay before I finally found a camera that was in good shape at a decent price. While I generally do love the camera, it does have a few issues. Here’s a breakdown of the pros and cons of the Canon EOS 1N:
Pros
Familiar form factor with other Canon SLR/DSLR bodies
Popular lens-mount (Canon EF)
Availability of both new and used lenses
Modern features like autofocus and TTL flash
Auto-winding film
Rugged design
Cons
Batteries are a little inconvenient to find sometimes
Battery has some connectivity issues (I have had to recently insert a piece of tape to keep the battery pressed against the contacts)
There’s a common issues with the shutter becoming stuck and not cycling, but is easy to fix (has only happened to me once when I first got the camera)
Focus is limited to only 5 zones and is a little slow (great for portraits, not so great for events…)
Should You Buy the Canon EOS 1N?

Absolutely! If you’ve already invested in the Canon eco-system, you can pick up a body and use all of your existing accessories, which is a huge win. If you’re just getting started but know you want to live in the Canon eco-system then anything you buy will work on all of the existing Canon equipment (with the exception of the newest mirrorless devices that use the new RF lenses). Also, if you’re interested in getting into film but don’t want to go the fully manual route that many of the older 35mm SLRs require you to take, then the 1N is a great camera at a great price-point that offers enough modern features to get you started. Just rotate the mode selection into P for Program and shoot away and you’ll get great results almost every time!
There are a lot of great features and specific settings that can help you get a lot out of the 1N - but honestly, I don’t use most of them. I mainly use mine for shooting 35mm film at weddings and special events when I need the speed of autofocus and the ability to use the lenses I already have with me. When I get an opportunity, I will also be picking up and Canon EOS 1V and will more than likely retire this camera. But its still a great workhorse and is dependable in spite of its age!

If you need more information, make sure and download the user manual below! It’s got everything you need to know about using the camera on a daily basis!
Check our Online Store for the Canon 1N
We occasionally carry these in our online store! Click here to see if we have any in stock!
Recommend Films to use with the Canon EOS 1N
If you’re a beginner, here’s some links to some great film to get you started with your Canon 1N.