

How to Develop Film at Home - Everything You Need and Need to Know!
Developing your own film at home doesn’t take a lot of expensive equipment or a masters degree in chemistry! Here’s a quick guide to get you started in developing your own film at home.
When you think about how sensitive film is to light and how careful you always have to be with it, many people are absolutely terrified by the thought of developing your own film at home. I know I was. When I started researching how to develop my own film, I immediately noticed the warnings on each step. Each one pointed to how easy it would be to screw up your film at that particular step. Developing your own film almost felt like being Indiana Jones trying to navigate your way through a labyrinth of traps and tricks designed to kill you at any misstep.
But learning to develop film is actually easy and developing film at home can save you a ton of time and money! For years, I developed film at my own home, in my bathroom. You don’t need a big space or a lot of super special equipment, just a few things and the willingness to explore something new and create something beautiful!
In this blog post, I’m going to be sharing my process, the equipment and tools and chemicals that I use to develop color negative film (CN-41) at home.
Developing Color Film Guide
First, this process is only for color negative. Usually the chemistry required to process the film is listed on the cartridge. But generally, you just know. Color Slide film must be processed in E-6 chemistry and black and white film is a different chemistry and process all together. This guide will help you develop your Kodak Portra, Ektar, Ultramax, etc films.
Equipment List
The equipment is going to be your biggest investment. Here is a complete list of the gear I need to develop film at home.
1 Liter Glass Bottles - 4 ea - Find them on Amazon
Thermometer - 1 ea - Find one on Amazon
Bottle Cap Opener - 1 ea - These Work Great
Scissors - 1 ea
Funnel - 1 ea - Find them on Amazon
Film Spool - 1 to 3 ea - Find them on Amazon
Developing Tank - 1 ea - This Tank Comes with Spools!
1,000 ml Measuring Beaker - 1 ea - Find them on Amazon
Plastic Storage Container - 1 ea
Stirring Rod - 1 ea - Find one on Amazon
Warm Water Circulation System - 1 ea - Available from B&H
Film Squeegee - 1 ea - Find one on Amazon
Film Clips - Several - Find them on Amazon
I’ll include links below to purchase the exact equipment I use. I’ve been using this gear for years and have a pretty decent groove going. Every photographer might do things a little different or have a different set up, but this works best for me!
Chemistry
There are several options out there for chemistry. In the beginning, you could easily get chemistry shipped to your house in both liquid or powder form. But over the past few years, that has changed. And the quality and availability of the chemistry has changed also. I’m not going to spend any time here reviewing chemistry options, rather, I’m going to cut to the chase with my recommendation.

For color chemistry (C-41), I prefer to use the Cinestill CS41 Color Negative Film Kit. This kit can be ordered in both liquid and powder form, which is helpful as sometimes shipping the liquids can be an issue. The liquid kit is almost always in short supply also. I have used both the powder and the liquid kits and have gotten the same consistent results from both. Cinestill’s kits are easy to use and come with detailed and color instructions to help you get the times and temperatures right.

Chemistry does become exhausted pretty quickly as you process and/or let the chemistry sit around. I have a tendency to try to keep at least one powder kit on hand just in case my chemistry is exhausted. It is ok to push the chemistry, but it’s more of an art than a science and you need some experience before you start trying to use almost exhausted chemistry on photos for clients or your own cherished moments!
Mixing the chemistry is actually quite easy, but it does require that you use water at specific temperatures, which is where your thermometer will come in handy.
Prepping Your Film for Processing
This part is honestly probably the most difficult because the film canisters must be opened and spooled in complete darkness. It can take a little bit of practice to get really fast at it, but it is not hard to do as long as you do a little planning and know what you’re doing before you turn out the lights.
Step 1 - Find/Make a Completely Dark Space
I’ve had a lot of luck using bathrooms. When I say completely dark, I absolutely mean COMPLETELY DARK. Turn off the lights and let your eyes adjust. If you can see anything at all, there’s too much light in the room. Generally, I stuff towels under the doors and/or hand a quilt or other thick blanket over the door. You know you’ve done it right when you cannot even see your hand in front of your face. This level of darkness can be a little disorienting, so be careful and be aware of your surroundings as you work. Remove any obstacles or objects that might cause you to trip or be hurt in the dark. Also, be sure to remove your Apple Watch or other smartwatch or fitness device. Take your phone out of your pocket as well. I actually ruined a roll of film because I forgot that my Apple Watch was still on and when I flipped my wrist it illuminated and the film was completely fogged.
Once you’re sure your space is light-tight, you are ready to move on to step 2.
Step 2 - Lay Out your Film and Equipment
This is important because it helps to know exactly where everything is before you turn out the lights. When I first started developing film, I did not have a lot of countertop space, which made laying things out difficult. Ideally, you want to lay things out in the order that you will use them and with enough space between the objects that you may not knock something over in the dark and not be able to find it. Once you start, you won’t be able to turn on the lights until you have the film in the developing tank with the lid secured. Until that moment, even if you drop everything, you cannot turn on the lights because the film will be ruined. Here’s what you’ll need to prep the film:
Exposed Film
Scissors
Bottle Cap Opener
Developing Tank (including the lid, and also the center spool if included)
Film spools
Normally I set my gear in a left to right configuration. The bottle cap opener on the left, then the roll(s) of film, then the scissors, then the film spools on the right.
Step 3 - Open and Spool the Film
Finally, we get to the fun part. Close the door, make sure everything is super light tight. make sure that there are no electronic devices nearby that are going to light up and fog the film. And in my case, make sure that there are no little kids that are going to burst into the room randomly, as my children like to do. Now let’s open up that film canister!
With the lights off, take your first roll of film and use the bottle cap opener to pry up on the side of the canister that does not have the protruding cylinder. I like to use the little cylinder to push the film out of the canister, so I open the other end. Once the bottom cap is removed, discard it (I throw it on the floor and clean it up later). Push up on the cylinder and remove the film roll and discard the canister. Hold the film by the plastic spool and do you best not to touch the film. Some spools might be included to spring loose so be careful to listen/feel for the film unspooling. More often however the film will remain tight against the spool. Pull the film leader away from the spool (the leader is the first part of the film that has the notch cut out. It’s what you use to spool up the camera), and cut the leader when the film is at its full width. Try to cut as little of the full width film as possible. Carefully, holding the film by its edges, insert the film into the uptake spot on the film spool. You might want to practice this part in the light with some old film before you actually try it with an exposed roll. Depending on the spool type you are using, they can sometimes be difficult. Once the film is started on the spool with a couple of rounds on the spool, carefully make sure you do not drop the film or let it hit the ground and begin to spool the film until you hit the film’s little black spool.

Here’s a visual example of how to hold the film and the film spool while loading. I generally do this with both hands.
It is a little bit of a trick to be able to hold the film carefully and spool it. It would definitely be worth grabbing an old or cheaper roll of film and just practicing this in the light before you try to do it blind.
Now you take your scissors and cut the film away from its original spool and finish spooling it onto the development spool. Normally the film is held on by tape, but sometimes the sprocket holes are fed into a center spool. Either way, you are going to have to cut the film to free it.
Once you have spooled the entire role, I always go ahead and place it in the developing tank, especially if I have more rolls of film to open. That way, there’s less chance of it getting dusty or exposed to light if anything happens. When you have all the rolls you are going to develop spooled up, place the lid on to the developer tank and make sure it’s locked down and light tight. From here you can turn on the lights and clean up the mess!
Step 4 - Prep the Chemicals
At this point, the instructions that came with your chemicals take precedent over whatever I say here. Mix them according to the instructions that came with them. I generally allow them to sit and settle a few hours before I use them to develop with. But I’ve also used them immediately so that’s up to you. Generally however, all of the chemicals will need to be heated to well-above room temperature. The Cinestill kit I use requires heating the chemicals to 102 degrees Fahrenheit or 38.9 degrees Celsius.
To heat my chemicals, I get a plastic tub and fill it with water. I then insert the Cinestill TCS-1000 and allow it to circulate and heat the water. I used to do this by using really hot water only and then just immersed my chemicals and monitored the temperature but this was really unreliable. After I purchased the TCS-1000, the process has been soooooooo much easier! I normally set the TCS-1000 to 104 instead of 102 degrees so that chemicals will make it over the last little hump of getting to developing temperature. I use my thermometer to monitor the temps in the chemicals and once they reach the correct temp, I ready to move ahead to Step 5!

Step 5 - Run the Film Through the Process
Here’s the tools and equipment you will need:
Again, the instructions that came with your chemicals will guide you through all of the specifics. You need to pay close attention to temperatures and times. As well as notes about agitation methods. Developing temperature, developing time, and film agitation can all have various effects on the final result so if you’re new to film developing, you definitely want to follow the instructions exactly.
For most color film developing, the process is the same with only a few variations. Here’s the basic process:
Pre-Wash (tap water at developer temperature)
Developer
Blix
Rinse
Stabilizer/Photo-Flo
Dry
To pre-wash, I usually just adjust the hot and cold taps until the running water is approximately that of the chemicals (102 for me). I simply hold my thermometer under the water and make adjustments until it gets to the correct temperature. Normally, you run the developer tank full of water and just let it sit for the prescribed time. Usually around a minute or so. Then you simply dump out the water. Don’t be shocked if the water comes out green or purple or brown or blue or some other color. The films are coated by the manufacturer and part of the pre-wash is to remove that coating.
Immediately after the pre-wash, I pour the developer into my tank with the film and begin agitations. During the entire developing process, I leave my TCS-1000 running to keep the chemical temperature consistent. When I’m not agitating, I put my tank back in the warm water to keep the chemicals from losing temps.
When it comes to agitation, there are a couple of different methods for you to consider using. Most developer tanks come with a little peg/handle that you can insert and rotate the film inside of the tank. They also come with a rubber lid that can be installed allowing you to agitate by inverting the tank. I have used both methods with similar success. Lately, however, I have noticed some lighter edges on my film around the sprocket holes which might be caused by turbulent developer swirling around the plastic spools as I spin them with the peg. I have been inverting more lately and have not seen those lighter edges.
The developer generally stays in for somewhere around 3:30 but that varies so check the instructions that came with your developer. As I’m developing, I go ahead and put the funnel in the developer bottle and get ready to pour the chemical back into the bottle. I also go ahead and open the bottle of blix so that I can be ready to pour. I get kinda obsessive about things when I’m developing and I like to make sure the same lids go back on the bottles they came off of. So opening ahead of time helps me to be organized enough that I don’t get things mixed up.
As soon as the developer is out, the blix goes in. Blix generally takes several minutes longer than the developer. Be careful not to spill the blix during the process, it can sometimes leave a nasty stain. While I’m blixing, I go ahead and put the lid on the developer and set it aside (or back in the heating tank if I have another batch to do). I also rinse the funnel and move it to the blix bottle to be ready to pour when the time has finished.
Once your blix process is finished, the film is no longer light sensitive and you can remove the lid without damaging the images. I usually pour the blix back into its bottle and then begin the rinse. Your rinse water needs to be warm, generally around 102 degrees and your rinse time can vary, but normally is around three to five minutes. Don’t get impatient during the rinse, just let everything get rinsed really well.
I normally allow the tank to fill completely up and then remove the lid and dump out the water and refill. You will need to dump the water several times during the rinse process. There will usually be a slight color tint to the water at first, but this should completely fade away as you rinse and dump.
Once rinse is complete, you can stabilize. Not all chemistry kits include a stabilizer. I normally mix in a drop of Kodak Photo-Flo with my stabilizer. But literally only add one drop. Too much and things will get really sudsy. If your chemistry doesn’t require stabilization (the Cinestil kits do not) then I go ahead and fill the tank up one more time with water and put a very small drop of Photo-Flo in and agitate for a few seconds.
After this, drain the water and you’re ready to move to the next step!
Step 6 - Drying the Film
Once the liquid is drained from the tank, the drying process has already started. As film dries, it can develop water spots, which are kind of a pain to get off. So to start the drying process, I usually try to get as much water as I can off of the film before I hang it up to dry. My practice is to leave the film in the spool and give it a good shake to get as much water off as I can. I then pull the film out of the spool and use a squeegee to get even more water off.
Using a squeegee is a hotly debated practice because there is the risk of scratching the film as you squeegee it. I’ve actually done it before and its heart-breaking. I’ve learned to be careful and make sure everything is clean and all surfaces are free of debris before I start. Your film will dry just fine without the squeegee, I’ve just found it leaves fewer water spots when I use the squeegee.
Next, you simply clip the film onto a film hanger and find a nice quiet cool and preferably dark place to let the film dry. The drying process takes a few hours and you generally want your film to be completely dried before you store or scan your film. Film loves to attract dust, and water spots are just a pain you don’t need in your life so hanging your film somewhere without a lot of air movement or light will allow the film to dry with less issues.
Sometimes, especially with 35mm film, the film can curl up as it dries. I usually attach another film drying clip to the bottom to hold the film straight, and it also helps a little with the curl. The film can curl up or it can kinda form an arch, both are difficult to deal with when storing or scanning so every step you can take to prevent it will help. You will discover that some films are worse than others when it comes to curling.
After Processing
Once your film has dried, you’re ready for the next step, which could be storing in film holders, scanning, or printing in a darkroom. Either way, the hard part is over and you’ve developed your first roll(s) of film! Congrats!
Be warned, once you start this process, film developing is kind of infectious. I love developing film at home and look forward to shooting so I can develop my next rolls. It’s almost a magical process honestly!
If you have any questions or run into any issues, please feel free to email me at tony@shutterjunkies.org or find me on Facebook - I’ll be happy to help you out!
If you’re just exploring and interested in find out more about film options, check out a few of my previous blog posts!
3 Best Kodak Films for Beginners
Good luck and keep shooting!!

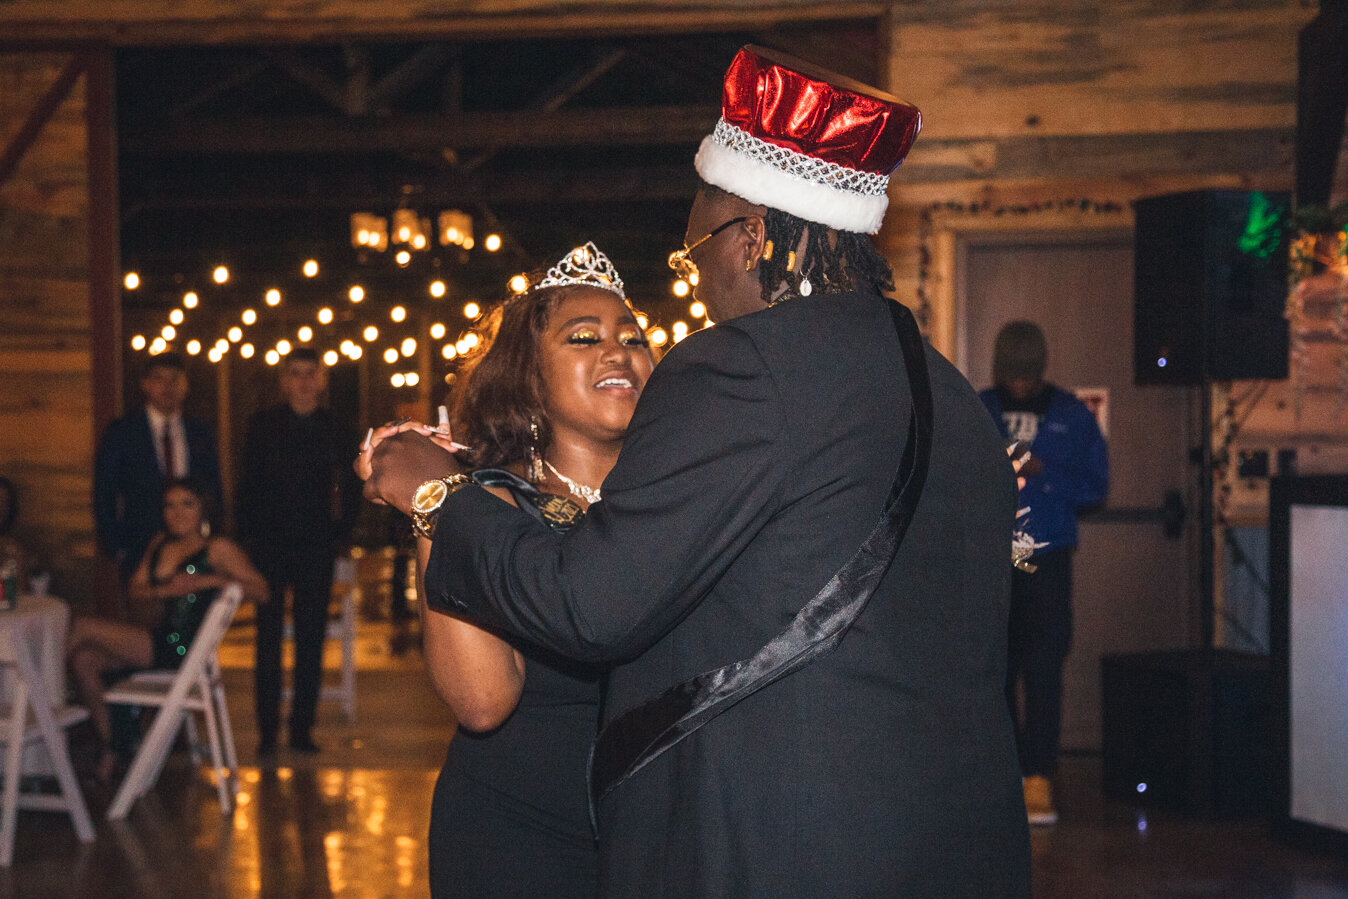
Terrell High School Prom 2021 Photos are Ready!
The Prom Photos from Terrell High School’s Prom are ready!

We’ve gotten all of the images edited and uploaded to our online gallery! You can find your 2021 Prom Pictures by going clicking the button below!
You can download web-sized copies of the photos FOR FREE! If you’d like to print your own images, you can purchase a high-resolution image for only $5. These are large enough that you could print a billboard from them! You can also purchase prints, photo books, and other great print products as well!


How to Get the Film Out of a Disposable Camera
How can you get the film out of your disposable camera with out damaging it? Its easy! Just follow this simple guide and you’ll have your film in hand in no time!
A Basic Overview
After reading my previous blog post about Disposable Cameras - I’m sure the excitement and motivation completely overwhelmed you and you ran out immediately and bought a fun little disposable camera to take some photos with. You spent time with friends and family, snapped up all 27 exposures before you had even realized it and then that familiar feeling as you try to advance the film - clickity clickity clickity, nothing is catching. You’re out of film.
So what do you do next…
You have some options as far as developing your film goes. You can actually just drop the entire camera off somewhere and get it developed. The bad thing is that most of the location places that will develop your film also won’t return your negatives and we definitely don’t want that. You can always develop it yourself or your can mail the film into a trusted lab that can process the film and return you negatives to you. These are both great options but sadly, both of them require you to get the film out of the disposable camera before you do anything with it.
Here’s a quick step by step guide on how you can get the film out of your disposable camera!
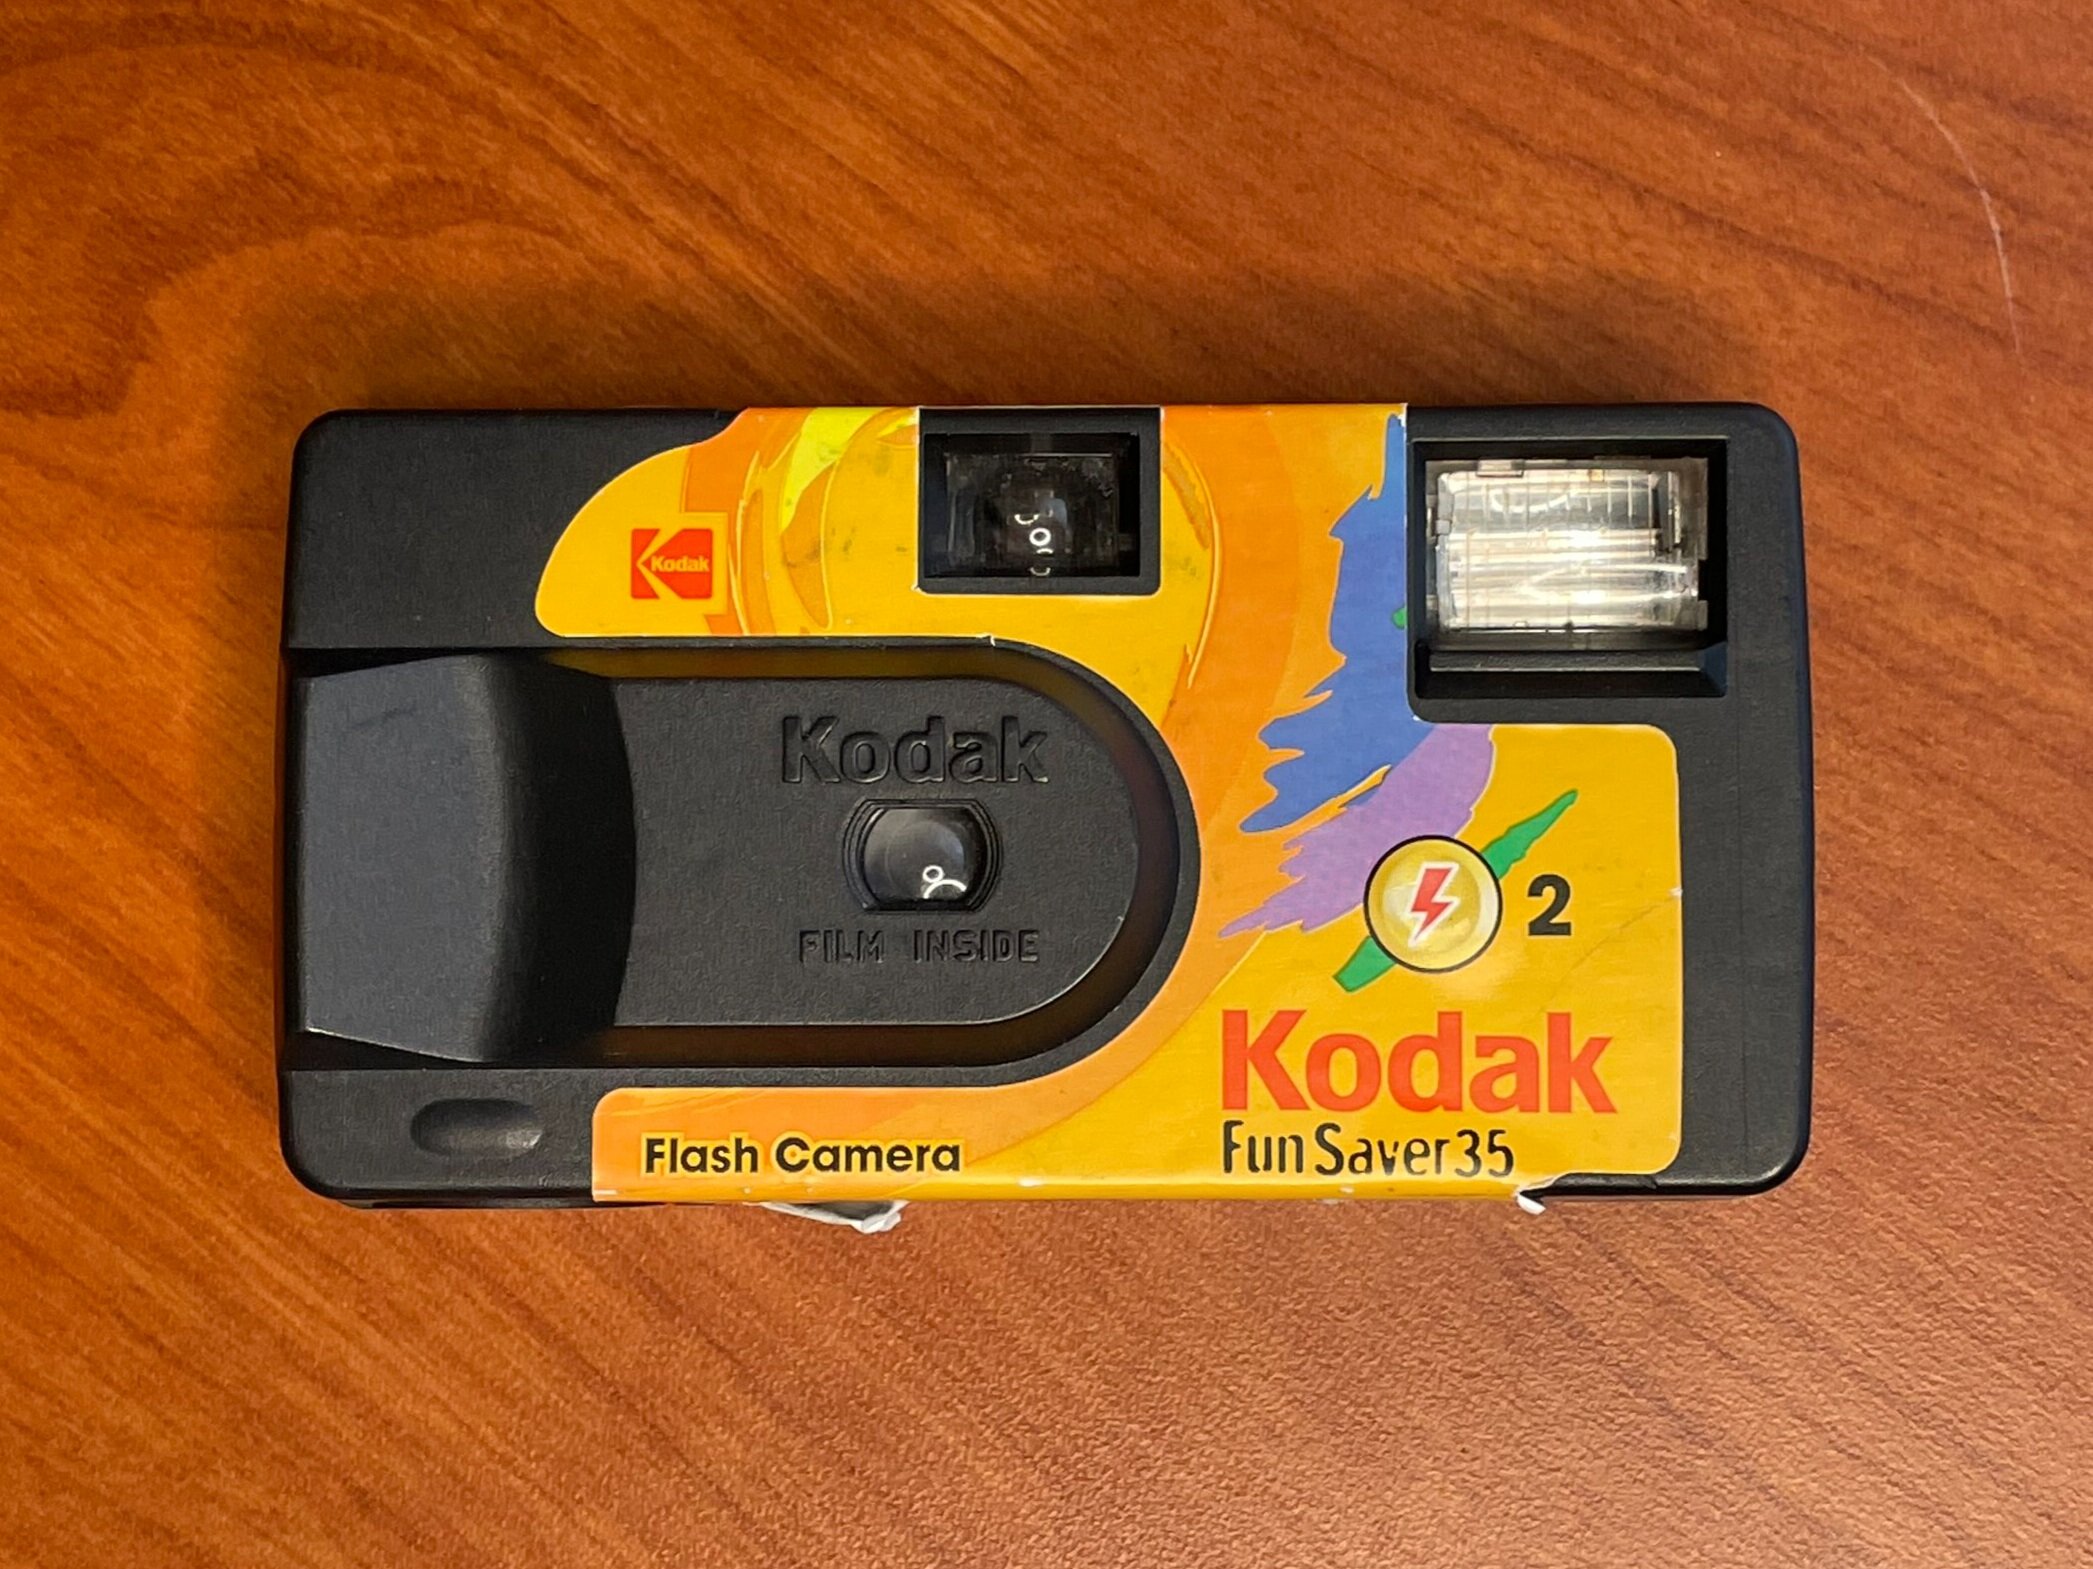
An older Kodak FunSaver 35 Camera - the graphic design just screams 2001!
Getting the Film Out of Your Disposable
Step 1 - Remove the label/wrapper
The disposable camera itself is just a general plastic camera. Each company puts their own branding on the cameras in the form of an adhesive label or a loosely fitting card stock type wrapper. In most cases, you will need to remove the label to get the camera apart. Its normally easy to do and it does not matter if it gets torn or damaged. On some cameras, like the one in the photos, the label doesn’t really wrap around or interfere so it can simple be left on.
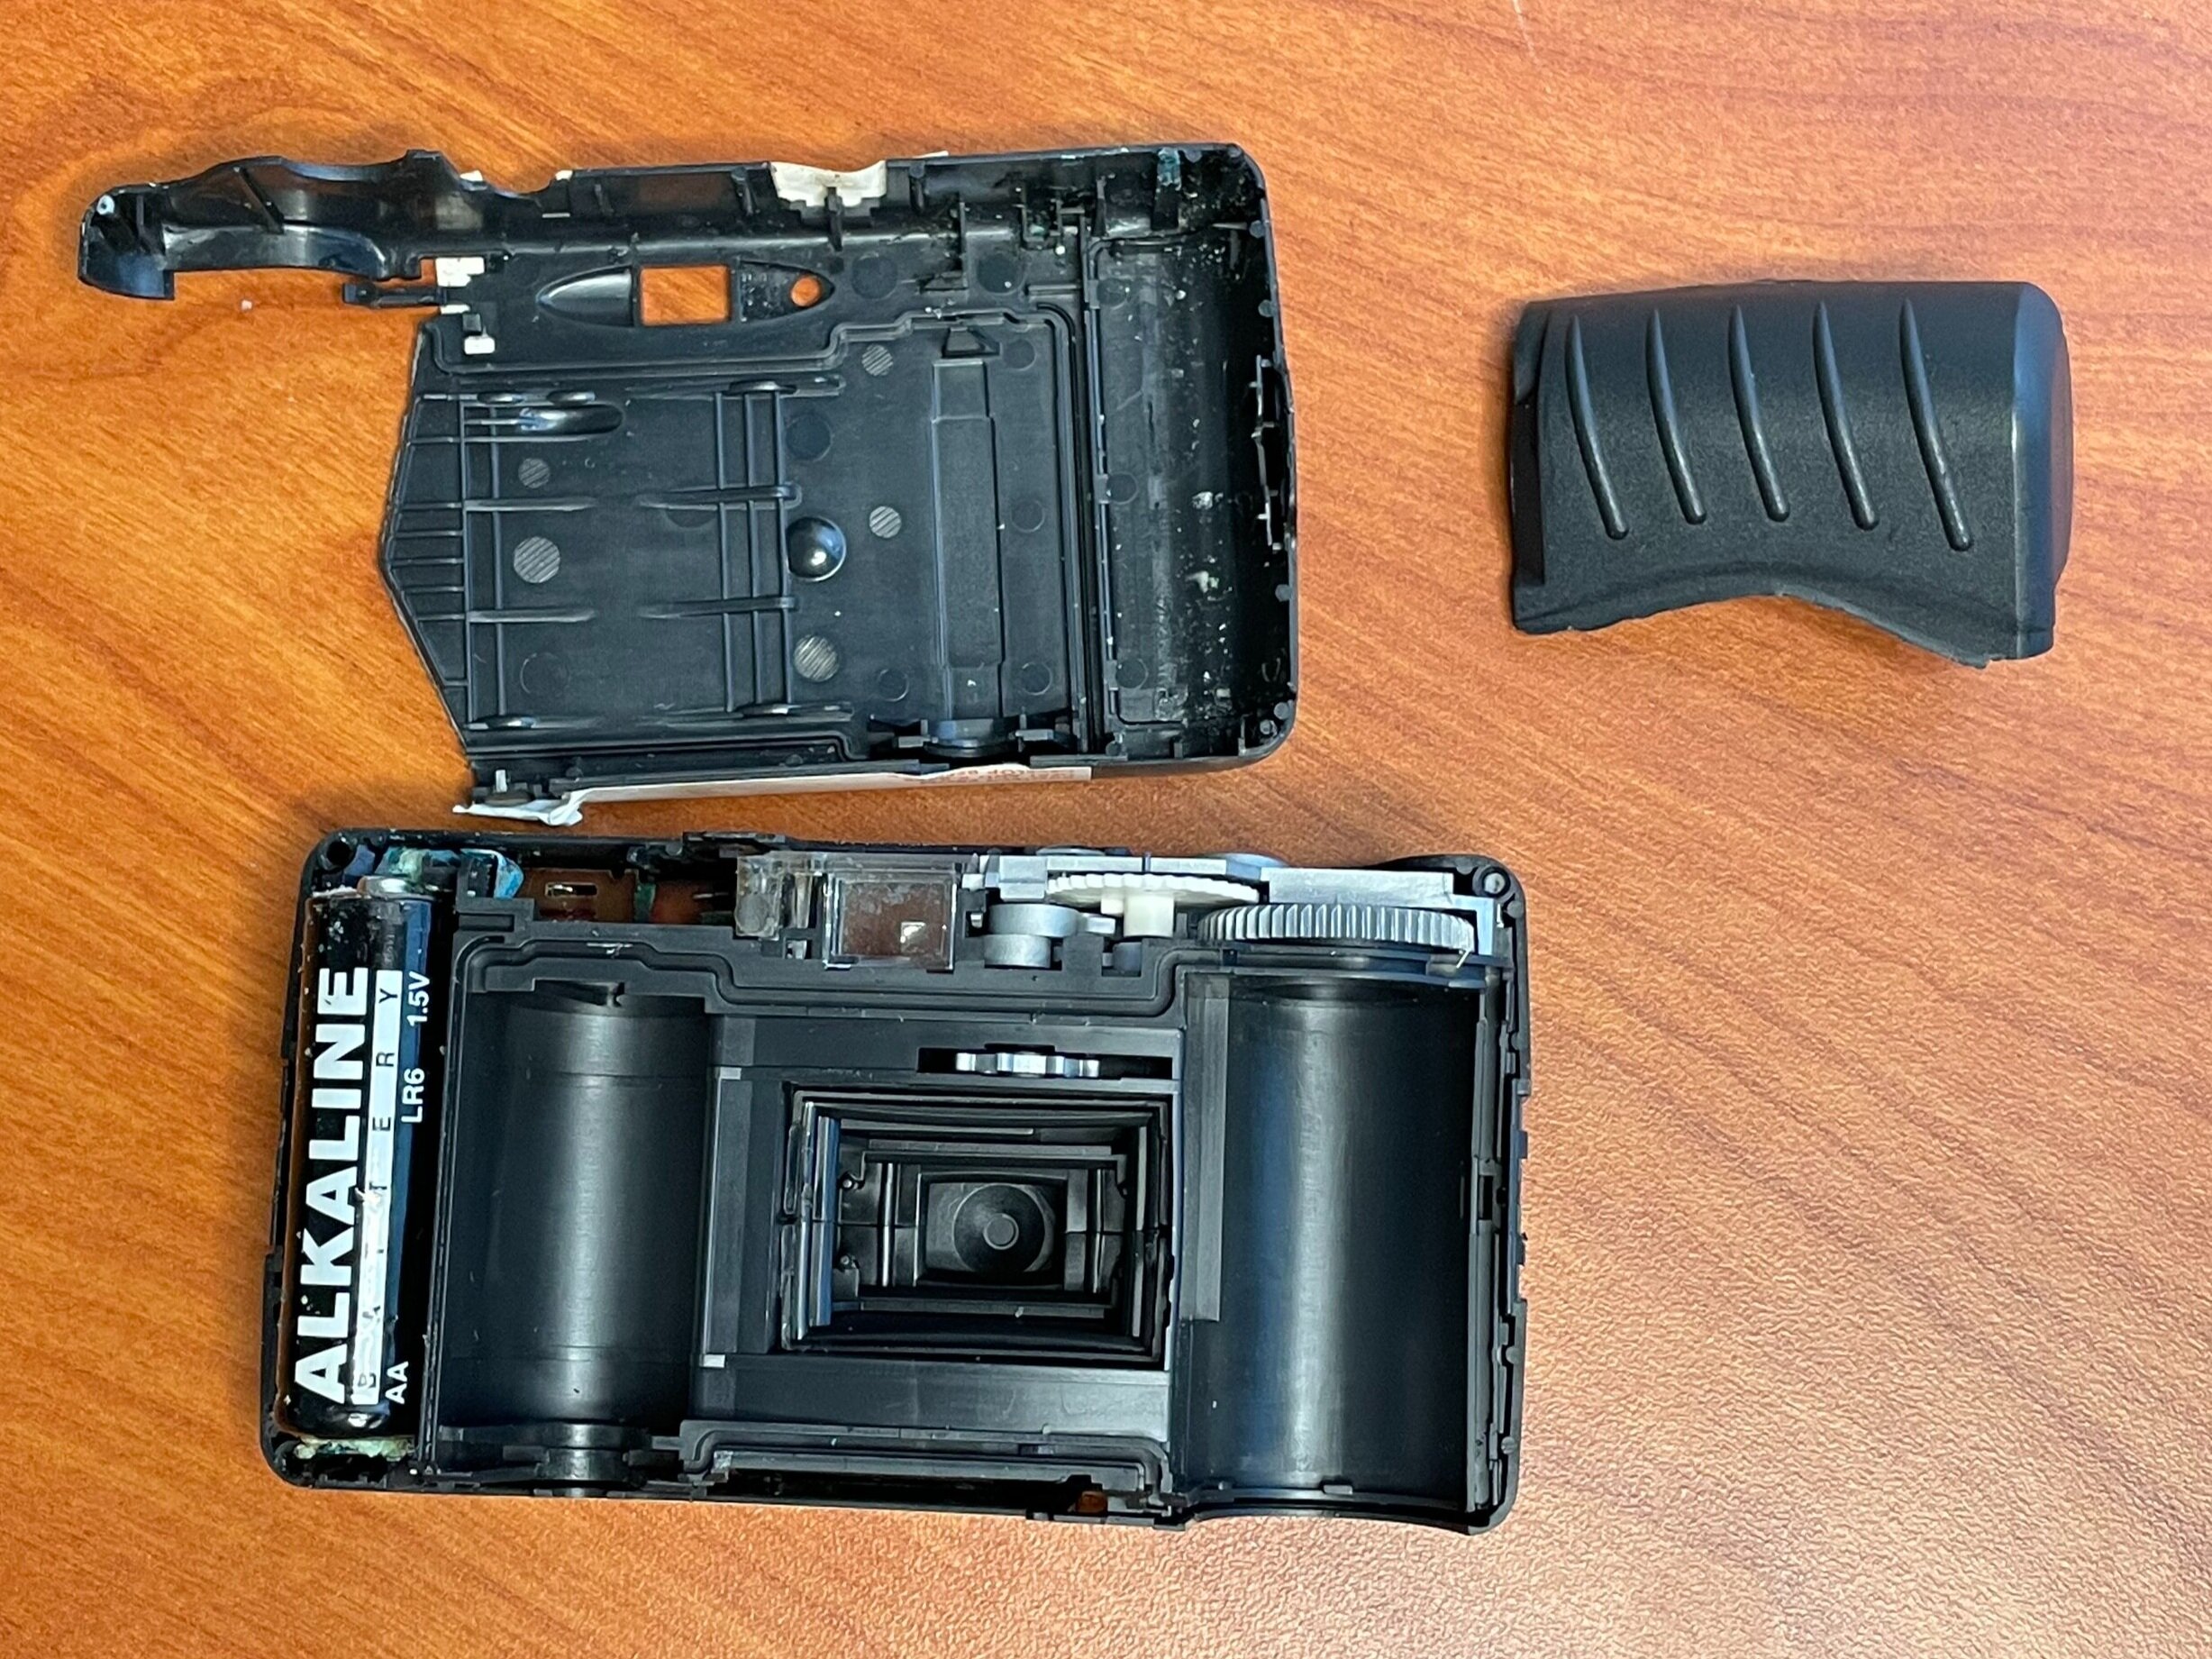
Step 2 - Locate and Pry Open the Tabs Holding the Camera Together

Pry Up on the tabs on the side. You may need a tool!
Usually these tabs are located on the sides of the camera. If you are just wanting to get the film out of the camera, all you need to do is pry on the right side (the side with the film advance) of the camera. Almost all cameras are designed to break easily, almost like a built in film door. Of course, only removing the part covering will completely break the camera, so reusing it is out of the question. Most disposable cameras will have tabs on both sides however so that you can pry up and remove the entire back. There are usually other little tabs of various types along the top and bottom that simple help to keep the back in place and light tight, these may require a little pressure/prying to get loose.

If you break the film compartment open, you can easily retrieve your film. If you’ve shot the entire roll, the film will be safely rolled up inside of the catrtidge.
Step 3 - Remove the Film
I don’t need to say much here. It literally just falls out. Really simple. Its self-contained in the little 35mm film cartridge, just like any other 35mm film.
Step 4 - Remove the Battery
Once the camera is opened up, you can get the battery out and reuse it!
Most of these cameras have a flash and are powered by a AA or AAA battery. For the 27 exposures you used, you barely drained any energy from this battery. Take it out and use it somewhere else! You know you never have a battery around when the TV remote dies!
On a side note, if you did not remove the entire back from the camera, you will not be able to access the battery.
Step 5 - What Do I Do with the Camera?
You have a few options. If you can separate the components its possible to recycle some of them. I actually put my disposable cameras back together, leave the battery in them and let my kids have them. They love to pretend they are taking pictures just like their dad! Its a super cheap but fun toy. You can also just throw it away. They are made to be disposable after all.
Don’t Let Your Disposable Camera Film Sit Around!
A lot of people shoot their 27 exposures and then put their cameras down because getting the film developed is a bit of process and they never come back to them. I have people come up to me all the time and ask about what they should do with the box of disposable cameras they have. Image quality does degrade over time, especially if your disposable cameras end up in the attic. Get those photos developed and start enjoying them! We do offer film processing for mail in and drop off film. If you have a bunch of old disposables that need to be developed, give us a call or send us a message and we can negotiate a bulk rate for getting them all developed and scanned! Click the button below to order film processing and lets get those images out of that plastic disposable and onto your phone or Facebook or printed on paper, anywhere that they can be enjoyed!
Want to see a video of how to do this?
Check out this very short how to video that will show you exactly how to get film out of a disposable camera!

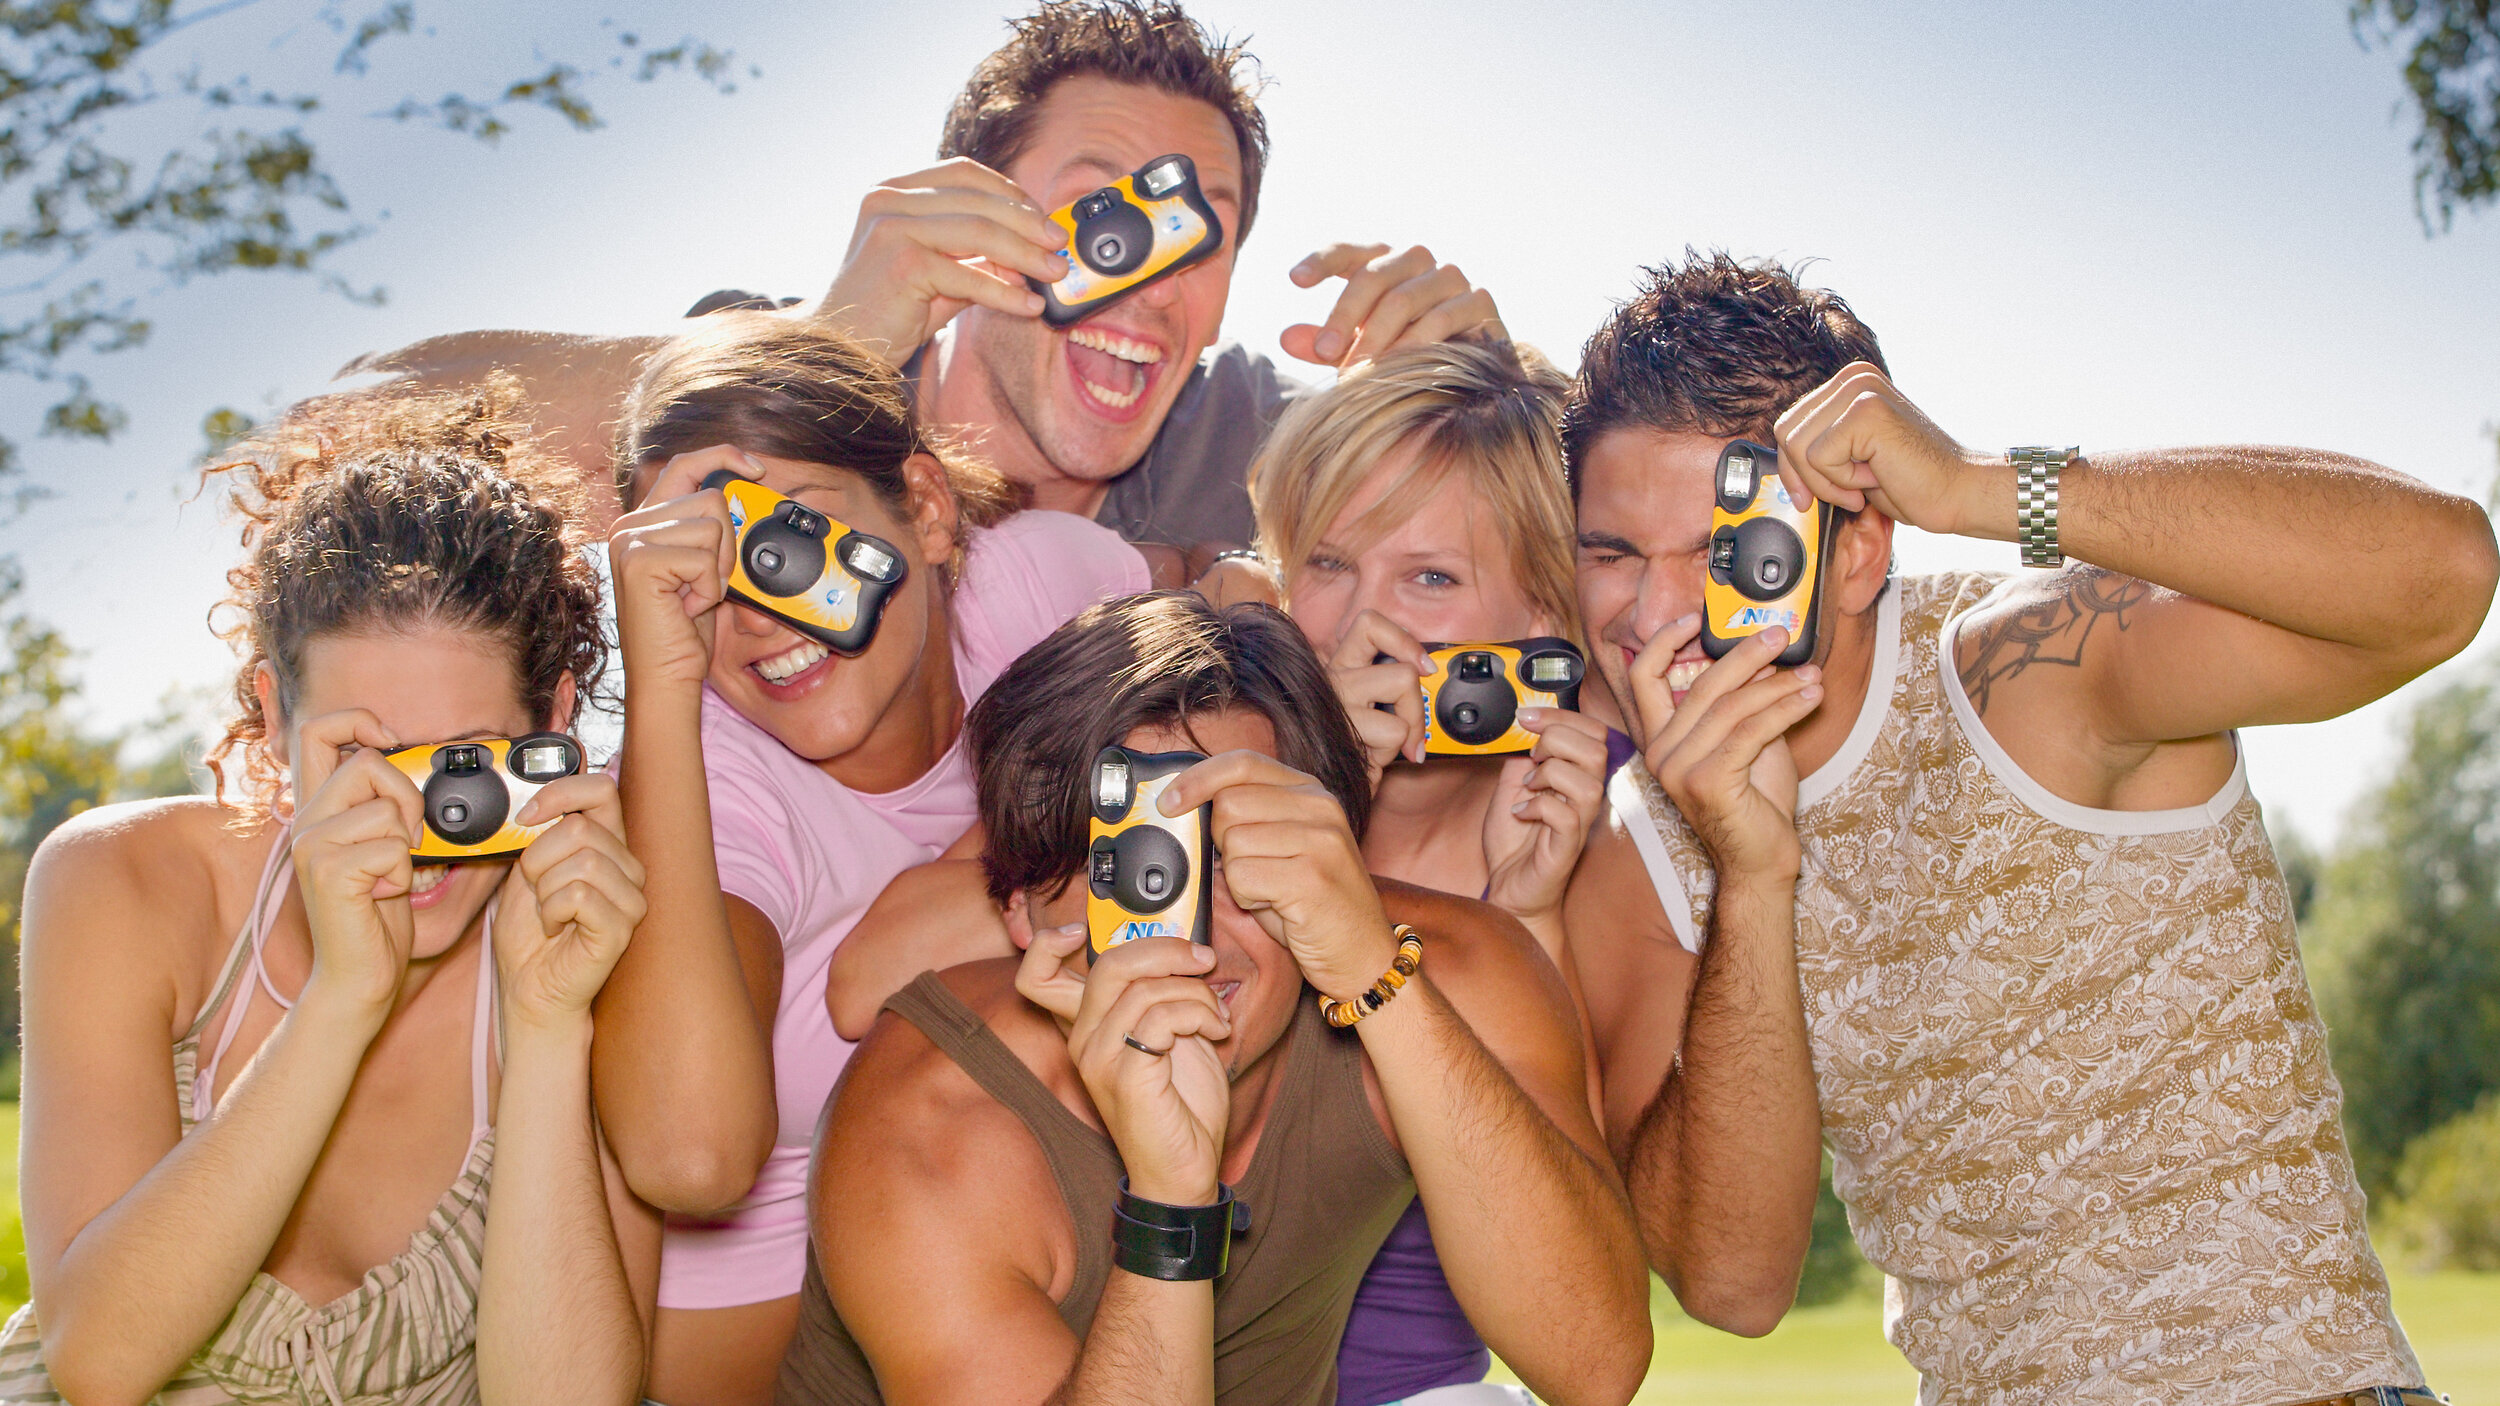
Disposable Cameras - Everything You Need to Know!
Disposable cameras are still around and they’re as fun and easy to use as ever!
Disposable Cameras in 2021

That’s me on the far left. I was beyond awkward. And this amazing moment was captured with a disposable camera!
In the late 1990s, disposable cameras were all the rage. As a completely irresponsible teenaged high school student, my parents would have never trusted me their real camera, so every time I went on a trip or out with friends, I always had to stop and pick up a disposable so I could at least record a few of the moments from the event. They were available everywhere and getting them developed and prints made was easy. But then came camera phones, the internet, social media, and the film industry and infrastructure took a huge hit. People stopped using disposable cameras and companies stopped producing as many of them, but they never stopped producing them! You can walk into any Walmart or CVS or Walgreens and still pick up a disposable camera! And, let me tell you, they are still completely amazing! If you’ve never shot with one, you absolutely should! They are a great way to get into film and with the resurgence of film photography in the last few years, the infrastructure is building back up to get your images developed and scanned!
What is a Disposable Camera?
It’s a very simple, very cheap pre-loaded roll of 35mm film loaded into a plastic body with a simple mechanical shutter and film advance and some very basic electronics and a battery. Originally, they were made to simply be dropped off at the local film collection center so you didn’t even have to deal with disposing of the camera and they could be easily recycled. Nothing is adjustable - everything operates in a fixed mode. The lens is fixed and plastic, the aperture is fixed, the shutter speed is also fixed at around 1/100th of a second. The only variable is the film speed. You can usually purchase disposable cameras in ISO 200, 400, and sometimes 800. The flash is usually decently powerful and is normally off. You normally have to press a button to charge the flash before you click the shutter. The recharge button has to be pressed each time so that you can have the flash charged for each shutter click.
These cameras are still made to be taken/sent directly to a film lab for processing, but they can easily be processed at home and if you want to save money on postage when you send your film in, you can open up the camera and send the roll of film in by itself.
Disposable cameras all come loaded with film, there are several different options ranging from basic color to black and white to some crazy film stocks. Disposables come in a lot of different film speeds also, so it gives you a lot of flexibility
Where Can I get a Disposable Camera?
Disposable cameras are available at a lot of places! They are sold in-store at CVS, Walgreens, Walmart, and Target. Mostly these stores either carry a Fujifilm or Kodak disposable in a single pack, a multipack, and a waterproof model.
You can also pick them up online from Amazon and several other retailers. Amazon and other online retailers have a much better selection!
| Store | Description | Price |
|---|---|---|
|
|
||
| CVS | Fujifilm QuickSnap Flash 400 Camera | $14.99 |
| CVS | Fujifilm QuickSnap Flash 400 Camera, 2 Pack | $25.99 |
| CVS | FujiFilm QuickSnap Waterproof Camera | $23.99 |
| Walgreens | Kodak HD Power Flash Single Use Camera | $19.99 |
| Walmart | Fujifilm QuickSnap Flash 400 Camera | $14.96 |
| Walmart | Fujifilm QuickSnap Flash 400 Camera, 2 Pack | $24.96 |
| Walmart | FujiFilm QuickSnap Waterproof Camera | $11.75 |
| Target | Fujifilm QuickSnap Flash 400 Camera | $12.99 |
| Target | Kodak HD Power Flash Single Use Camera | $12.99 |
| Target | Kodak Water Proof Camera | $18.99 |
How Do You Use a Disposable Camera?
Disposable cameras are great because they are so very easy to use. The only thing you need to worry about is buying the right camera/film speed. Because the settings are all locked, there’s no flexibility in exposing the film. While you could maybe use a 200 ISO film in a darker room, an 800 ISO film might not be the best for a bright sunny day. Fortunately, the cameras are all labeled with what lighting environments they are best suited for. All you need to do is make sure you select the right one.

After that, you literally just point and shoot. The focal range is pretty big on these cameras. The biggest thing you need to remember is that the minimal focal distance is going to be your biggest concern. You can’t put the camera right in your face and expect the image to be in focus. Generally, I’ve found that about an arm’s length away is the minimal focal distance for these cameras. If you’re in the shade or a shady area, you should definitely always use the flash. In fact, even if you are out in the sun, use the flash any way as it helps to fill in the harsh shadows on the face. In most situations, you can never have enough light!

It is important to note that when you are taking a photo, looking through the viewfinder only gives you an approximation of the image you are taking. There is no optical view finder or ranger finder, its simply a hole in the top of the camera for you to look through. You need to take parallax into consideration when taking photos of objects close to you as it might change the final composition of the actual image.
Where Can I Get My Disposable Camera Developed?
There are still quite a few places out there that process film. Unfortunately, most of them are not local for the majority of us. I created a blog post talking about your options for getting your disposable cameras developed. Check out that blog post HERE! There’s a lot of great information there that will also help you with disposable cameras. Walmart, Walgreen, and CVS still process film, but you won’t receive your negatives back. Even if you’re new to film, one thing you need to know is that YOU ALWAYS WANT YOUR NEGATIVES BACK! If a service doesn’t return your negatives, don’t use them. If you have your negatives, you can reproduce the image as many times as you want. The digital scans are no replacement or substitute for the film negatives.
We also offer disposable camera processing! Unlike some of our competitors, we handle your images ourselves and we always return your negatives. Click HERE to get your order started! You can also send it off to a number of really great labs out there. Richard Photo Lab is great as well as The Darkroom. Almost all labs will give you scanning options as well as prints and other options. If you’re mailing your film in, you. might want to remove it from the camera so save on postage. If the lab you are sending your film to offers a pre-paid label, I would just send the whole thing in. Most labs have places to recycle the cameras and batteries and it beats throwing all of that away yourself.
How to Get Disposable Camera Pictures on Your Phone
Almost every lab the processes your negatives will offer scanning services. With The Darkroom, you can have your images scanned and they go to a gallery where you can download them onto any device, including your phone. I usually opt for higher resolution scans so that when I download them to my phone or tablet, I’m getting an image that’s decent enough quality that it could be printed. You can also purchase a film scanner yourself and scan your negatives. It is a little more work but it gives you a little more control over the scans and the final product.
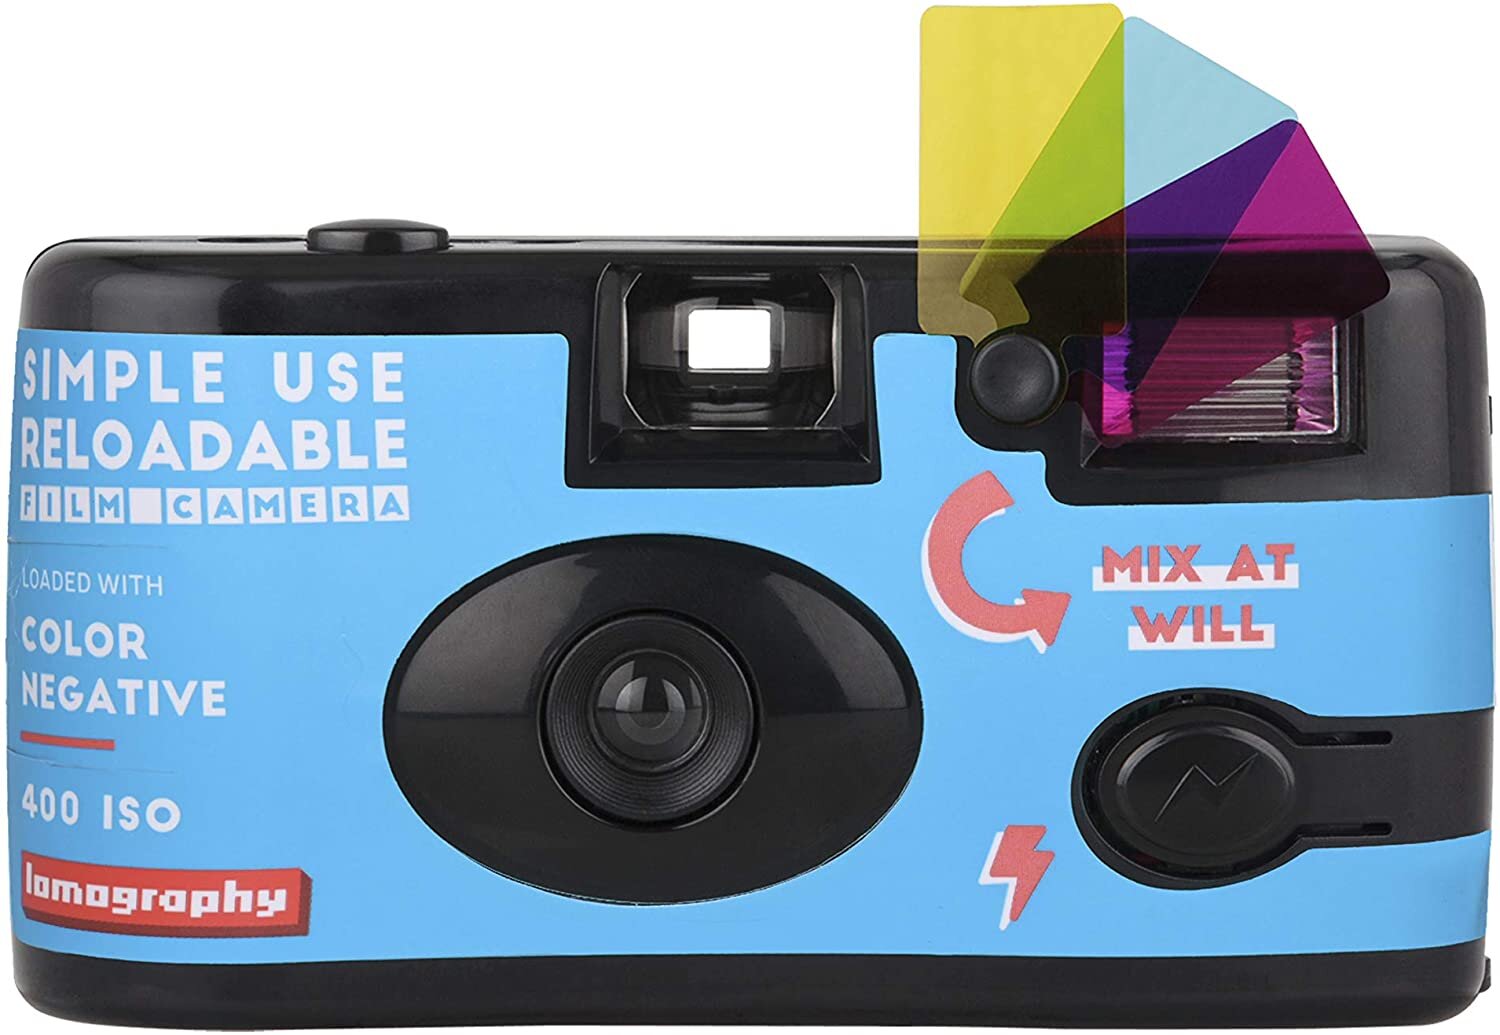
Simple Use Vs. Single Use Cameras
There are two other types of cameras out there on the market which fall into the disposable camera family, in my opinion. Recently, Lomography.com released a new line of cameras call Simple Use Cameras which shared the design and simplicity of a disposable camera, but were made to be reloadable. Disposable cameras have to be essentially broken to get the film out and while you can reload and tape up the camera and use it again, it’s pretty much trashed. Lomography’s Simple Use Cameras come pre-loaded with film and are easily reloaded and reusable. The price for these cameras is significantly higher than traditional disposables, but you have to take the reusability into consideration when looking at the price.
Single-use cameras are merely a rebranding of disposable cameras. With sustainability and conservation being very popular some companies decided to move away from the disposable moniker because of negative connotations associated with the word disposable. Single-use cameras are no different than normal disposable cameras.
Disposable Cameras are So Much Fun!
I have a large number of cameras, both film and digital I can shoot from at any given moment, and I still love using these disposable cameras! They’re just fun and almost stress-free! And I love the look of the images they produce! These are great to give to the kids to take on trips but they're also great to grab and have some fun with friends. As a camera, they are way less intimidating than a mirrorless or an SLR, or even a cell phone. Anyone can pick one up and start shooting and that’s the magic of these cameras and why they have never gone away in spite of the roller coaster that film has gone through.
Jump on Amazon and check out what’s available or run down to your local Walmart and pick one up and have some fun! You won’t regret it, I promise!

The Best Ring Light Kit of 2021
Whether your a teacher or an instagram influencer, a ring light can make all the difference in your videos and photos!

Adding a Ring Light makes a HUGE difference!
As the effects of locking down for the pandemic began to really blossom, I was spending much of my day on Zoom calls in meetings, on Facetime trying to figure things out with clients, and creating videos where I used to just meet with people in person. But as I zoomed, facetimed and recorded, I noticed one consistent thing - I looked so terrible and old and it was all because of the terrible lighting! Tired of looking like a distant cousin of the Adam’s Family on camera, I started setting up my video lights. I have a lot of lights, all very professional and very expensive and they did an amazing job, but the problem is that they were not very movable and often times, I needed to set up and do videos in different locations. It would have been impossible to pack up all of that gear and move it, set it back up and and shoot for 15 minutes only to take it back down and move it back. I decided it was time to give and do what ever 12-25 year old girl on Instagram has done: Get a Ring Light…
What is the Best Ring Light Kit of 2021?

It shouldn’t be a surprise that the market is absolutely flooded with ring light kits. While I know a lot about lighting, I know nothing about ring lights. So I began my search for ring light on Amazon. There were literally more options than I could count. It was immediately overwhelming. I was looking for a quality ring light, but I didn’t want to spend $700 for one. I left my ring light Amazon search and instead headed over to YouTube where I watched a ton of reviews for different lights. Here’s what I discovered…
Ring Light Features
The features the ring light comes with really do make or break a lot of products out there. Even if the price is low, if the ring light doesn’t have some key features then it becomes almost useless really quickly. Here are some of the key features you should consider when shopping for a ring light.
Color Temperature
Some of the cheap ring lights out there only offer one color and its usually a daylight kind of blue color. If you’re going to only be filming in one location and that color works with the ambient lighting you’re using then you’re good. But if you’re going to be moving your light around, shooting in different areas or want to have any control over white balance, you are going to want a ring light with a color temperature range so that you can adjust from daylight blue to tungsten orange as needed. I even use this creatively by turning the light to the tungsten range and adjusting my cameras white balance, which gives me a blue-colored background. Some of the cheaper lights out there offer clip on plastic panels which act as filters to change the light color. This isn’t a bad option if it keeps you in your budget, but those panels are just one more thing to keep up with. Its just so much easier to turn a knob and get a different color out of your light.
Ring Light Power Options
Many of the cheaper options out there only offer one option. You either are going to have to leave your ring light plugged in all the time or you’re going to be relying solely on battery power. If either of these options fits your needs then it opens up a broader range of options for you. But again, if you’re needing some flexibility with your ring light power options, then you definitely want to opt for a light that will let you use both battery and plug-in as needed. There have been moments when I have needed to shoot for longer periods of time and so leaving the ring light plugged in gives me the stability and duration I need. But there have also been moments when I needed to be in a place that didn’t have power and being able to plug in a battery and still get the same power and options has been a life saver. Of course, any time you are on battery you have a limited amount of time and I have pushed mine too far on occasion and have my ring light shut-off in the middle of filming, but live and learn I guess lol.
Ring Light Stands
I’ve got stands. A lot of stands. But I’ve learned something, one more stand couldn’t hurt! If you don’t have any stands you definitely want to get a ring light with a sturdy and durable stand that is also compact. The effective range of these lights isn’t a very big space so you’re not going to need a 20’ stand and sandbags, but you want something that will at least work for what you need it to and not get in the way. As I shopped for ring lights, I realized that many of them out there were ok ring lights, but the stands they came with were absolutely awful. If you get a great ring light and an awful stand and the stand falls over and your ring light gets smashed now just have an awful stand and no ring light. Make sure the stand you’re getting with your ring light is decent quality.
Ring Light Adjustability
I guess you could just move the light further away or closer to you. But what I noticed when using an iPhone or Android phone with a ring light is that ambient light can really mess up your camera’s automatic exposure while taking photos or video. There were times when I was shooting in a darker area that I was just completely blown out by the ring light and I couldn’t get my camera to adjust correctly. And let’s face it, if you’re using a conferencing app like Zoom or Google Meet, they did not spend a lot of time on the camera controls for the apps. Having the ability to adjust your power settings gives you greater control of the light and of the look you’re going for. You definitely want a ring light with an adjustable power setting.
Which Size Ring Light Should I Buy?
This is another great question. The larger the light, the better, but if you’re on a budget, a smaller ring light is infinitely better than no ring light at all. And if it comes down to price, I would skimp on the size before I skimped on the features. Get the biggest, feature rich, ring light you can afford!
Should I Buy a Ring Light Kit?
Unless you are in a very small group of individuals who already have a lot of equipment, you definitely should just shop for a kit. Almost all of the right light kits on Amazon, Adorama, and B&H have everything you need to get started. You really just have to consider the price, the features, and the quality. And don’t just stop at looking at the reviews on the website. I found that YouTube was full of really great reviews of every single one of the top selling ring light kits.
The Ring Light I Bought

Of course, is this ring light the best ring light of 2021? Well for me it is, but your needs could vary wildly. As I started shopping, I knew I would be using this light for Zoom calls, Facetime, and recording videos and I knew that I would a great deal of flexibility and a lot of features. After watching a ton of reviews and checking out some of the ring lights my friends were using, I decided on going with the Westcott 18” Ring Light Kit. This kit came with two batteries, a battery charger, a plug-in power supply, a stand, an iPhone holder with flexible arm, and a case. For the money, it was definitely what I felt would work best.
I’ve used this ring light from Westcott almost daily for the past year. Zoom calls for work, zoom calls with doctors for check-ups, job interviews, recording digital content for classes (instruction), YouTube videos, church, you name it, I’ve used this light for it! It provides a ton of light and the color temp is adjustable. The power level is adjustable too! It can be battery powered or plugged in and it comes with a stand that can get pretty tall but also folds up to fit really nicely in the well-built cases that was included.
The light itself is great but the materials for everything aren’t the highest quality. The plastic housing around the light is very flimsy. The stand also has some issues with the legs staying in place. Often times, these legs will slowly settle to the floor. Especially if you have a camera attached. I’ve had to really tighten that nut down to keep it from moving while I’m shooting.

You can easily attach an iPhone or a small mirrorless camera to this ring light.
The price is higher also, which could be a deal breaker for you. But after looking at a lot of lights and considering the price, I would get one of the cheaper lights. You’re not really asking for much when you purchase a light for under $200. But this light beats out almost all of its competitors for quality in this price range. I could have gotten a light for much cheaper, but feel like I would not have gotten the life and usability out of it. If you’re looking for a ring light for zoom calls or a ring light for streaming you could possibly go with something a little more affordable. But if you’re going to be trying to create quality content for YouTube or classroom instruction, this light is the one you want to pick-up.
There are a few other quality lights out there. I strongly considered the 18” 55w Ring Light Kit from Neewer. It was a much more affordable option and if you’re working inside of a tight budget, this light would be a great budget buy!

Getting a Ring Light will Improve Your Video and Photo Quality Dramatically!
Teachers, a ring light is going to help your videos look so much better! YouTubers, stop sitting in front of that window and enjoy the flexibility that a ring light can give!. Instagram influencers, you know you need this! Do some research and take the plunge!

Family Portraits
While family portraits aren’t always fun, they definitely can be if you follow these helpful tips!
Spring is in full swing and that means its time to start thinking about getting those family portraits updated! Whether its out in the Texas Bluebonnets or in the front yard of your house getting everyone together, wearing matching or at least coordinated clothes and trying to get everyone to smile at the exact same time, family photos are everyone’s favorite experience!

Well, not really…
For most participants, the family portrait is a grueling experience. Usually only mom wants to be there. The kids are all hot and tired of being told to stand still and smile and dad often goes from complacent to a silent pipe-bomb of rage just waiting to explode. Add to that unpredictable weather, heat and or humidity, bugs, uncooperative animals, you’ve got a recipe for a photographic disaster!
But - there are a few ways you and your family avoid things becoming such a mess. Here are a few tips and tricks to make your family portrait experience something that is actually enjoyable!
Tips for Great Family Portraits
Choose a Photographer with Lots of Family Photo Experience
I’m a photographer and if someone contacts me and wants family photos, I’m going to take them! But I’m going to be honest - I’m not good at them. Sure, I can get you a great look photo in the end, but it takes a special and experienced photographer to be able to reign everyone in the family in and get them focused and smiling. I’ve worked with photographers in the past that are only family photographers and they almost seem to be able to hypnotize disruptive children, unhappy husbands, and critical mother-in-laws into an almost blissful catatonic trance where they smile and take amazing photos. When shopping for a family photographer, don’t only look at the end results, but take a look at their portfolio and their reviews. A photographer with lots of family photos under their belt and a lot of positive reviews definitely knows that they are doing! And if you’ve got someone that’s good at what they do in charge, it will make the entire process flow much more smoothly and more importantly, much faster!
Choose a Time that Works with Your Kids
This is the most important when your kids are under the age of 6 but it can also be a factor with kids of any age. For younger kids, bringing them when they are freshly rested can make all of the difference. Infants to preschool kids can become particularly difficult and cranky. Even older kids and teenaged children can be difficult and grumpy if they didn’t get much sleep the night before. Well rested kids make the best photographs!
So this means that you are going to have to schedule a time that works best for your kids rather than one that works best for your photographer or yourself. Make sure your younger kids are within an hour of waking up. Make sure you older kids haven’t been up all night at a friends house or playing video games. For everyone’s sake, pick a weekend that isn’t already packed full of things to do.
Choose a Place to Shoot that Makes it Easy
Almost no one is shooting family portraits in the studio any more. I have no idea why? When you opt to shoot outside, you are surrendering practically all control over the quality of your photos. It could be raining, it could be cold, or hot, cloudy or ridiculously sunny. Shooting outside can be extremely difficult. However it does give you the ability to get some more interesting backgrounds and work with larger props or even cars or buildings.
However, shooting in the studio is an amazing option and really really does simplify the process. The photographer can control the lighting, the environment (thank you AC and heat), and can even include customer backdrops and props. when you’re shooting outside, your photographer is battling the elements to get a decent shot while inside they can be in complete control and can produce more exact and beautiful images much faster than they ever could outside. It’s much faster to shoot in the studio also, meaning that you might be able to get everyone out of there before they expire and start screaming or grumping.
You’ve got to balance a lot of factors when it comes to selecting a place to shoot, but I would definitely recommend checking with your photographer to see what in-studio family portrait options they might have available.
Make it More than Just a Photo Shoot
Plan something fun to do afterwards! Ice cream, go to the movies, go out shopping, anything that will give your kids and your husband something to look forward to. This kind of reward motivation can really help people stay focused and gives everyone a reason to work hard to get the photos done and get out of there!
What to Wear to your Family Photo Shoot

A lot of families do themes or wear matching tops. You would be surprised how much drama this can cause. I’ve seen mom’s buy wrong sized shirts for their adult children, which is a disaster. I’ve seen some matching family shirts that are so embarrassingly lame that it almost physical hurt me to snap the shutter. I know many of you are going to approach family photos with this doctrine of ‘everyone much match’ or at least be coordinated, but I would suggest at least considering how resistant some of your family might be to this and how much drama it might cause. Because if its going to be a problem, its going to ruin the photos.
I once had an adult child lose it over being forced to wear a matching shirt for a photo shoot. In the Office part of my studio, this 20-something guy began screaming and dropping ‘f’ bombs at full volume. It made for some very awkward photos a few minutes later. It can be helpful to get input from your family members so that they might be more apt to wear the outfits without complaining. Or you could always just not worry about anyone matching and just let them be yourselves. Whatever you choose, just make sure that its appropriate for the weather. I’ve seen people taking family photos in tropical attire in 30 degree weather and people dressed up like eskimos in the middle of 80 degree weather. Everyone was miserable and its hard to smile when your teeth are chattering or you can’t get the sweat out of your eyes.
Remember to Have Fun

Families are being pulled in so many different directions these days and with so many distractions its hard to actually have any memorable or meaningful moments together as a family. Instead of making family photos a stressful event, why not try to turn it into something fun? The biggest problem with taking family photos is that someone, if not everyone is miserable and it just shouldn’t be that way. Talk with your photographer about ways you can make the shoot fun. Think about some out of the box photo ideas, check out Pinterest and see what neat concepts you can come up with. But don’t let your family photo be a miserable experience!

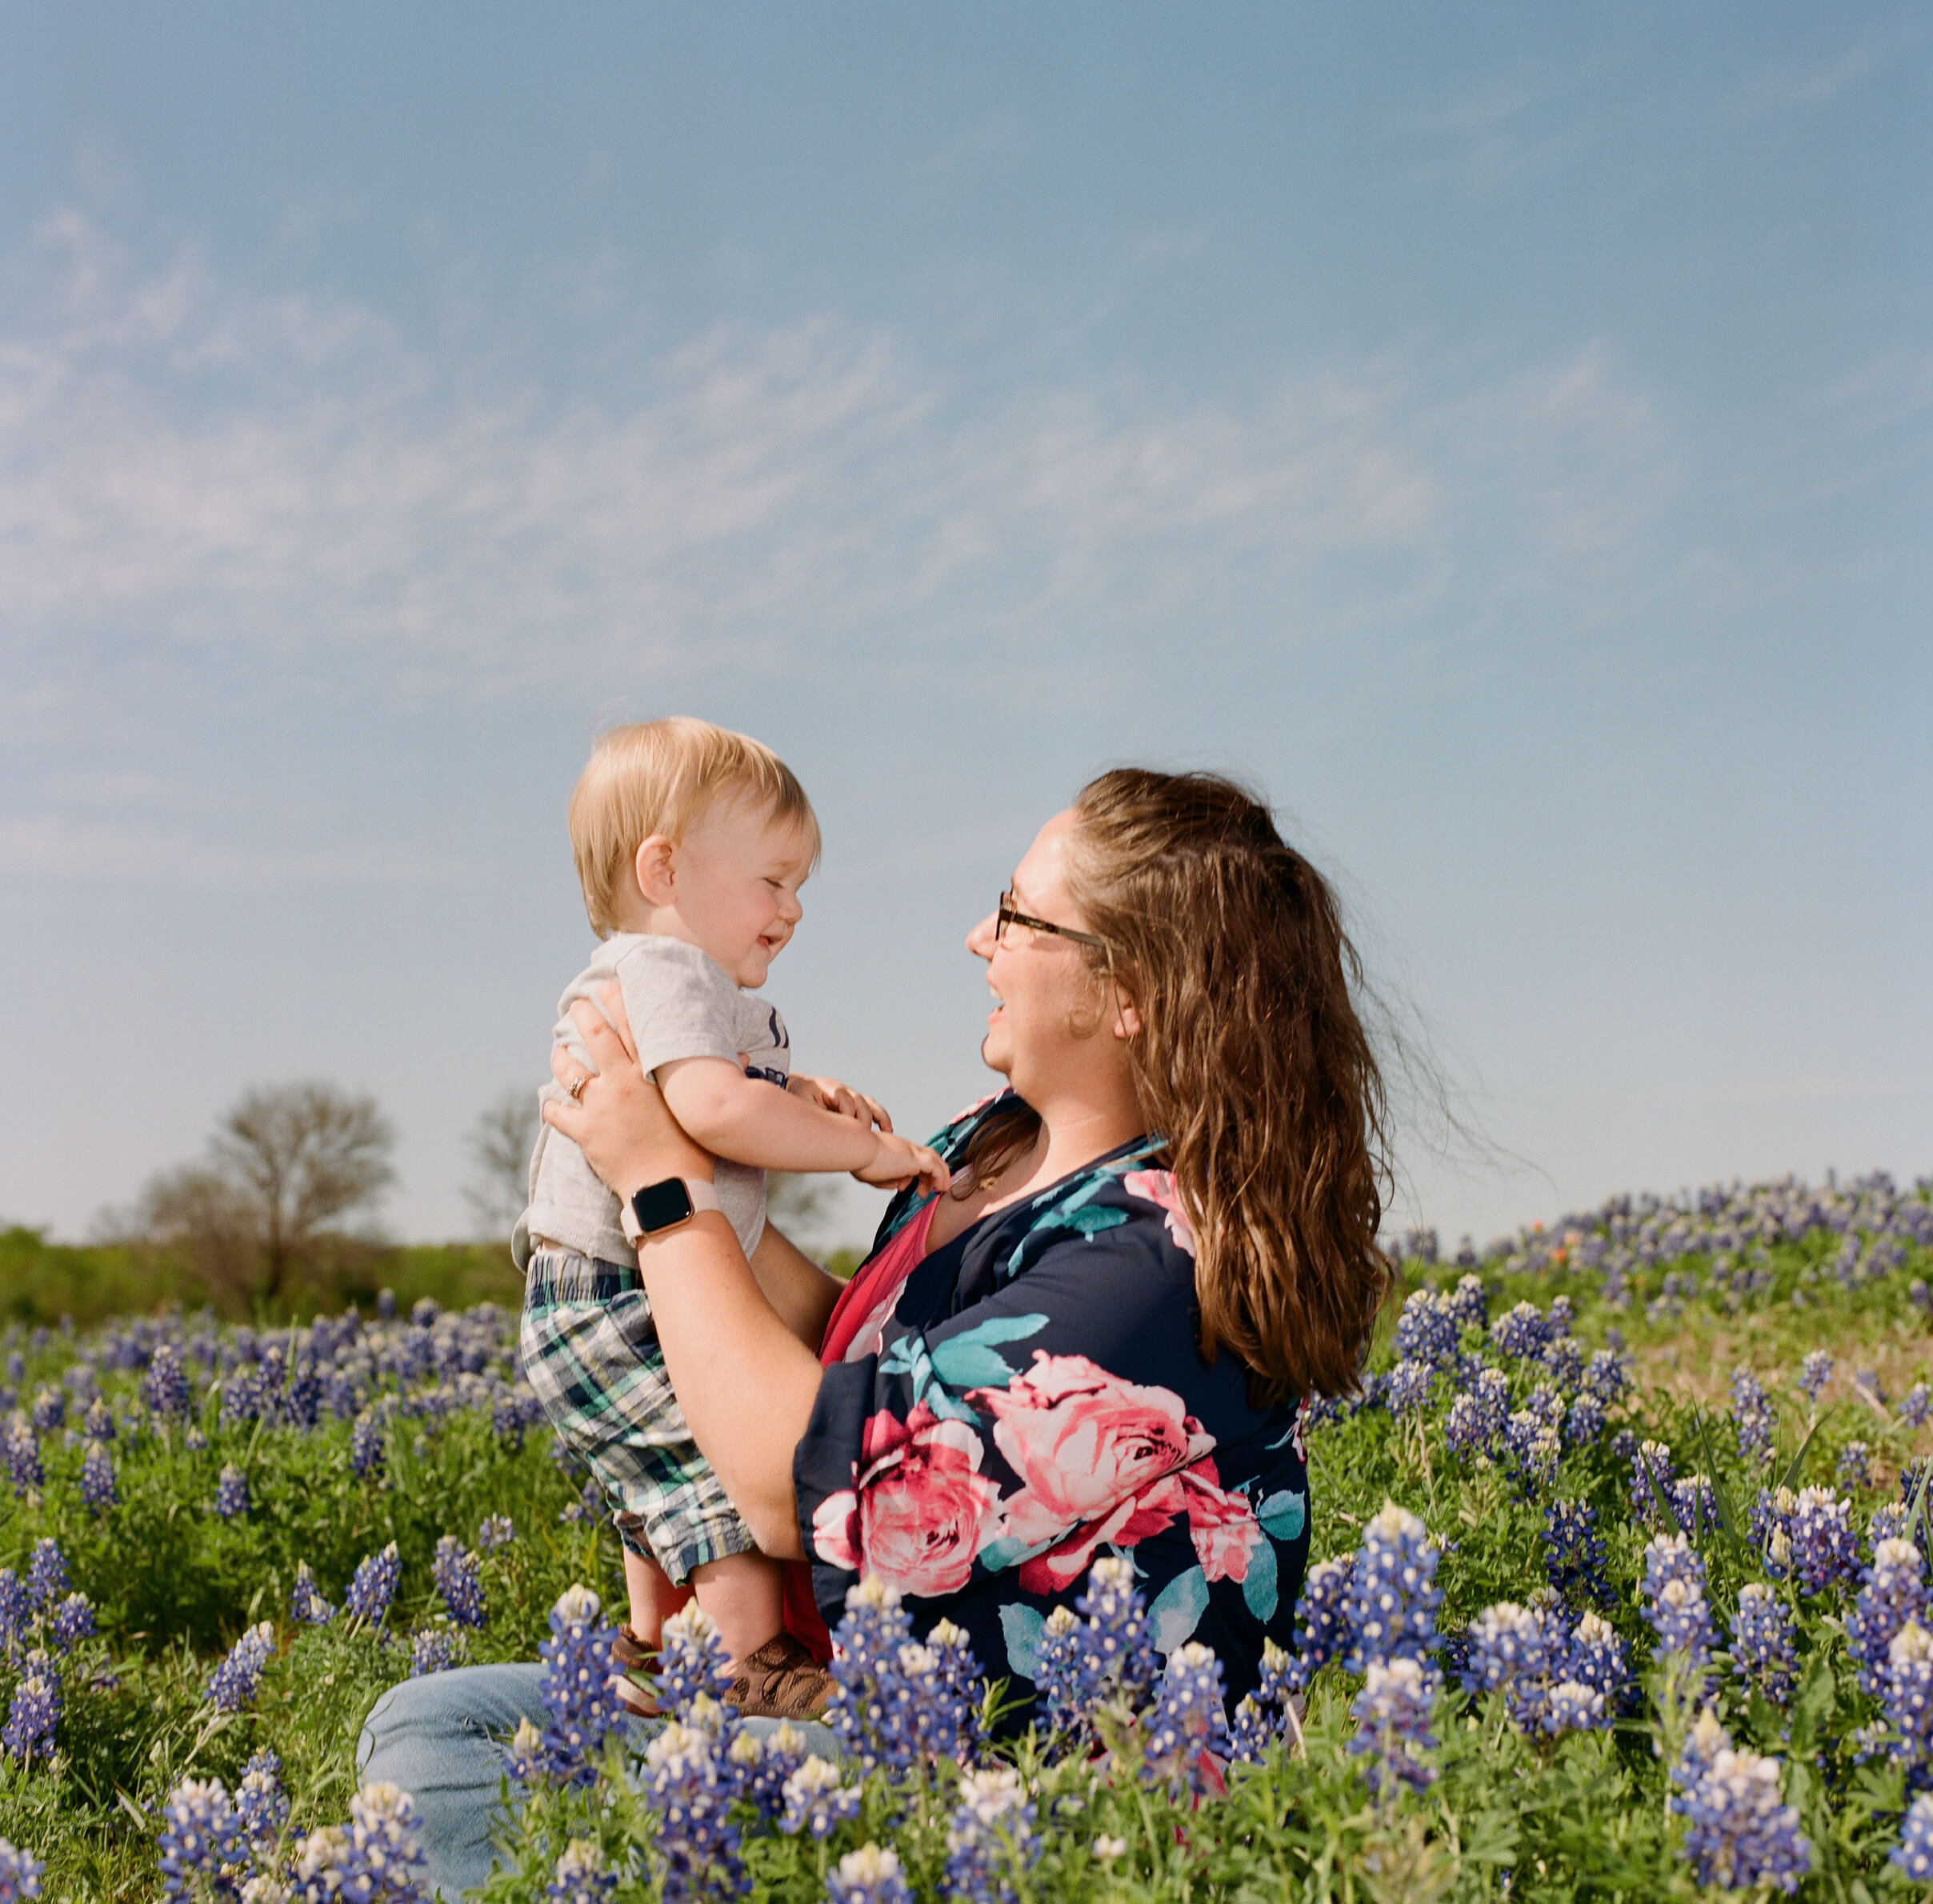
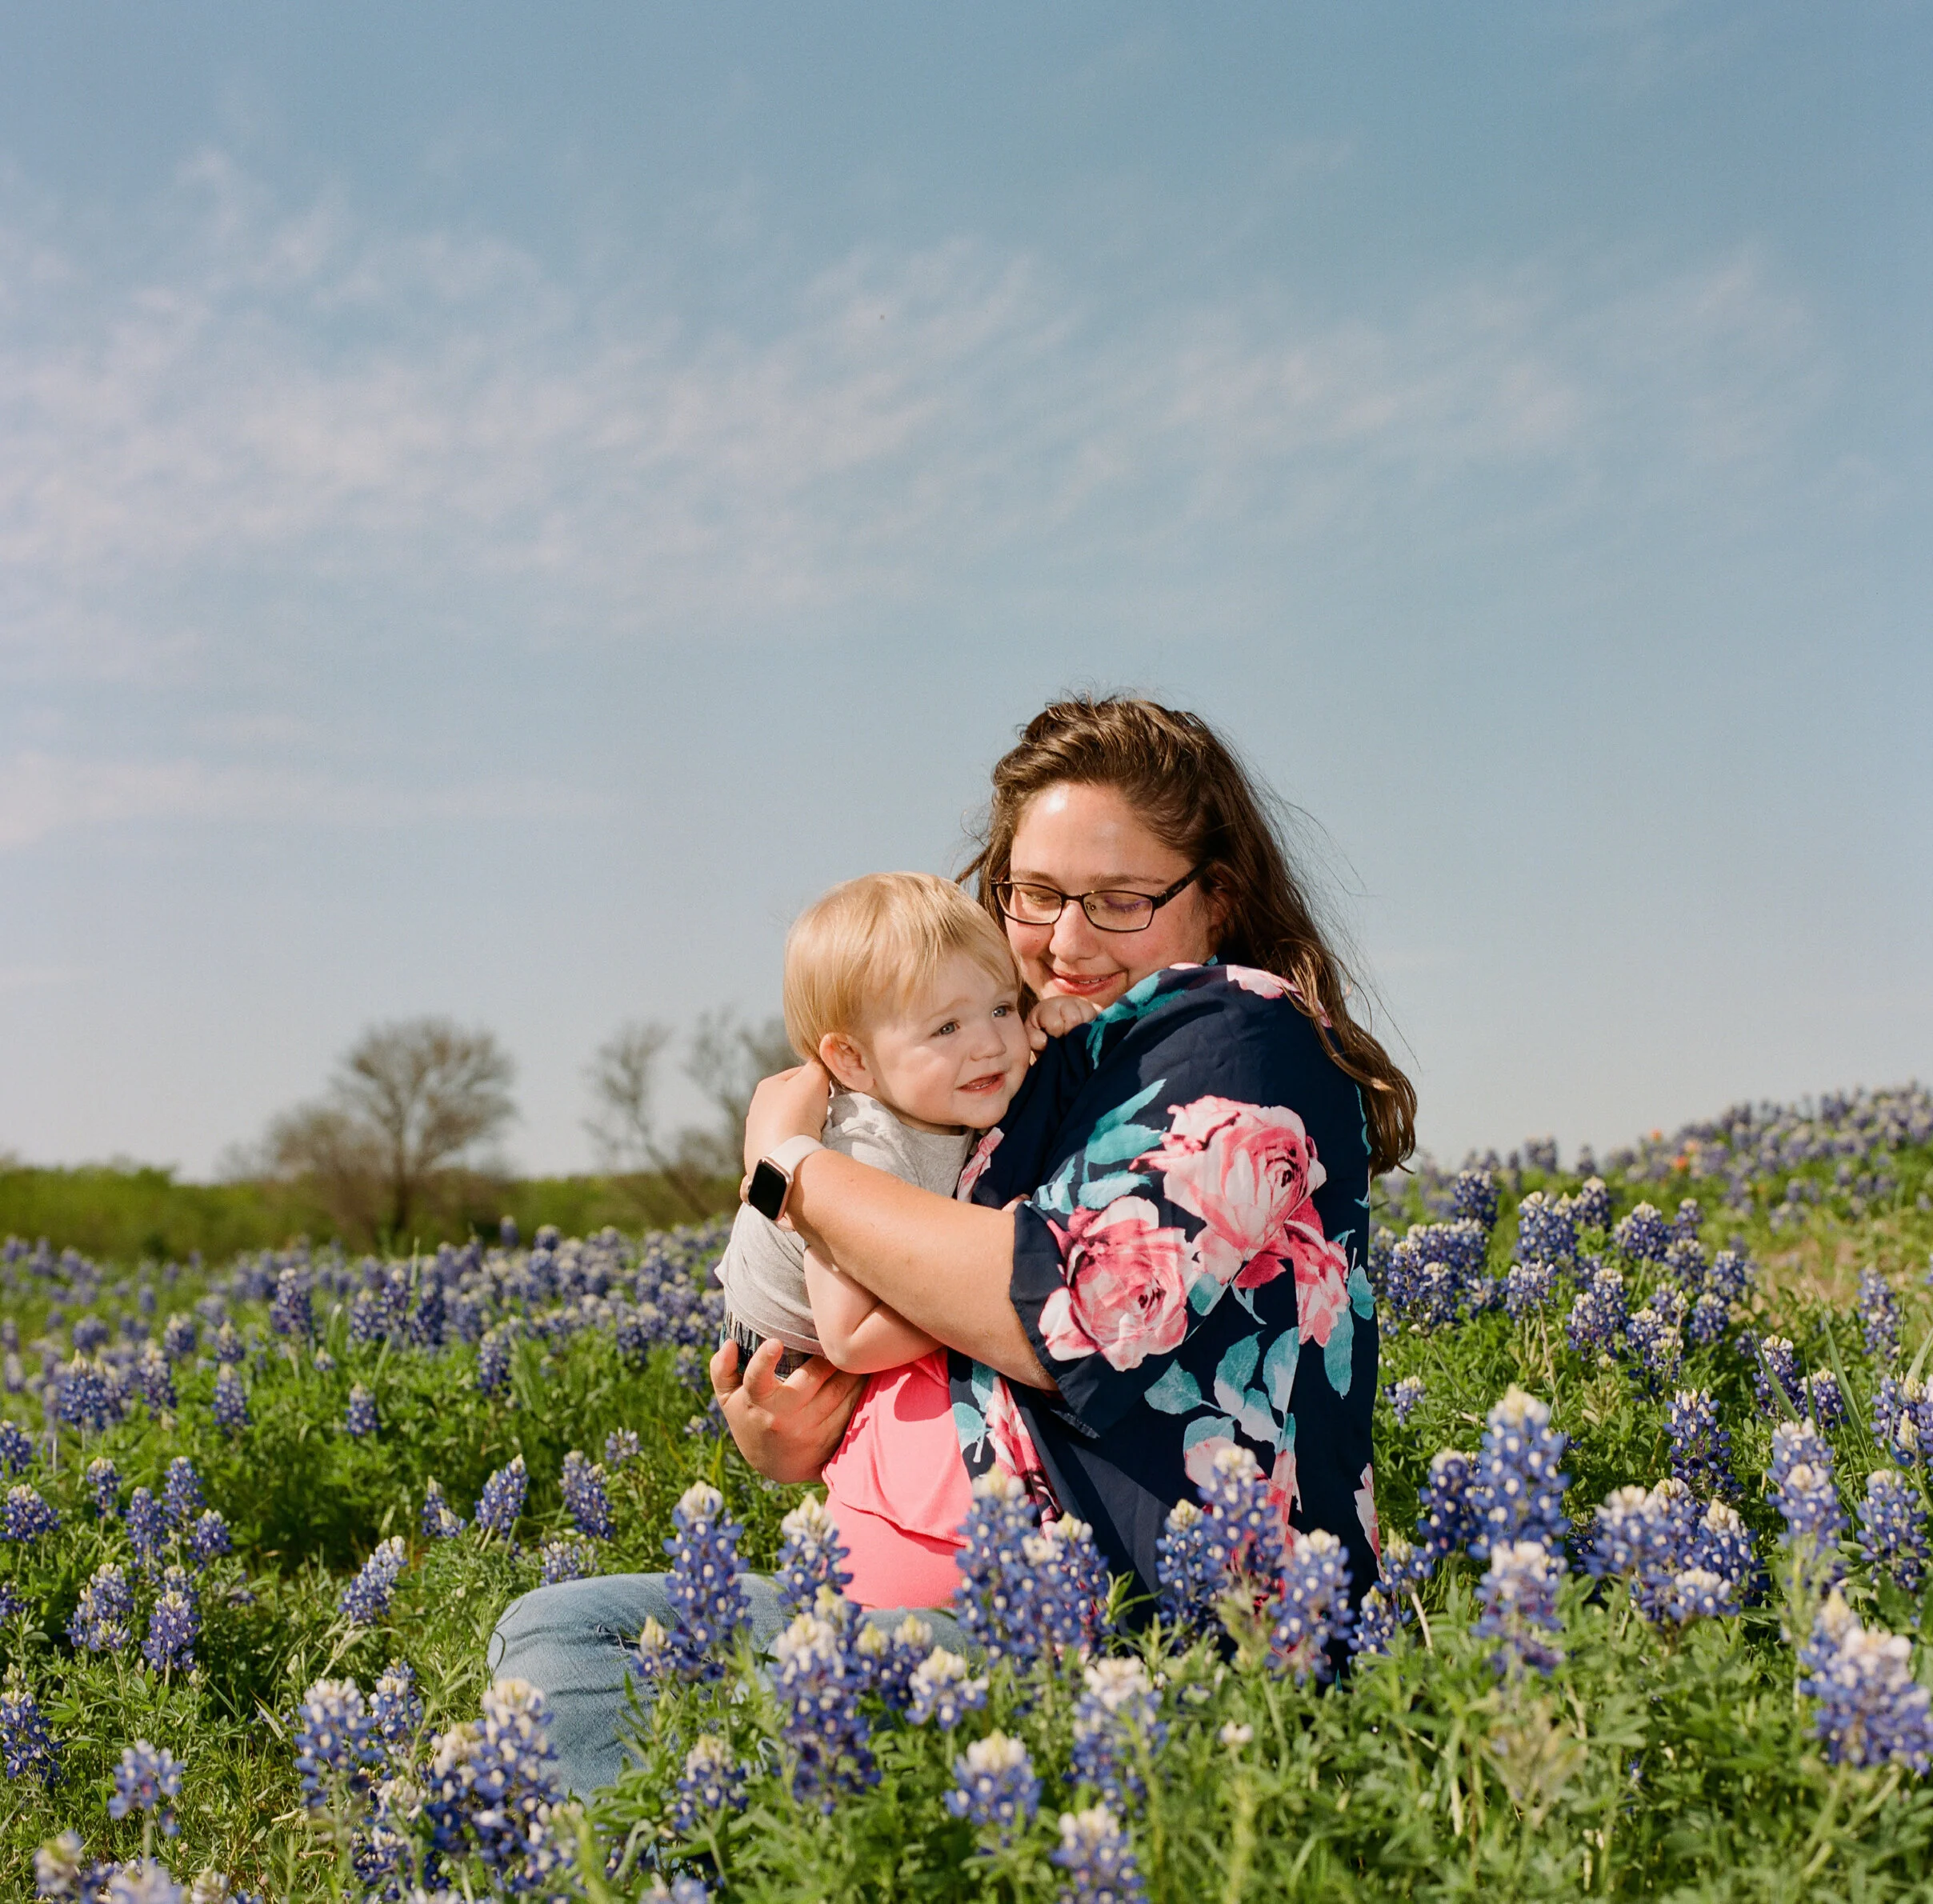
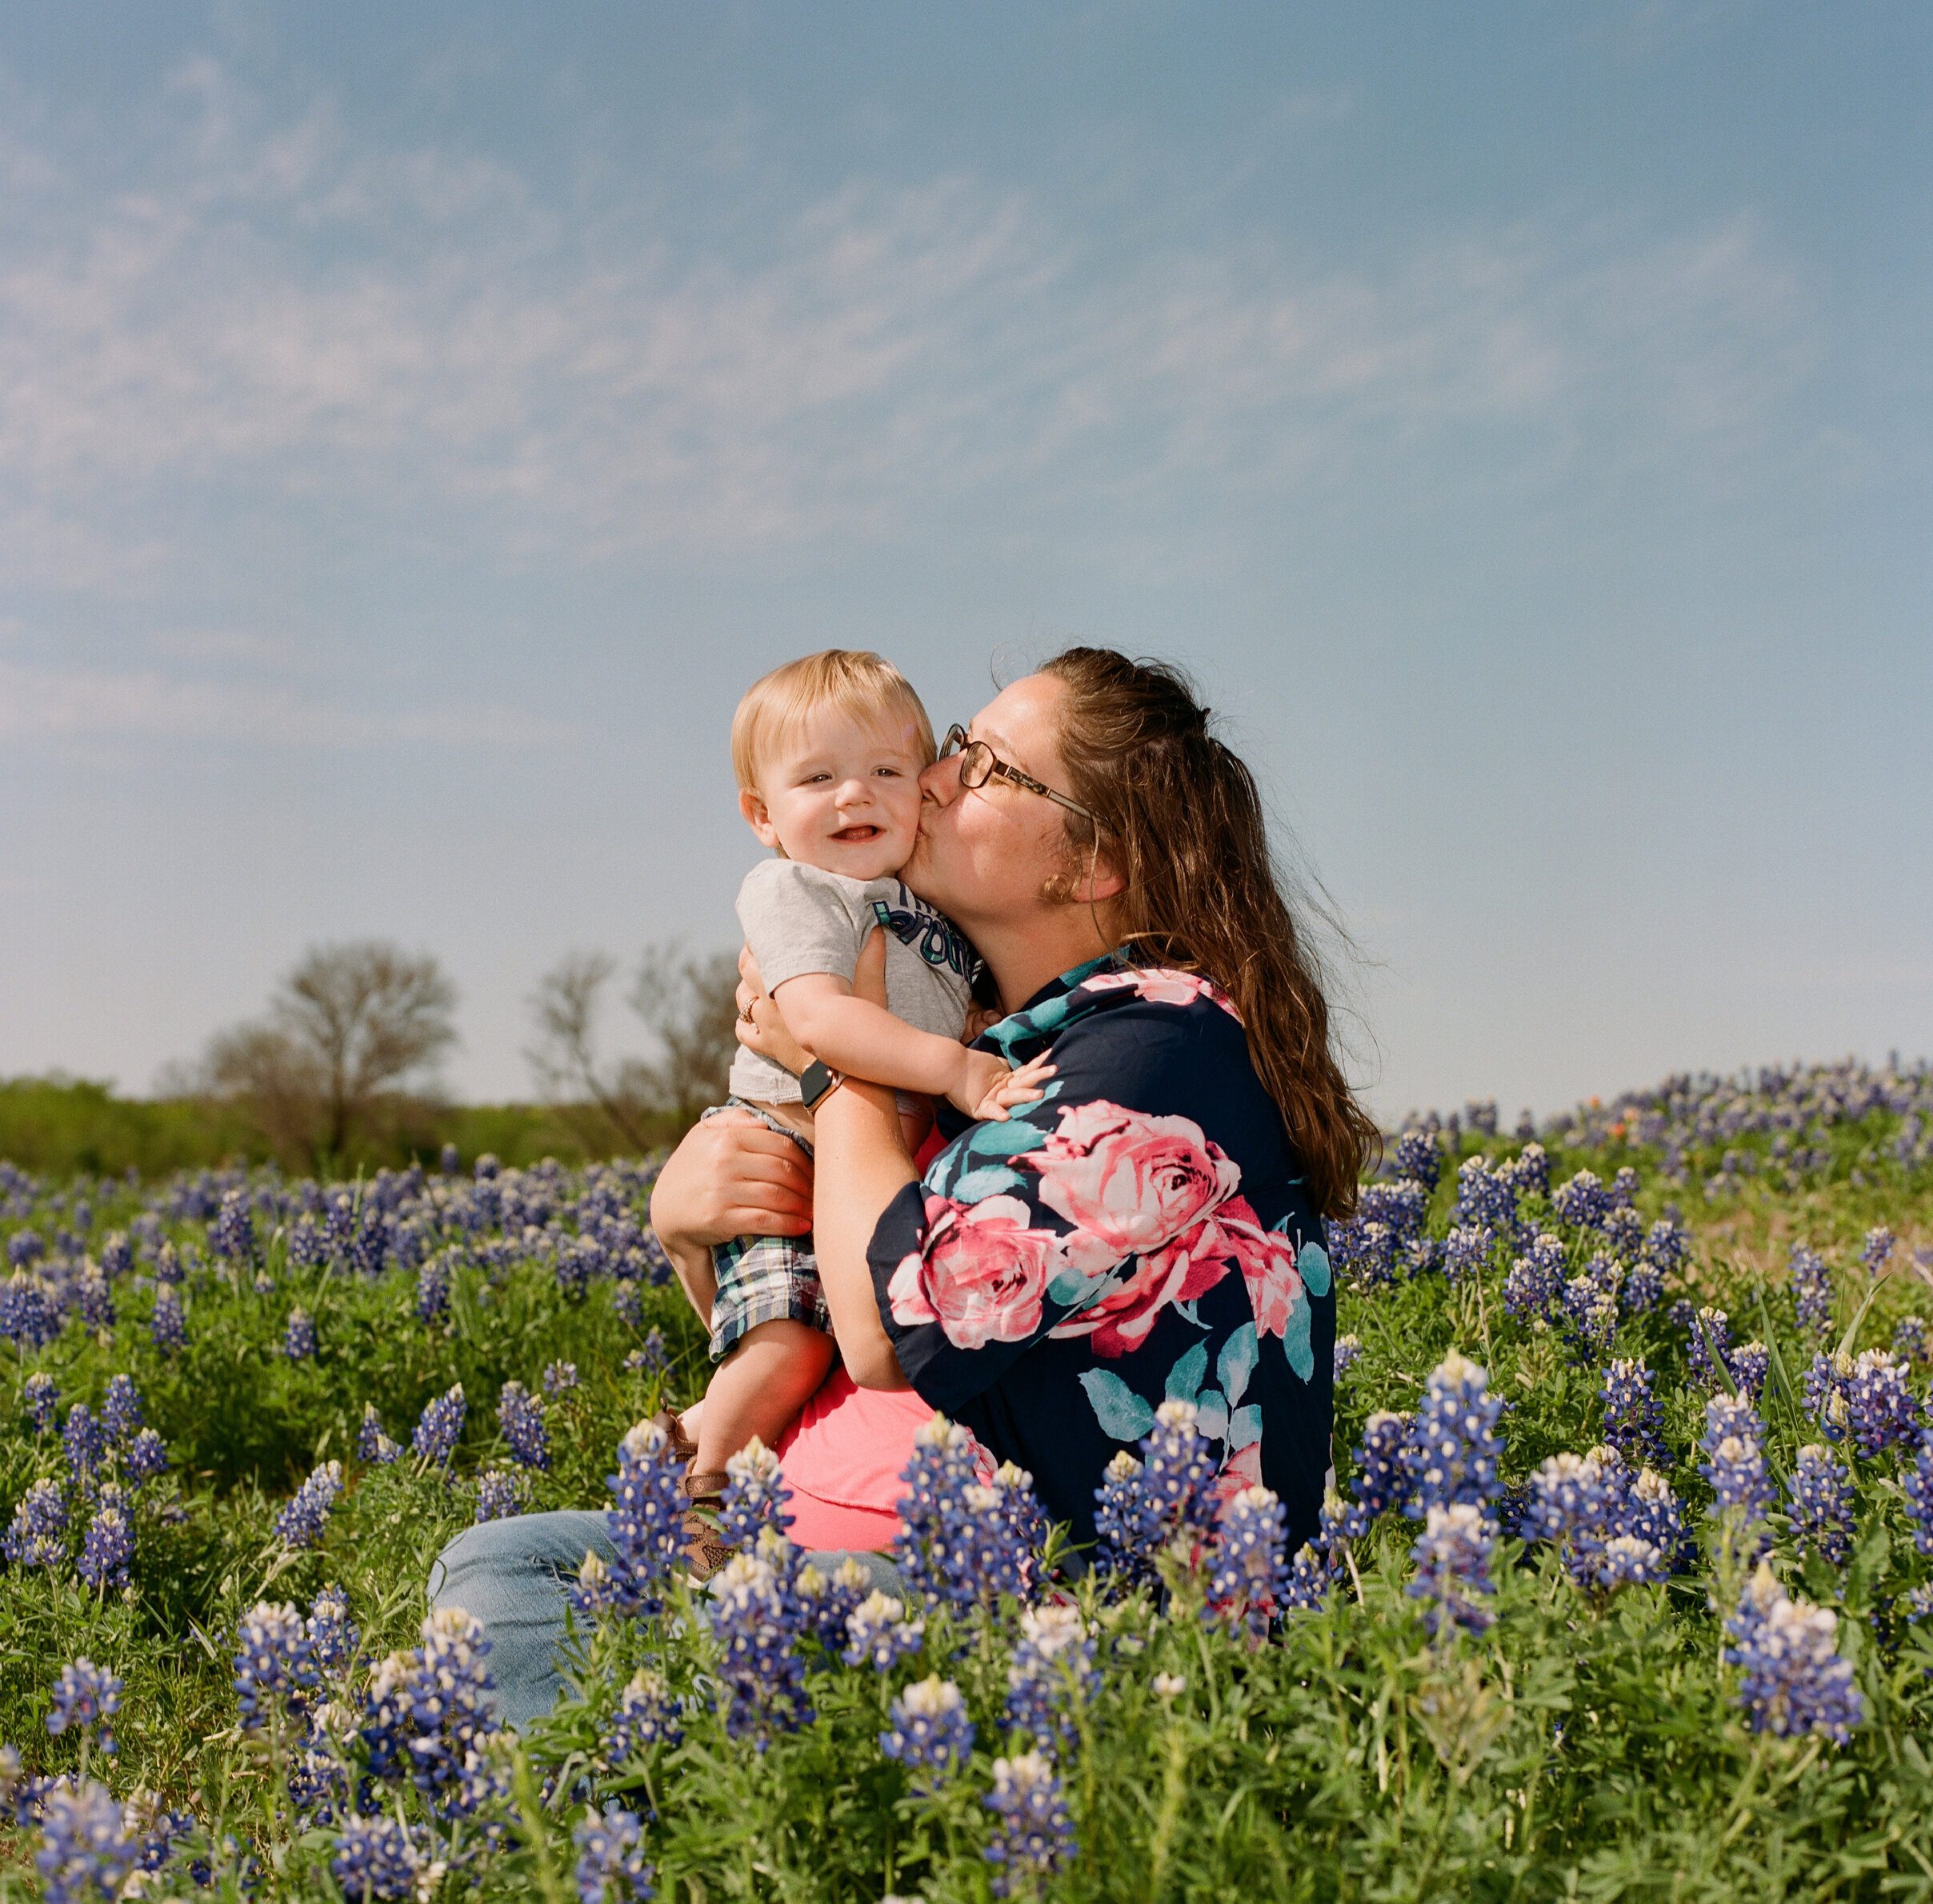
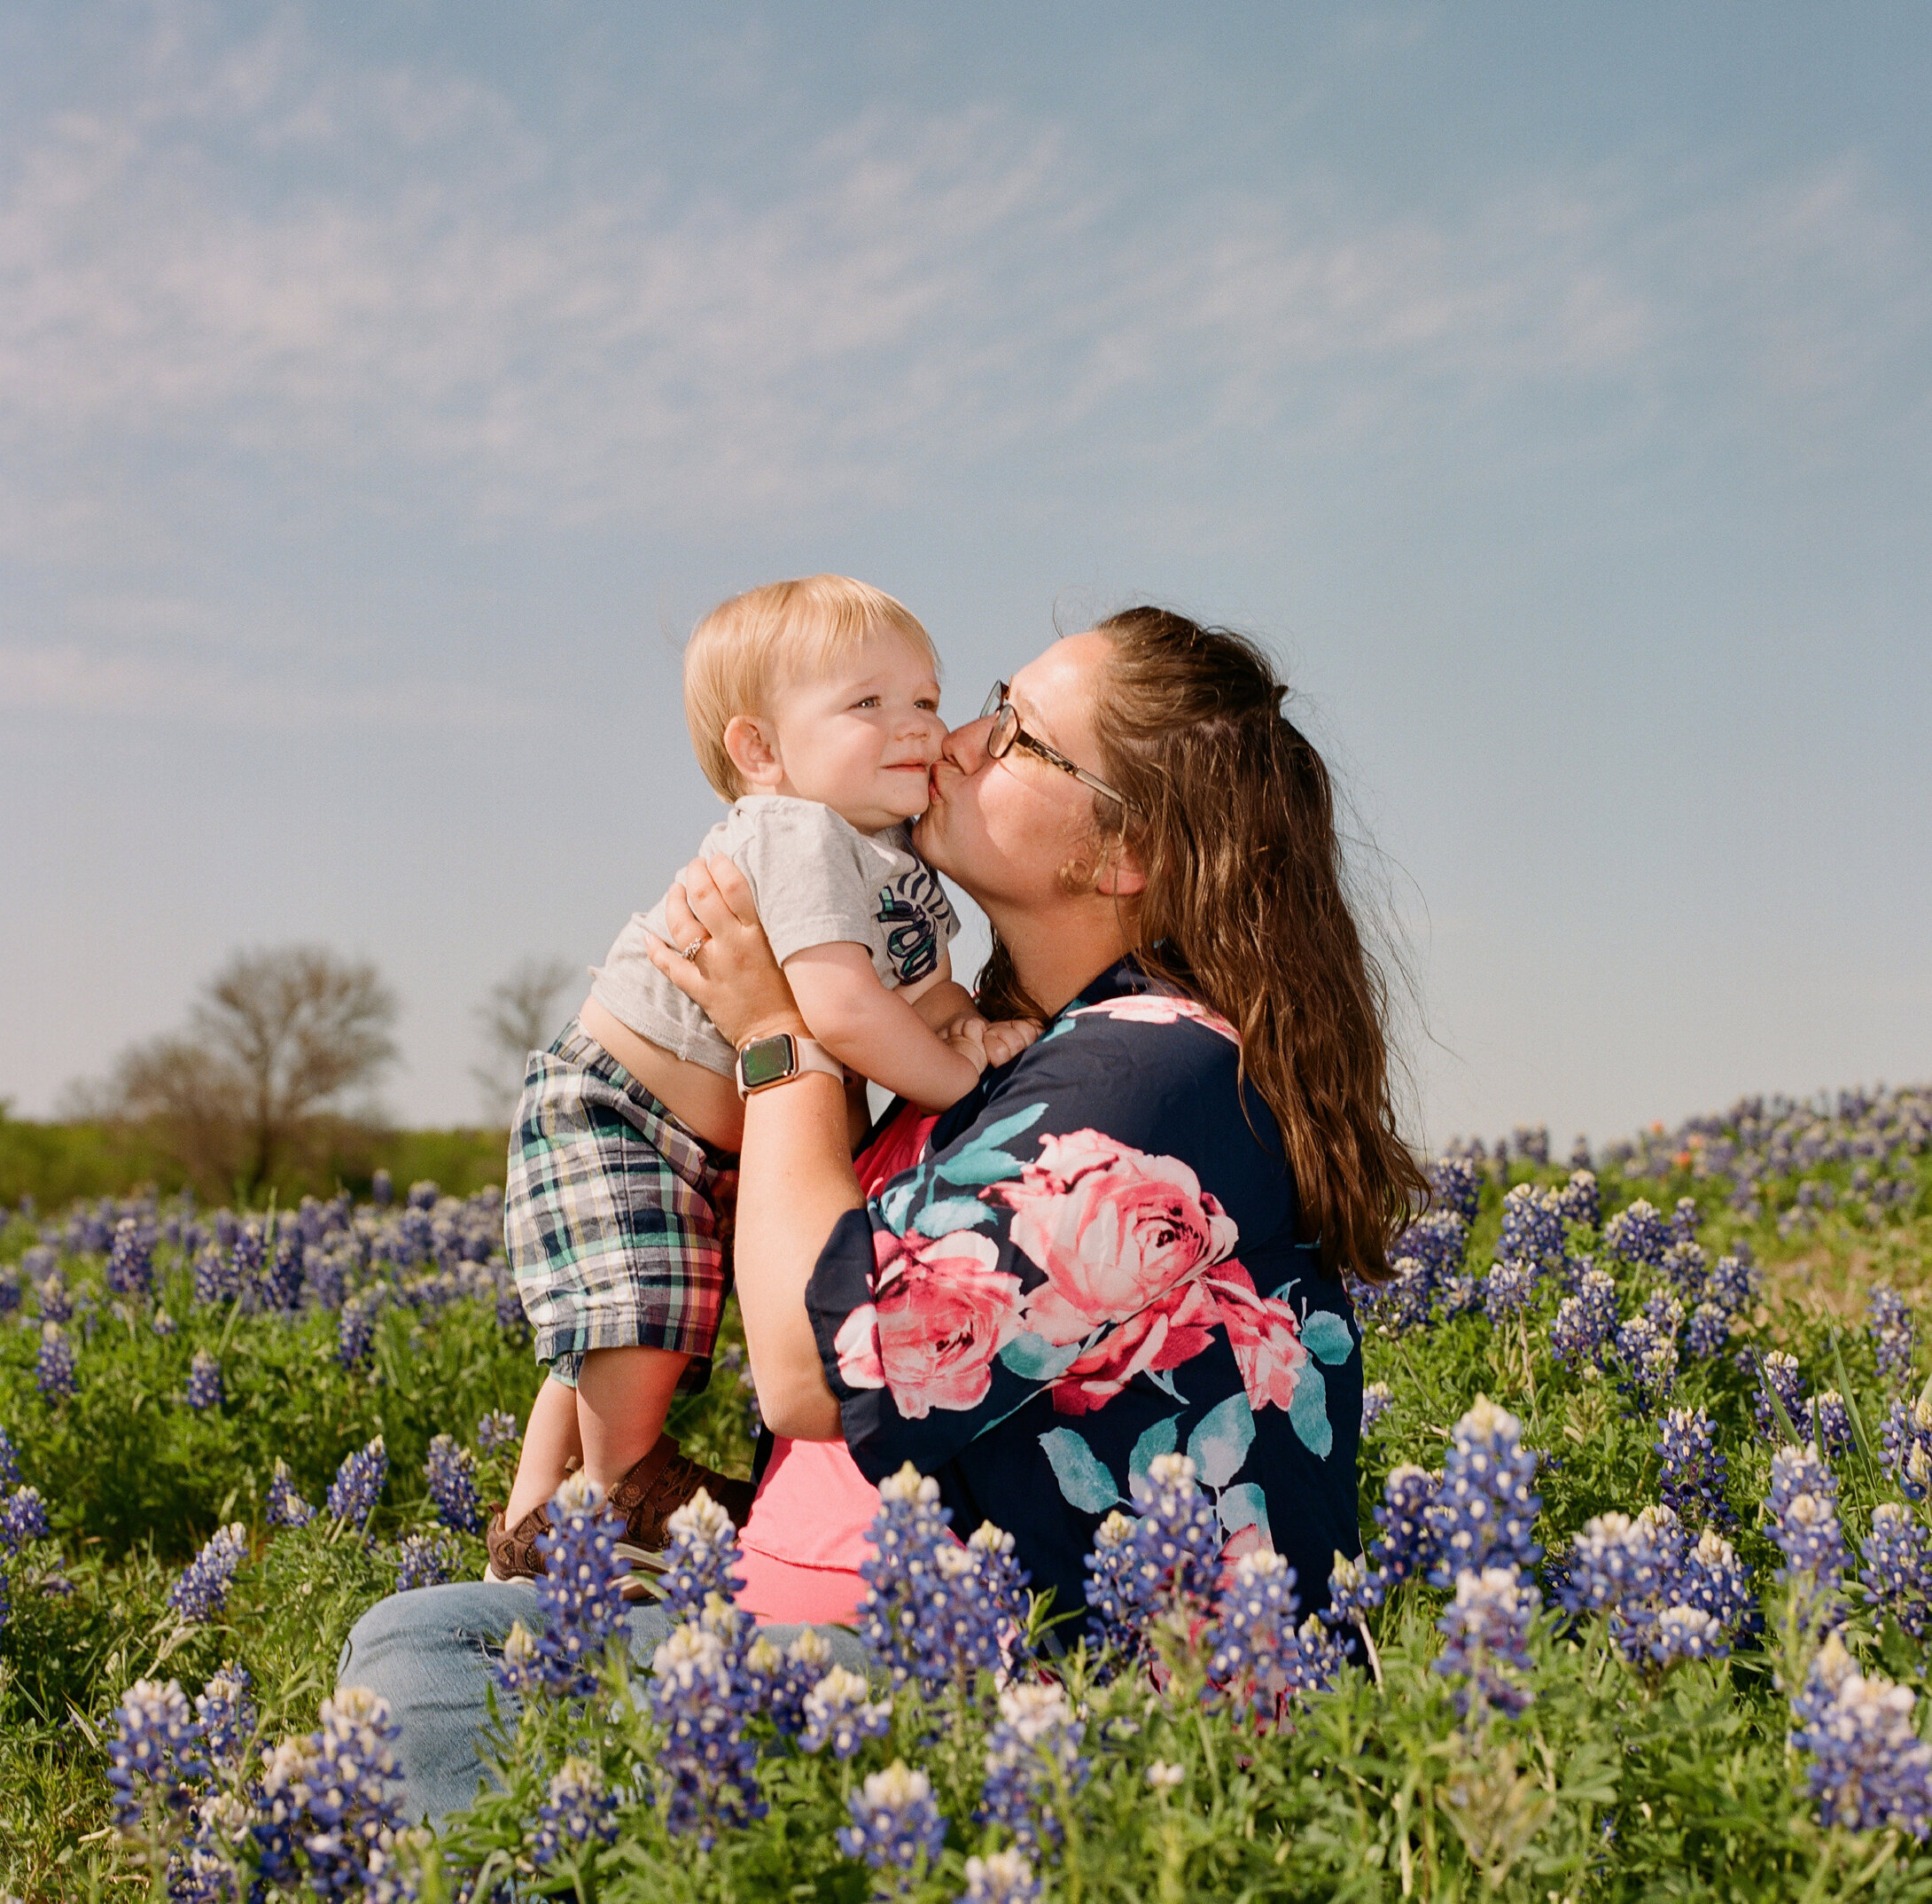
Texas Bluebonnet Photos 2021
Every year we make Bluebonnet photos a big thing! Here’s our how 2021 family bluebonnet photo session went along with some helpful hints and tips!
For many of us here in Texas, spring is just about one thing - waiting for the perfect time to go get those family bluebonnet photos! There are so many factors to consider - location, time of day, what to dress the kids in, etc. For us, we don’t actually take a lot of family styled photos of our kids, but bluebonnet photos are the one annual thing we do. And to be honest, I stress about it every year.
Getting the Perfect Bluebonnet Pictures
If you haven’t already, go check out my previous blog post, that gives a lot of tips and trick on how to get great bluebonnet pictures. Click Here to check out that post! There are a lot of great tips there that will help you get really fantastic photos. Here’s what I did this year to try to up my bluebonnet photo game!
My Camera
This year, for the first time in a few years I decided to go back to film for our family bluebonnet photos. Last year during the middle of Covid season, I just snapped them with my digital. The previous year, our kids were really little and so I knew there was no way I was going to get them all to sit still and behave so there would need to be a lot of editing and photoshopping. But this year, I thought I had a chance to get a decent shot of my three younger kids. I loaded up my Hasselblad 501cm with the 80mm lens attached and headed out! The 501cm is an amazing camera, its fully manual but its fast for a fully manual camera. Plus, I just really wanted to use this camera. I mainly keep it in the studio, but I felt a trip to the bluebonnet fields would a fitting exercise for my latest camera acquisition.
My Film
I’ve known for like 4 months what film I was going to use for this shoot. I’m not kidding when I say that we take these photos very seriously each year. I’ve literally been planing these photos since winter started. For this shoot, I decided to go with Kodak Portra 400. I’m using a medium format camera so I used the 120 version of the film but you can also get it in 35mm. Portra is great for skin tones and that’s what I really wanted to focus on this time around. I loaded up two rolls (24 exposures) and hoped I could at least get one decent photo out of 24…. But there was no way to be sure that would even happen.
One trick that I have learned from shooting with Kodak Portra 400 is to shoot it at ISO 200 instead of 400. This means, you are essentially overexposing the image, but the over exposure actually brings out some of the best qualities of Portra and it can be easily corrected in the scan/print process.
Lighting Bluebonnet Photos
We were traveling back from College Station after visiting our oldest at Texas A&M and we were adding this photoshoot on to the end of a very busy weekend. There are several amazing locations in Ennis, TX for bluebonnet photos, which was on our way back to that’s where we planned to stop. If you’re looking for a great location for bluebonnet pictures - Ennis is it for North/Northeast Texas! Unfortunately, the time we were going to be in Ennis was not going to give us the best lighting, so I had to improvise.
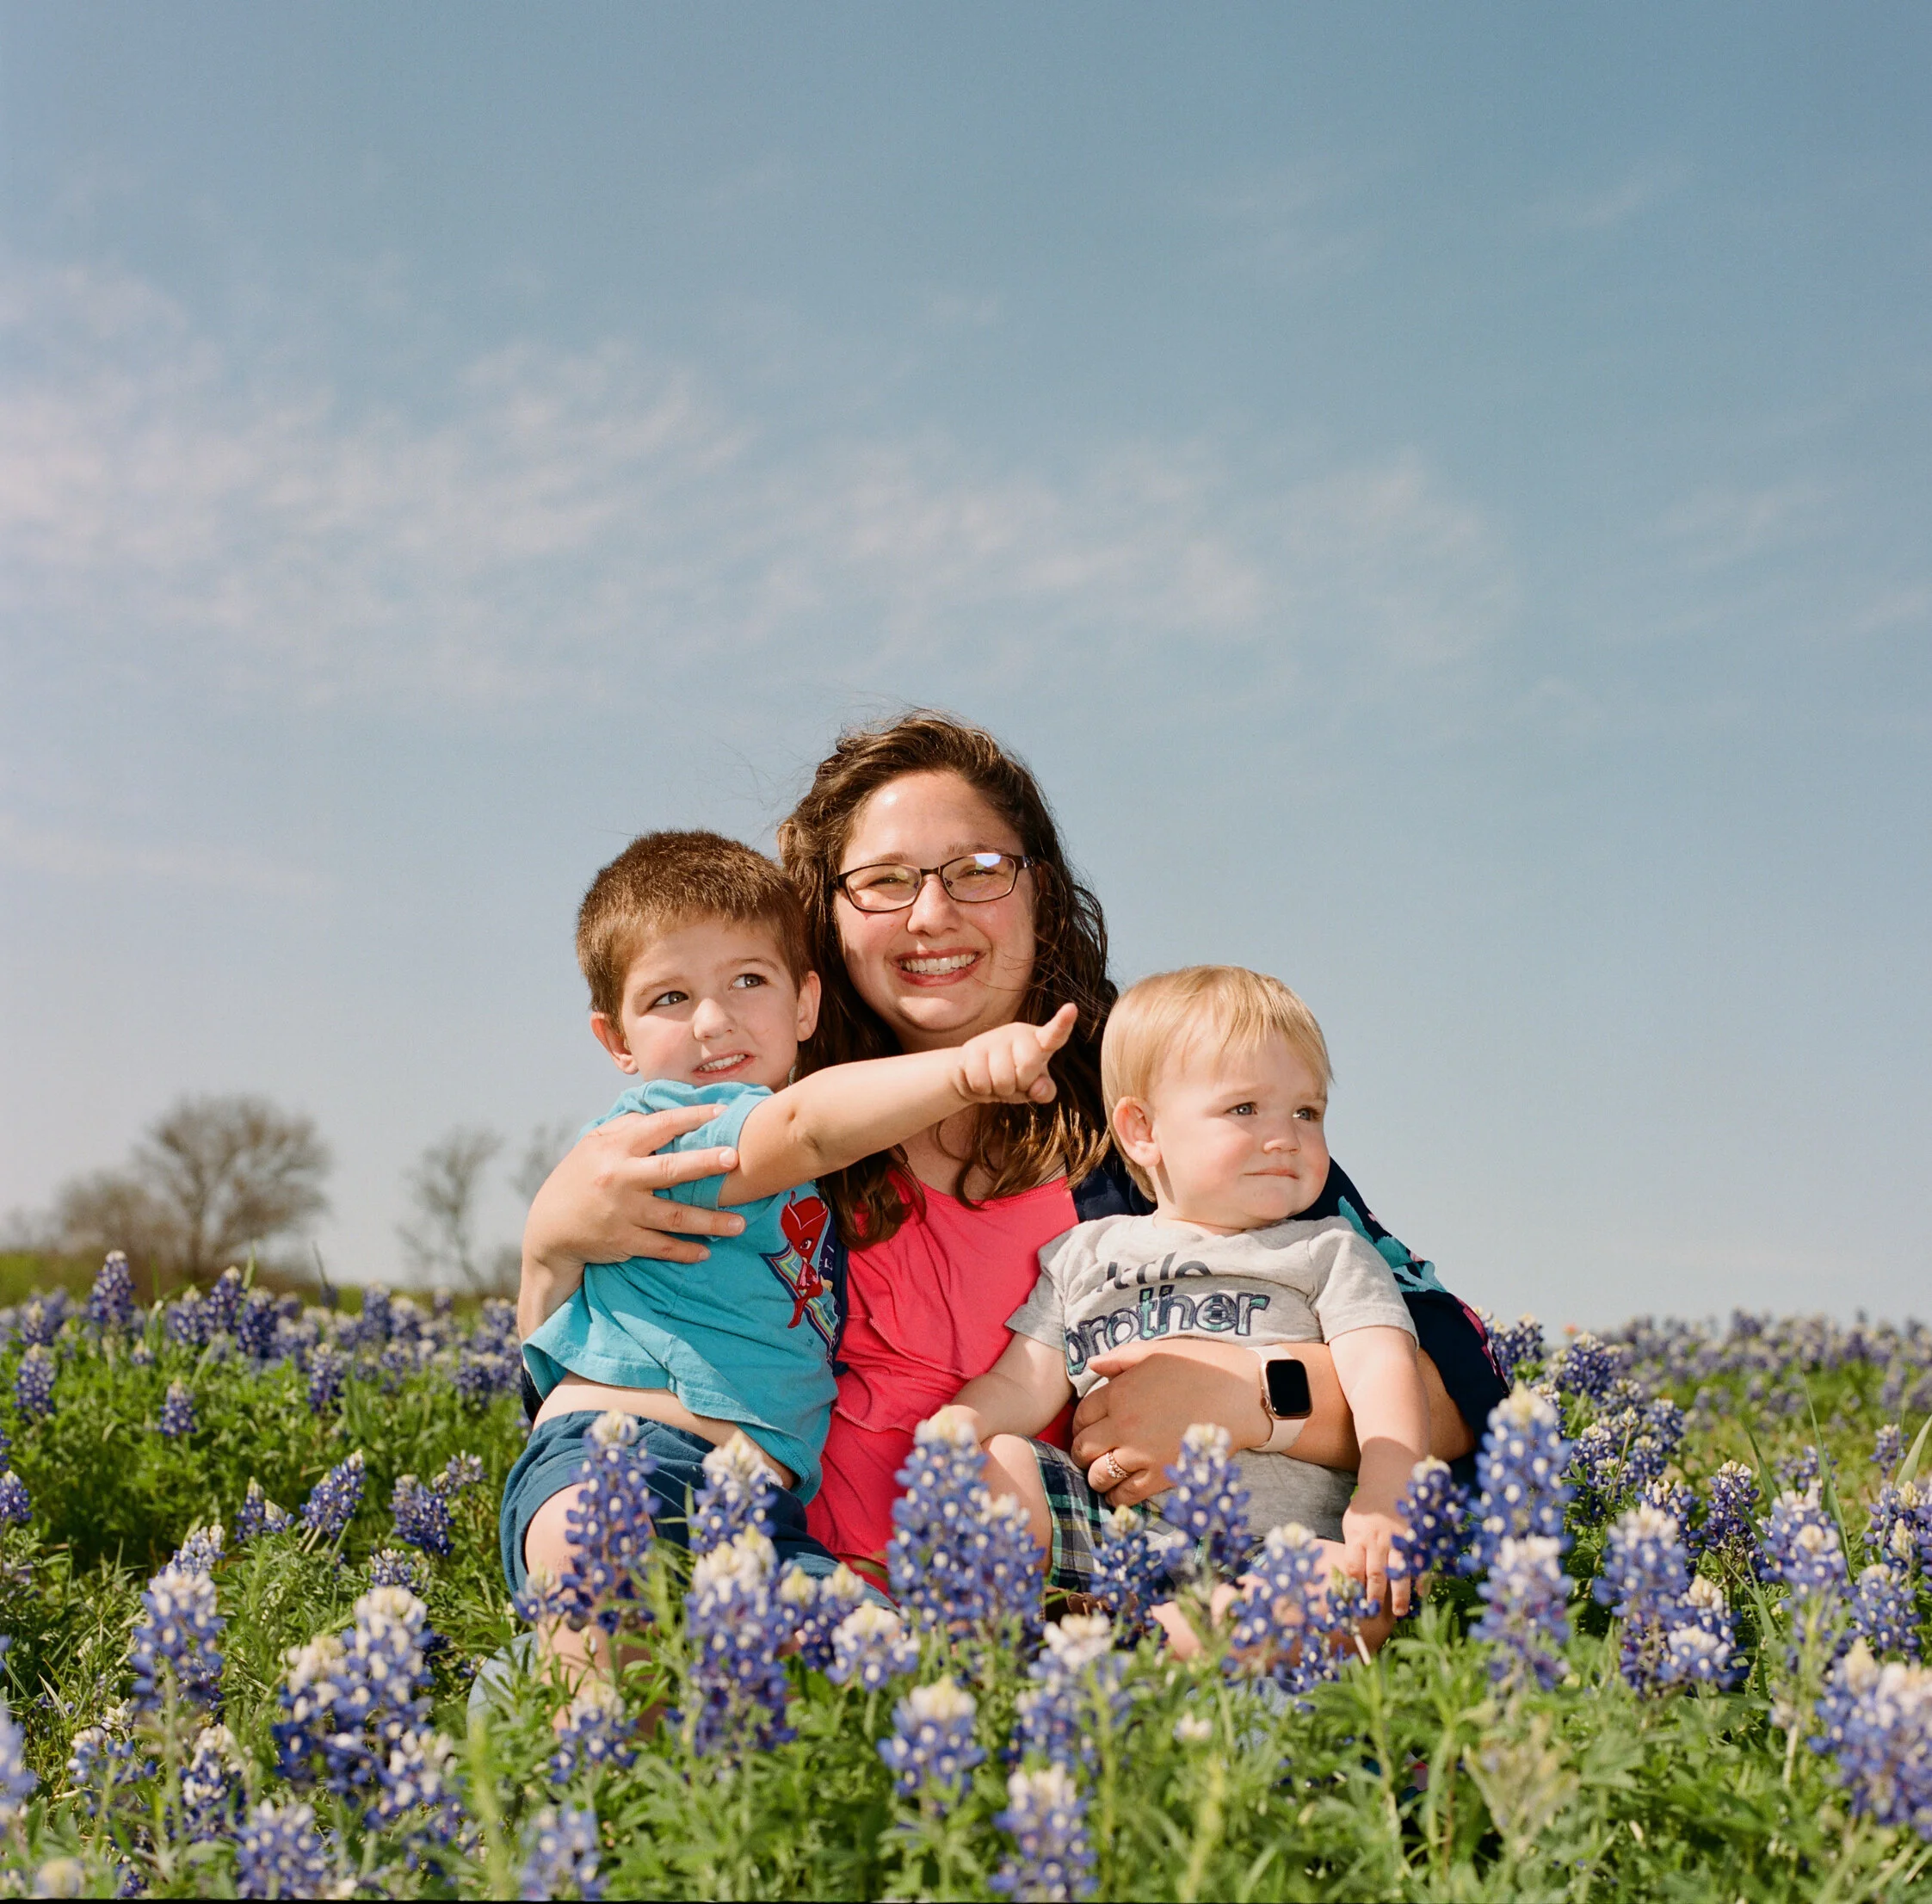
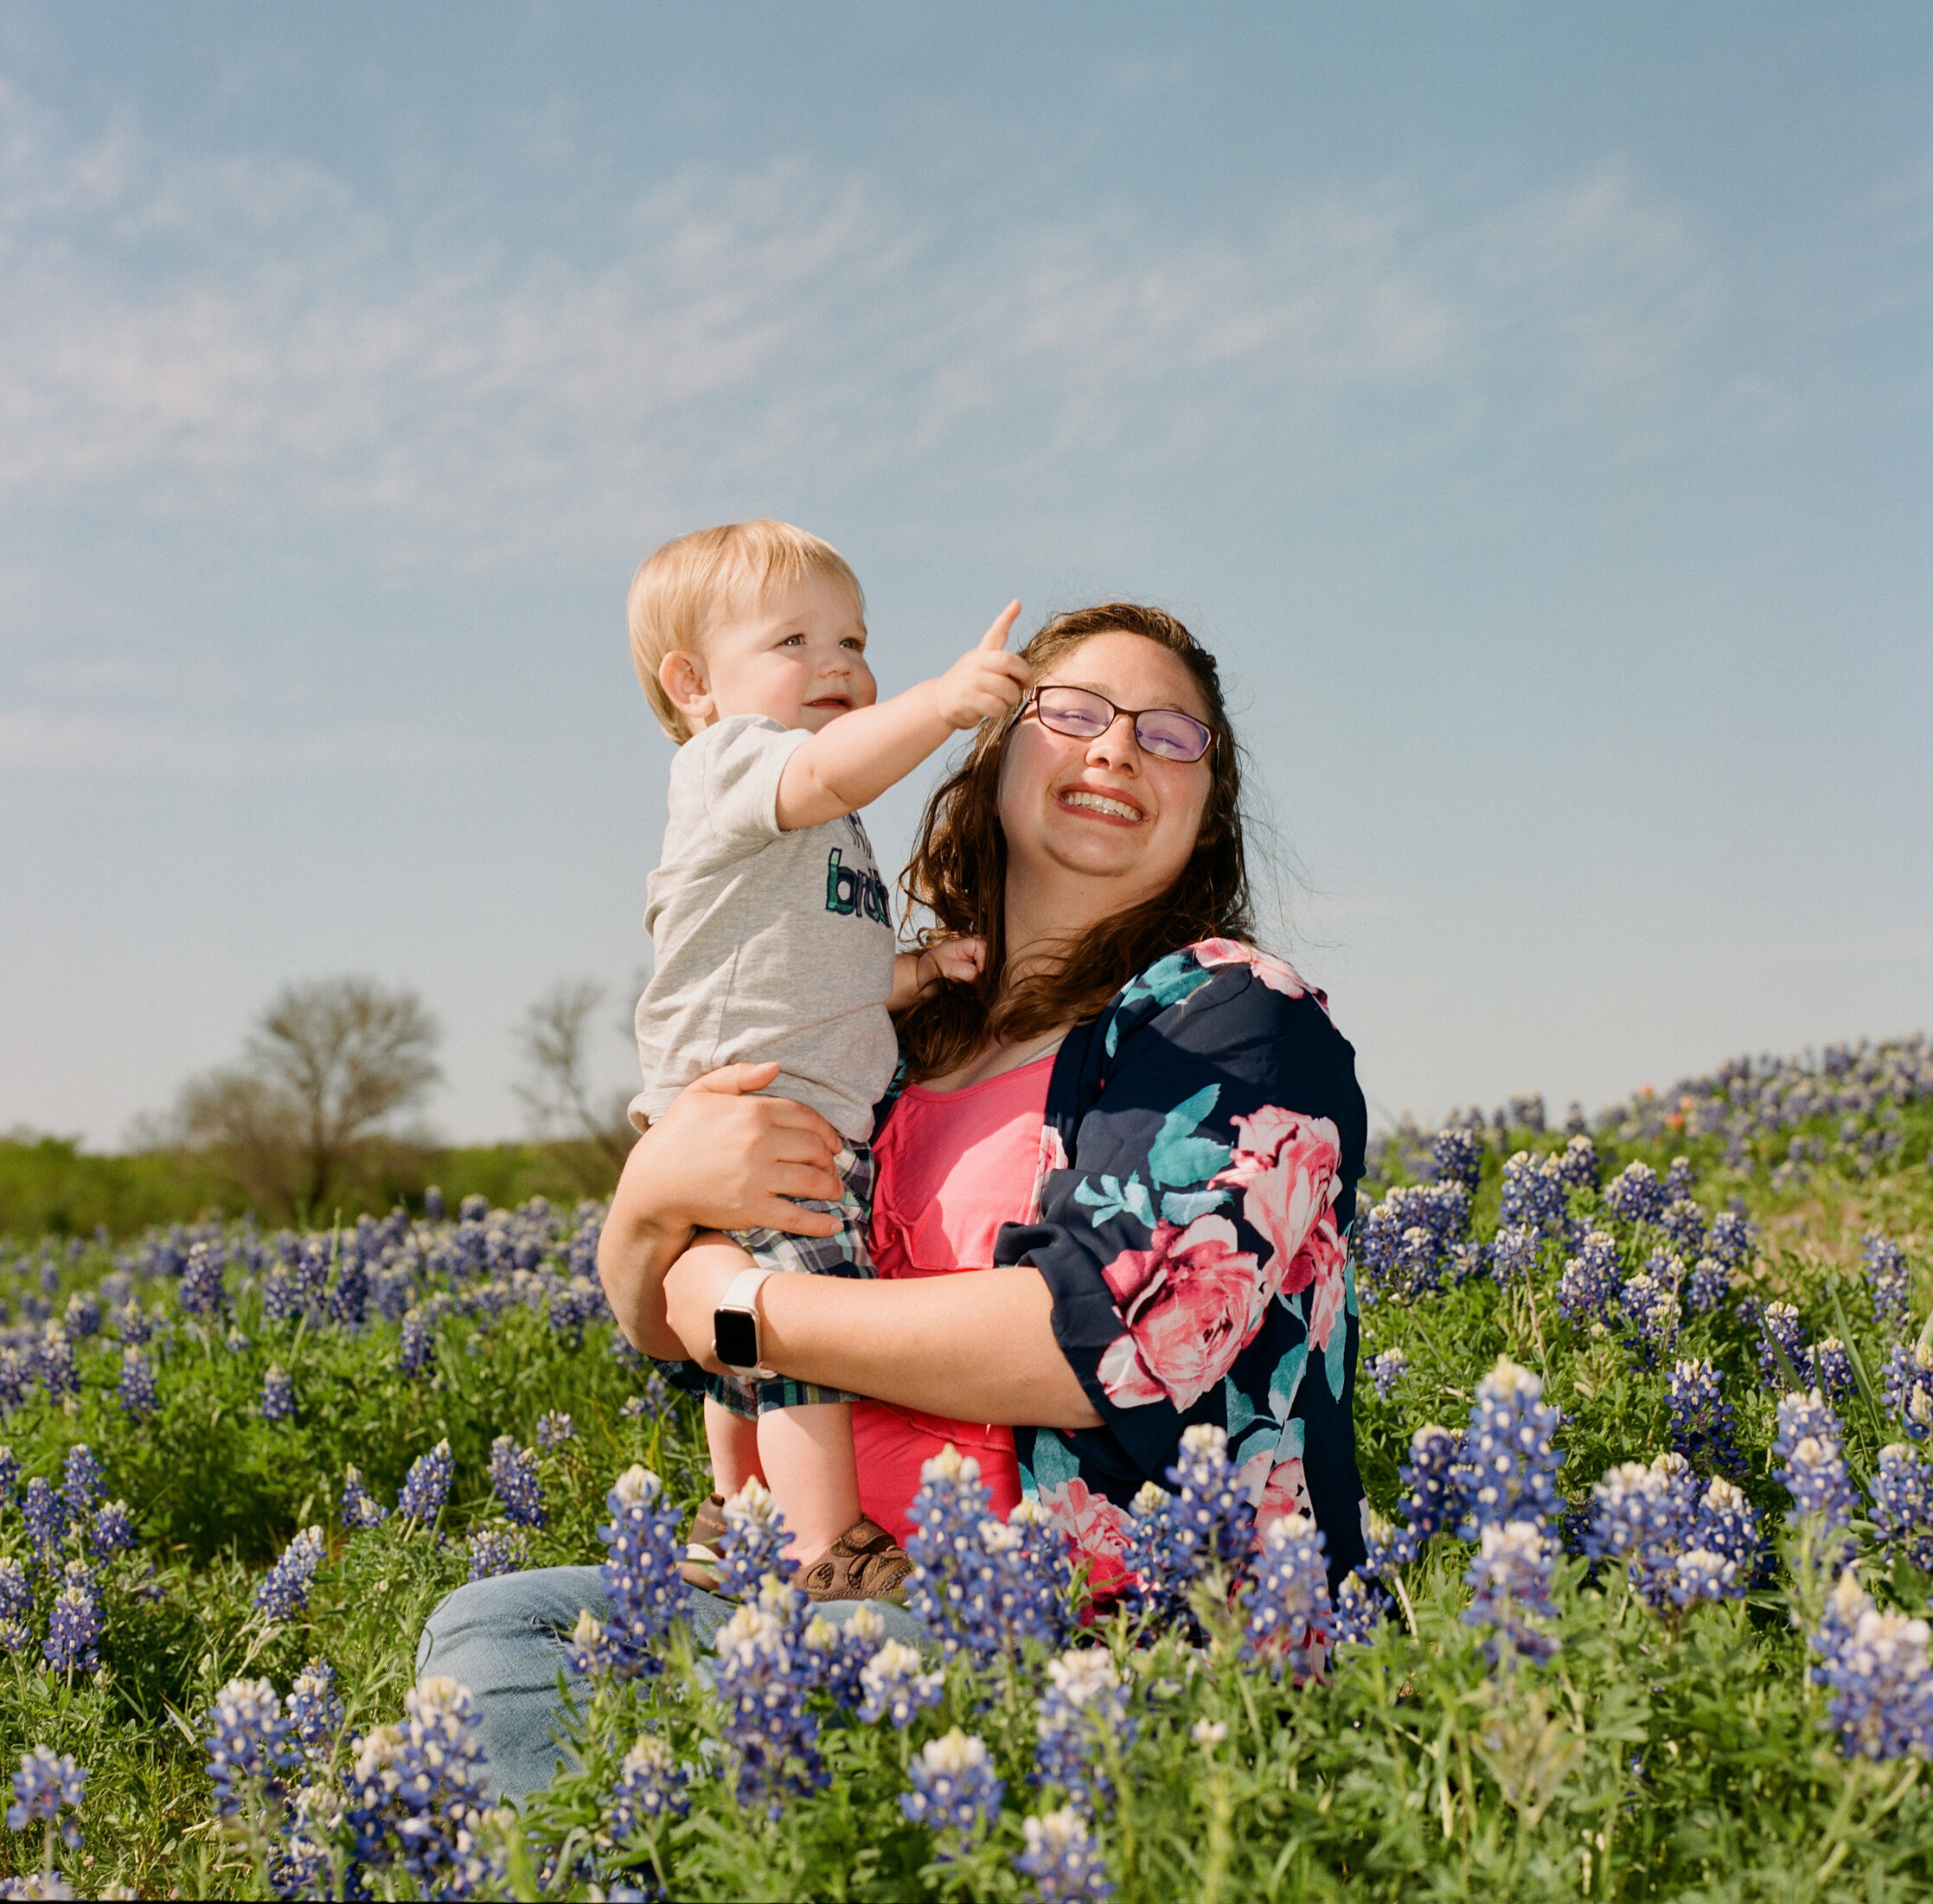
I positioned my family in a little patch with their right sides facing the mid-afternoon sun. The shadows were harsh. I metered for the bright sunlit side of their faces and then I pulled out my strobes to fill in the dark shadows on their faces. I metered the shadows first and discovered that they were 4 stops below the light side. Which is harsh for sure. If you are looking for a meter, I use the Sekonic L-478D-U. Its an incident meter but it works great and has been a very handy tool to have in my camera bag for years. I set up my lights to try to compensate for the shadows. I had brought with me my Profoto B2’s (these aren’t made any more sadly - the Profoto A1X is a good replacement) and a Profoto 2’ Octabox to help control the harshness of the flash. The octabox from Profoto has two diffusers inside so it really really softens the shadows a lot and fills very nicely. I positioned the flash about 5 feet from my subjects at a 45 degree angle to fill light from the left side.
Posing for Bluebonnet Pictures
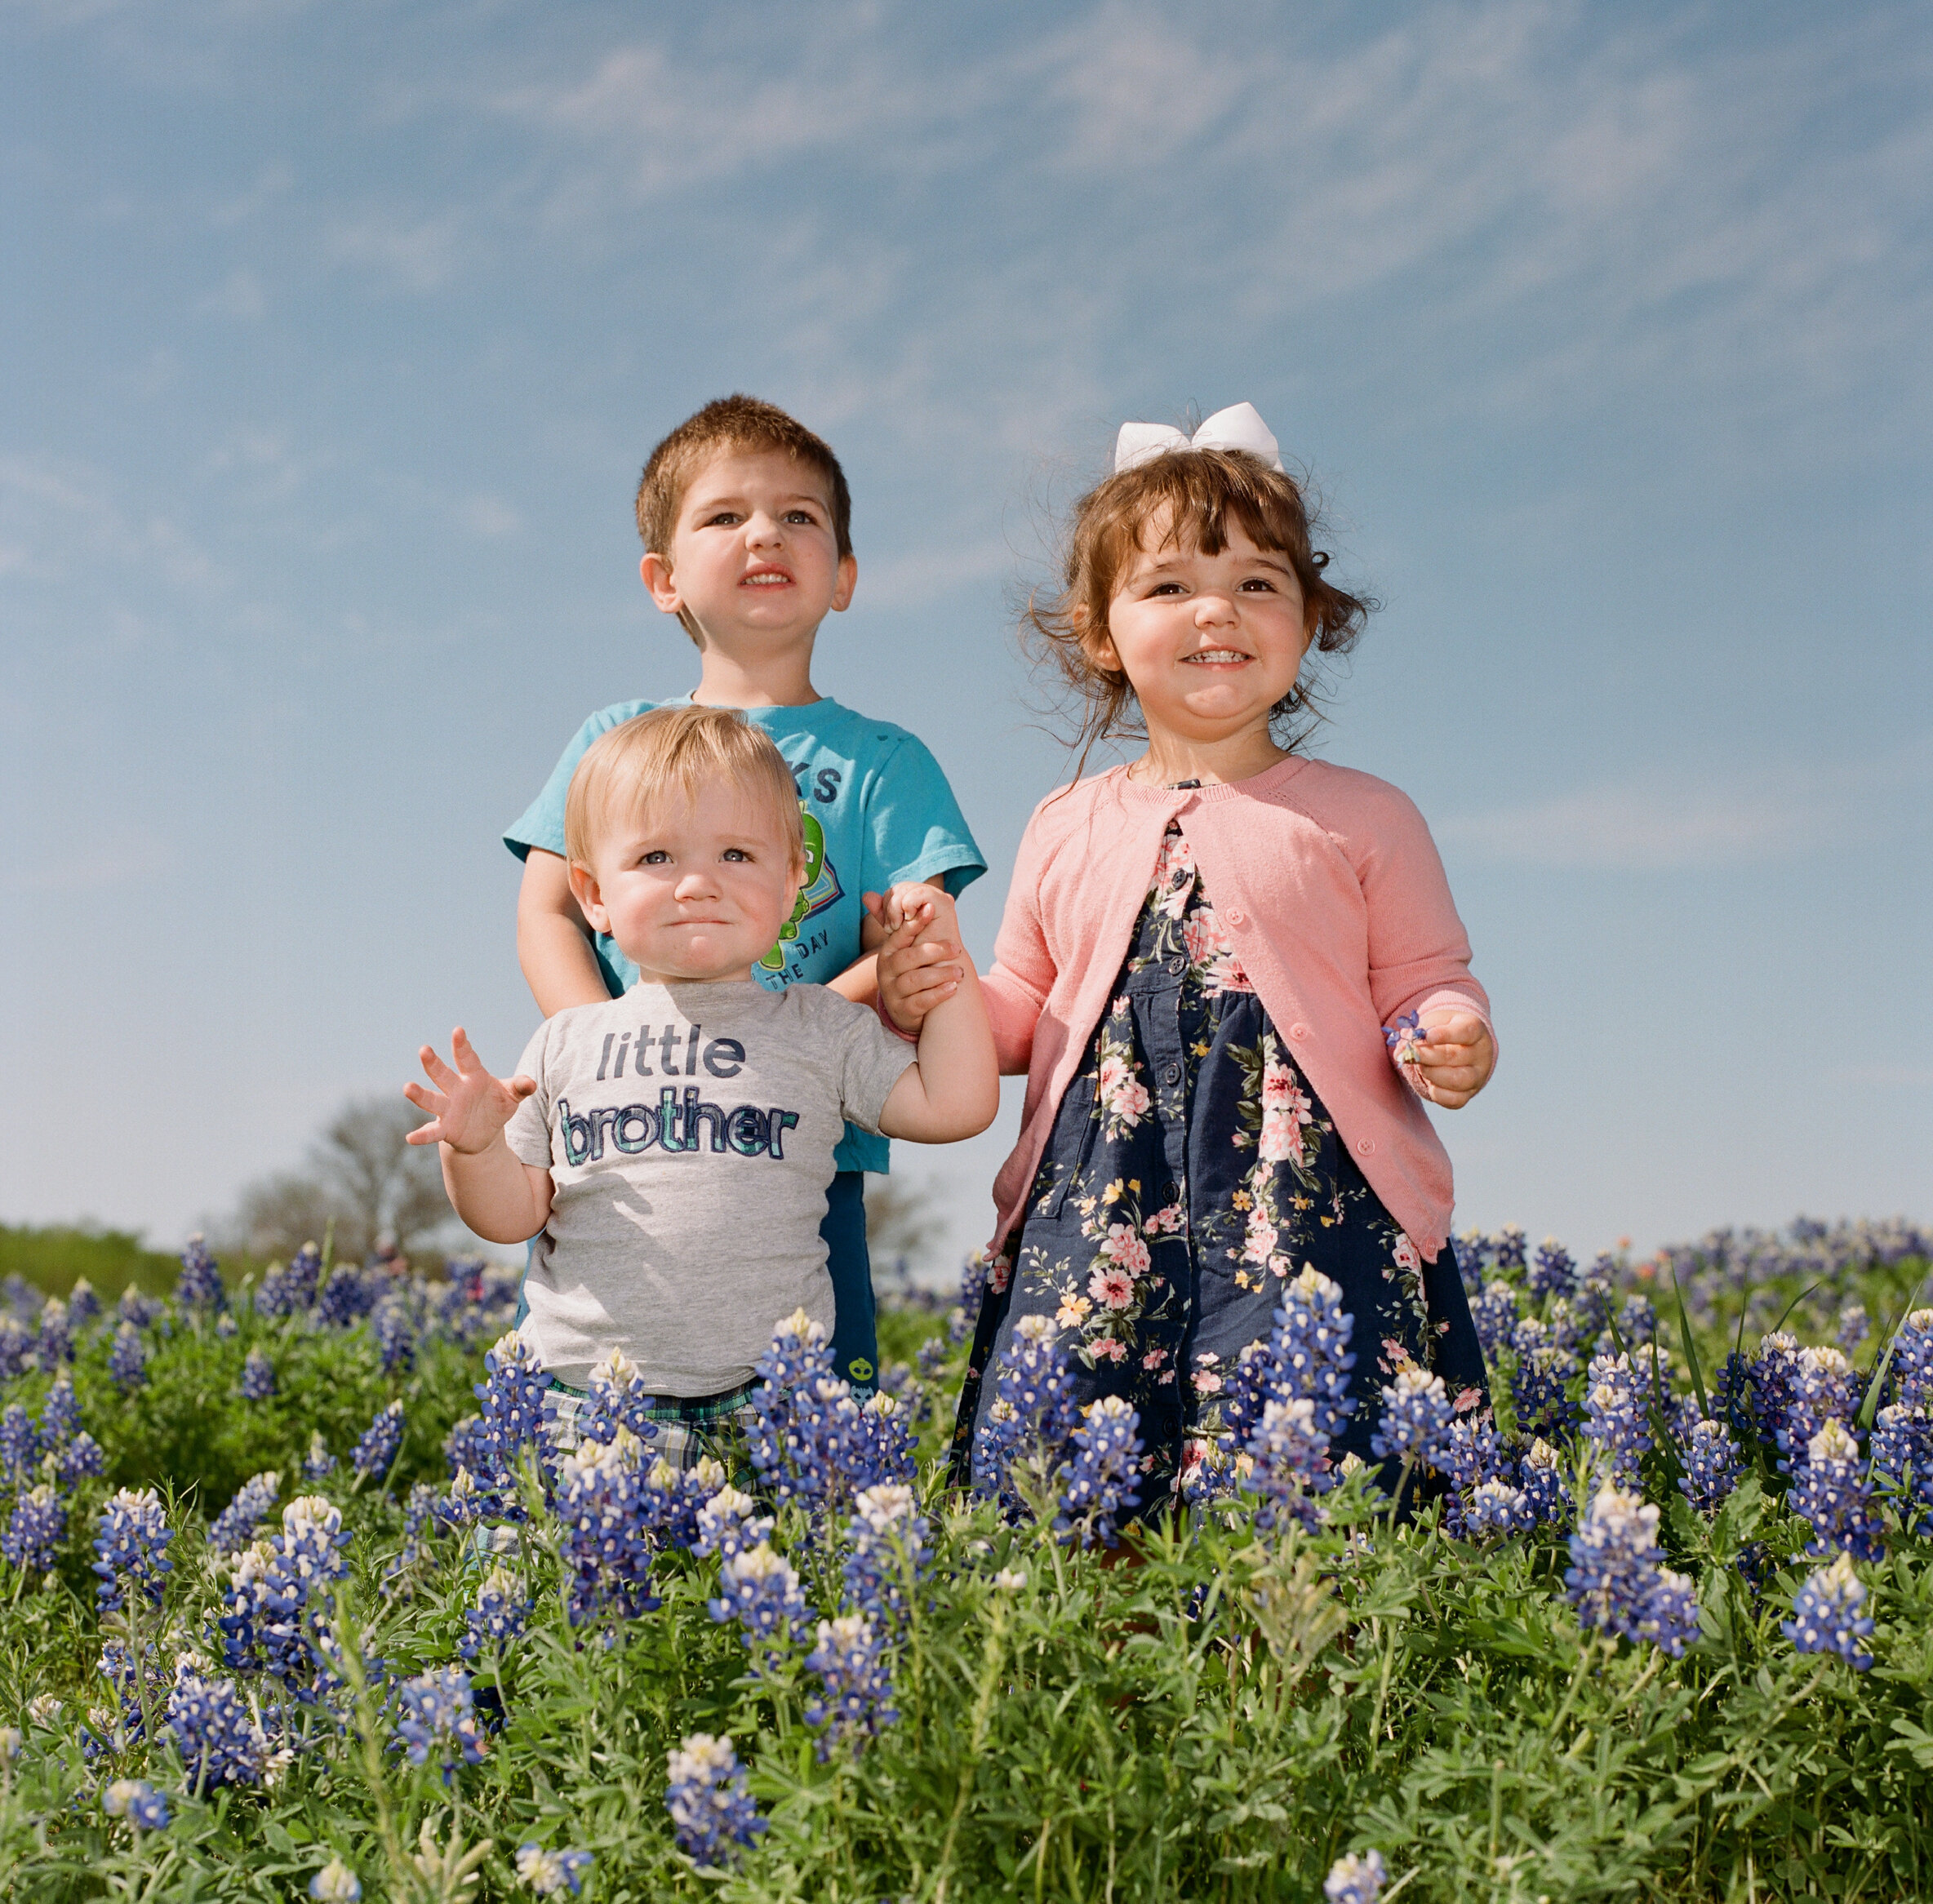
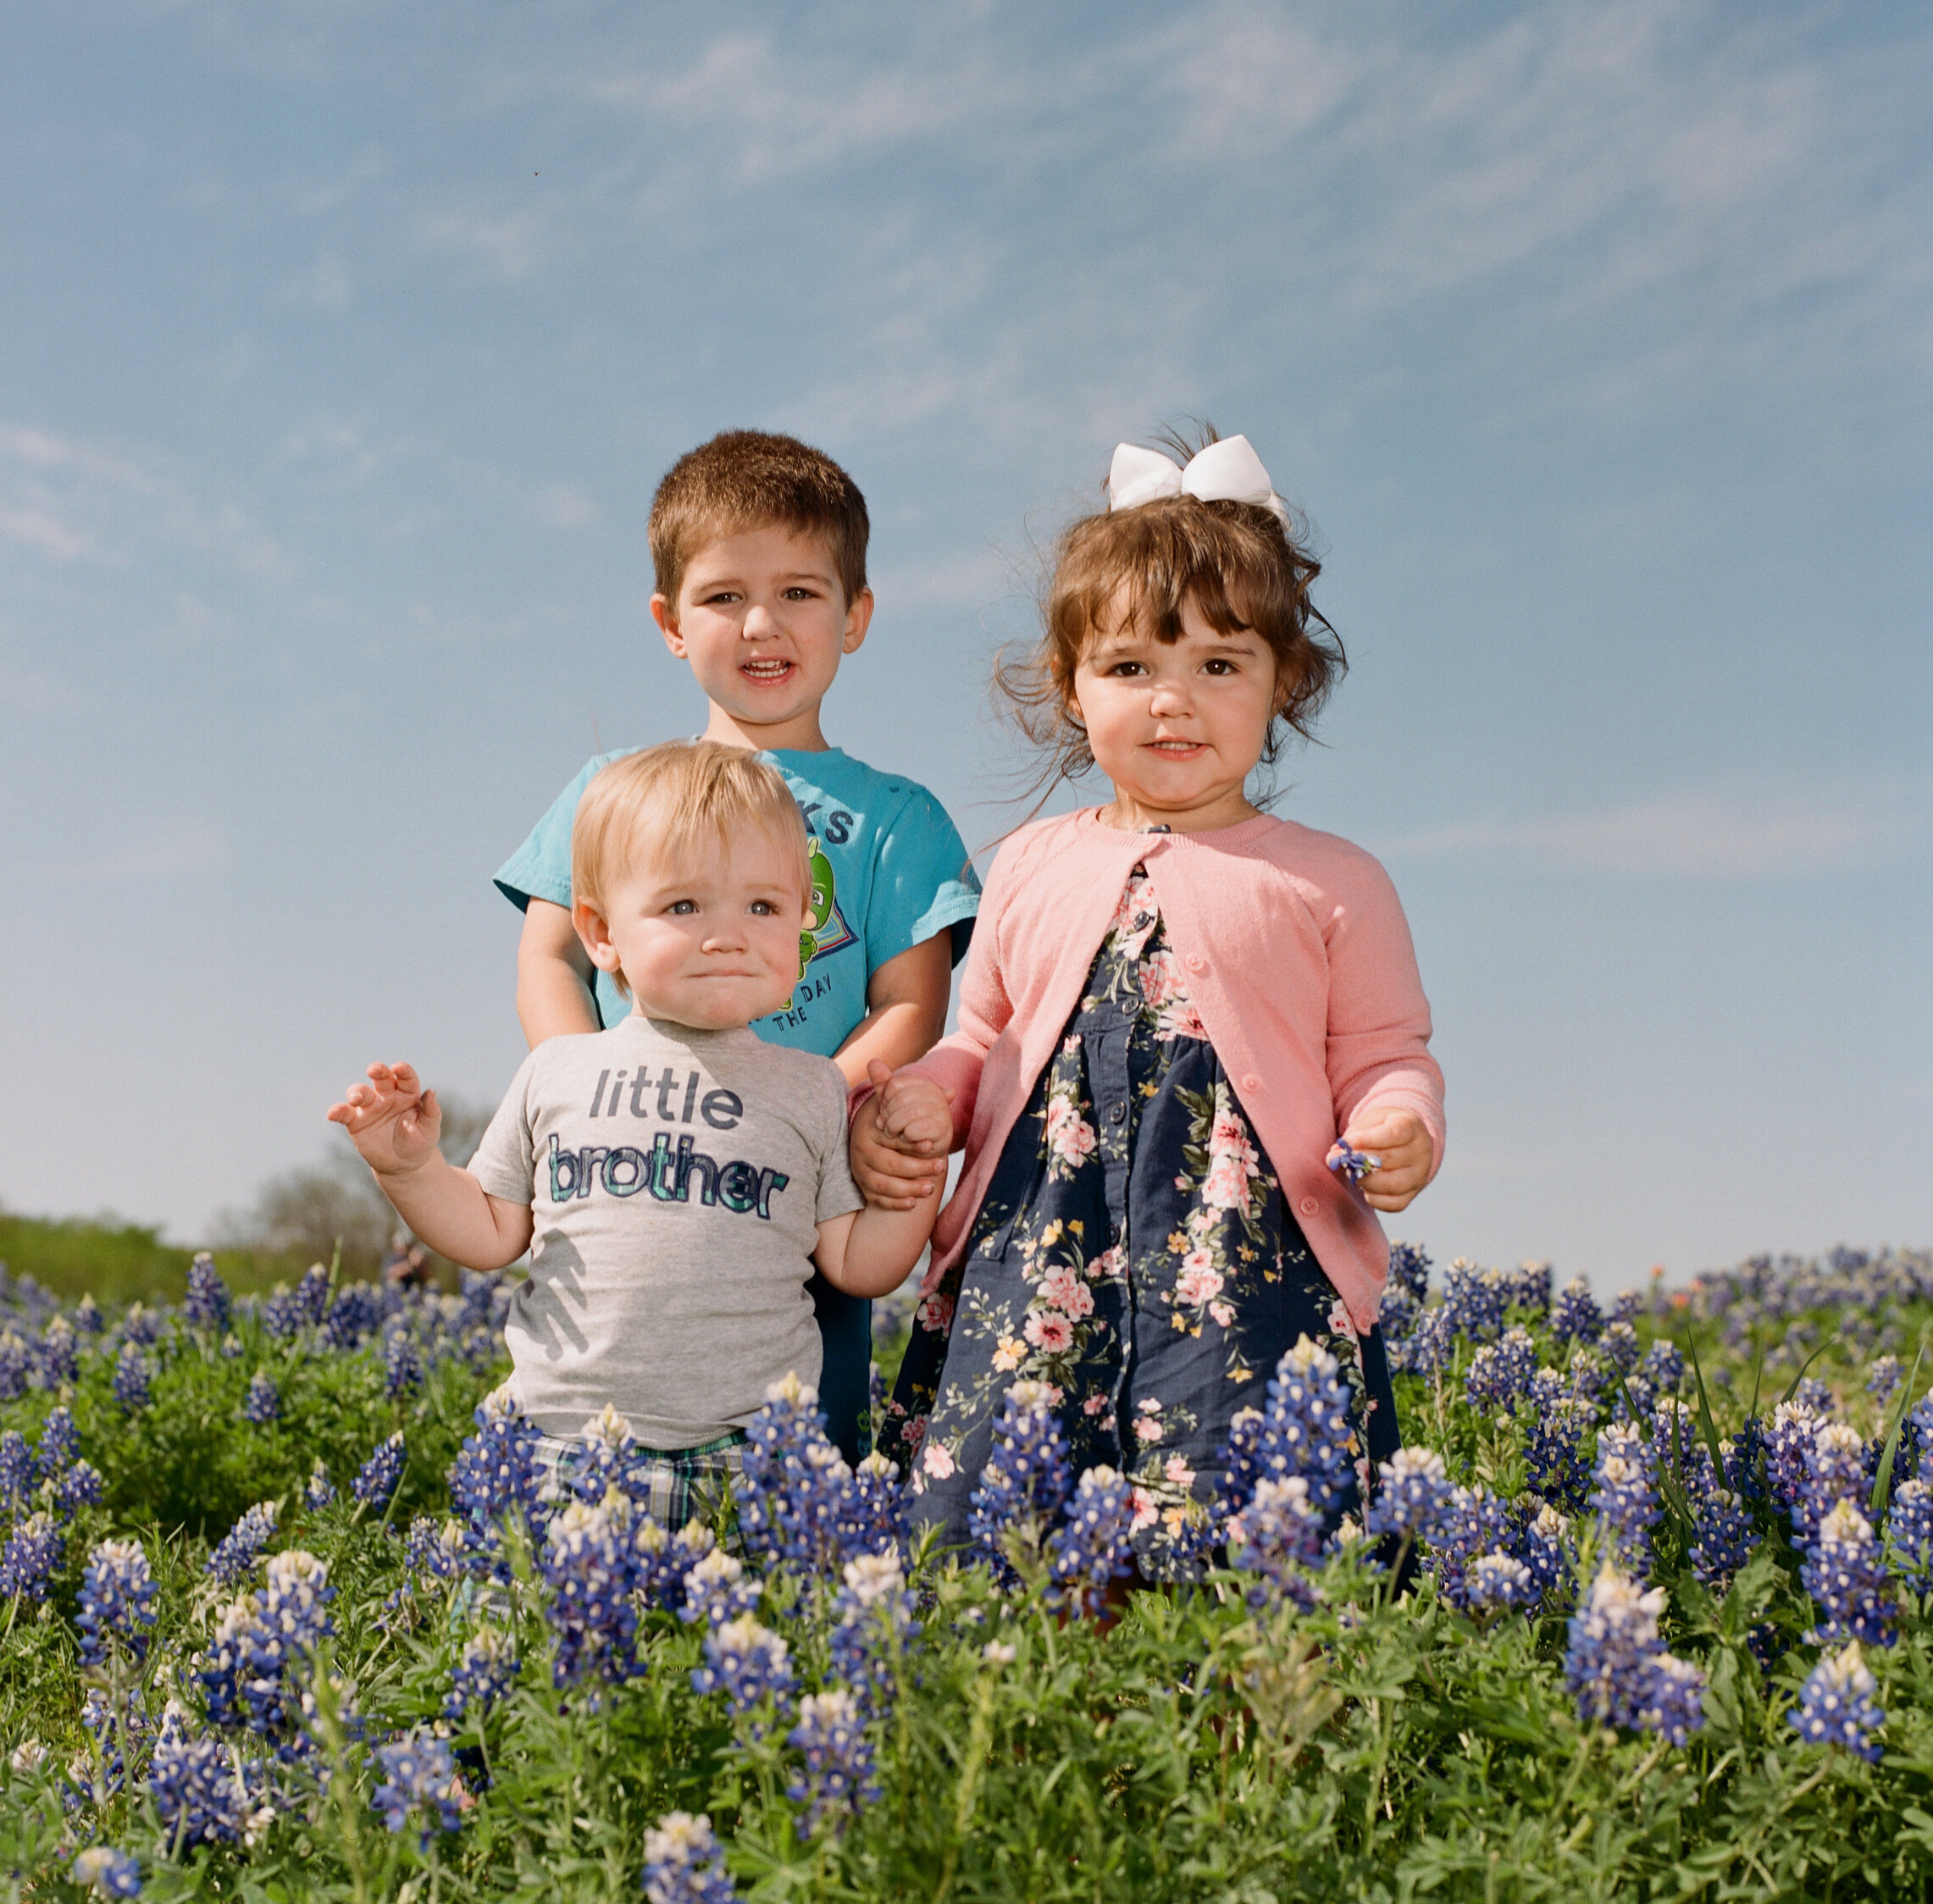
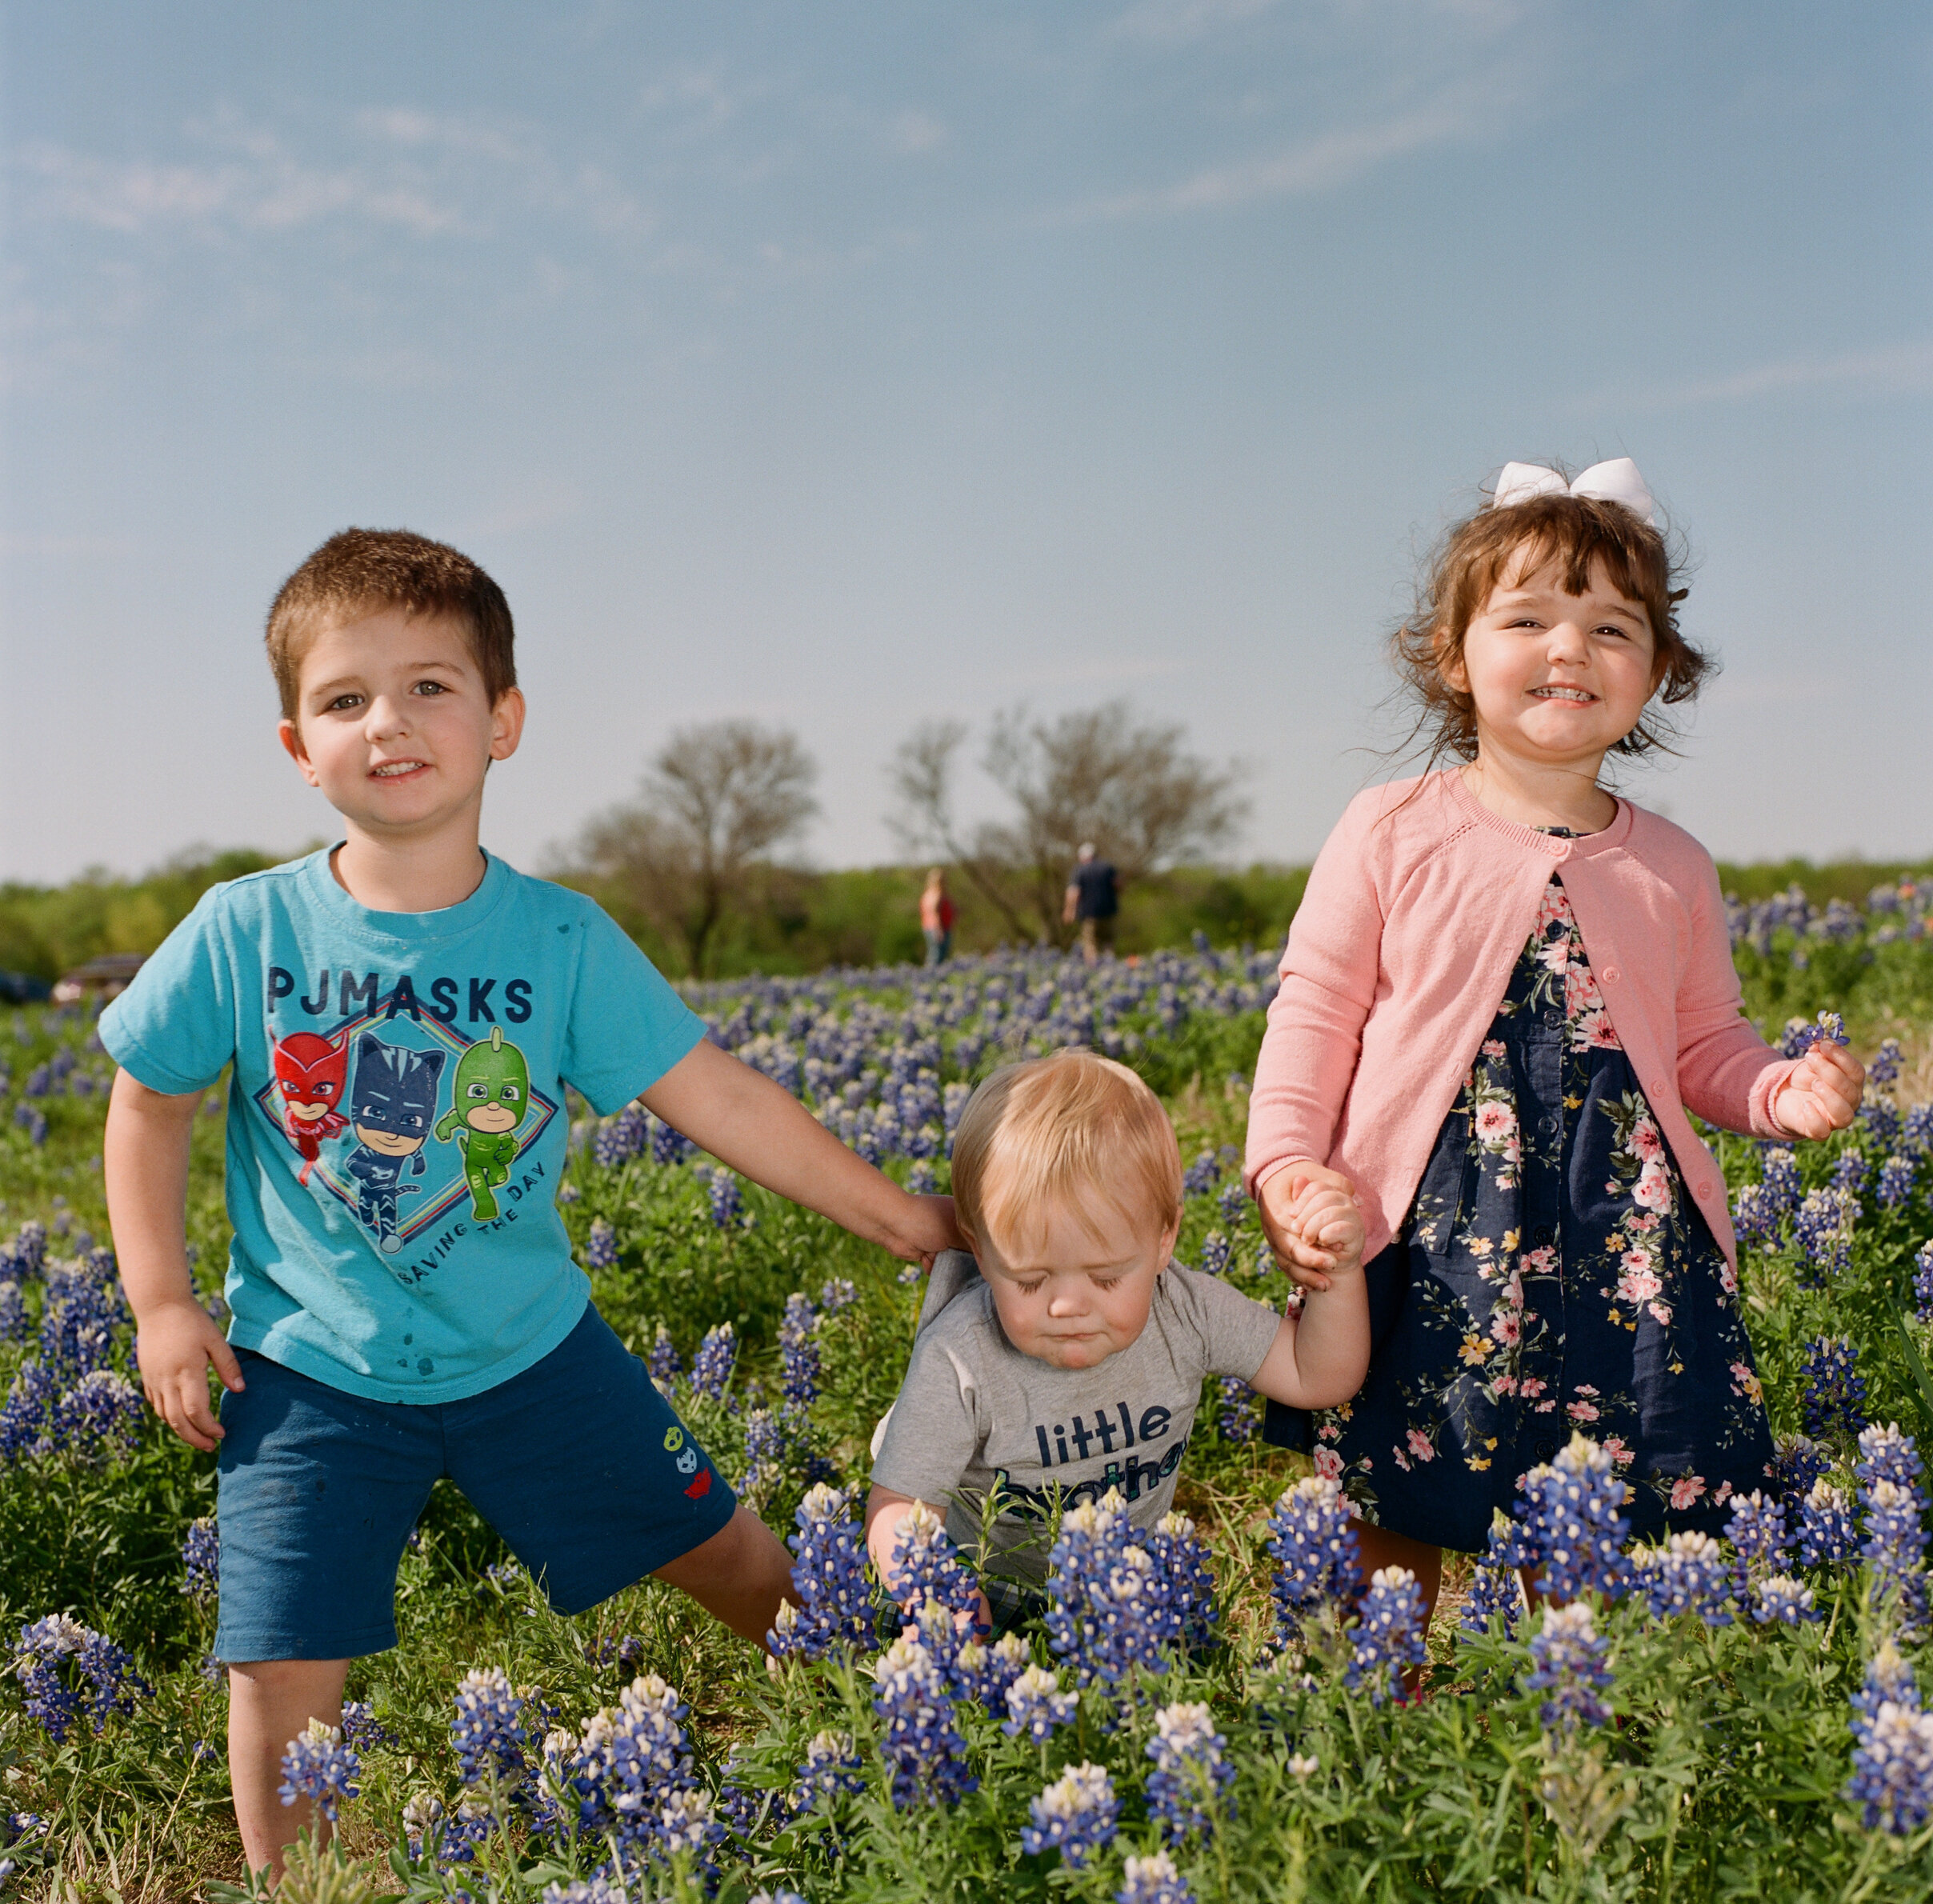
While I had several great picture poses in my head, we had to just go with whatever my kids would do that day. As you can see form the photos below, it was kinda a mess. Make sure you get low and get lots of bluebonnets in the shot and in the background. We were positioned on a hill so being lower also meant I could cut out all of the people that were on the other side of the hill taking photos also.
Processing the Film
While I normally process my own film, I’ve been swamped lately with weddings and events so I sent my photos off to done at Richard Photo Lab. These guys are absolutely amazing! Their prices are reasonable and their customer service and attention to detail is unmatched! I went ahead an ordered prints as well and have been so very pleased with the results!
The hard part about film, especially when you send it off is waiting. Richard Photo Lab is very prompt and it doesn’t take very long to get your images back, but when you’re really excited to see if they turned out, it might was well take forever lol.
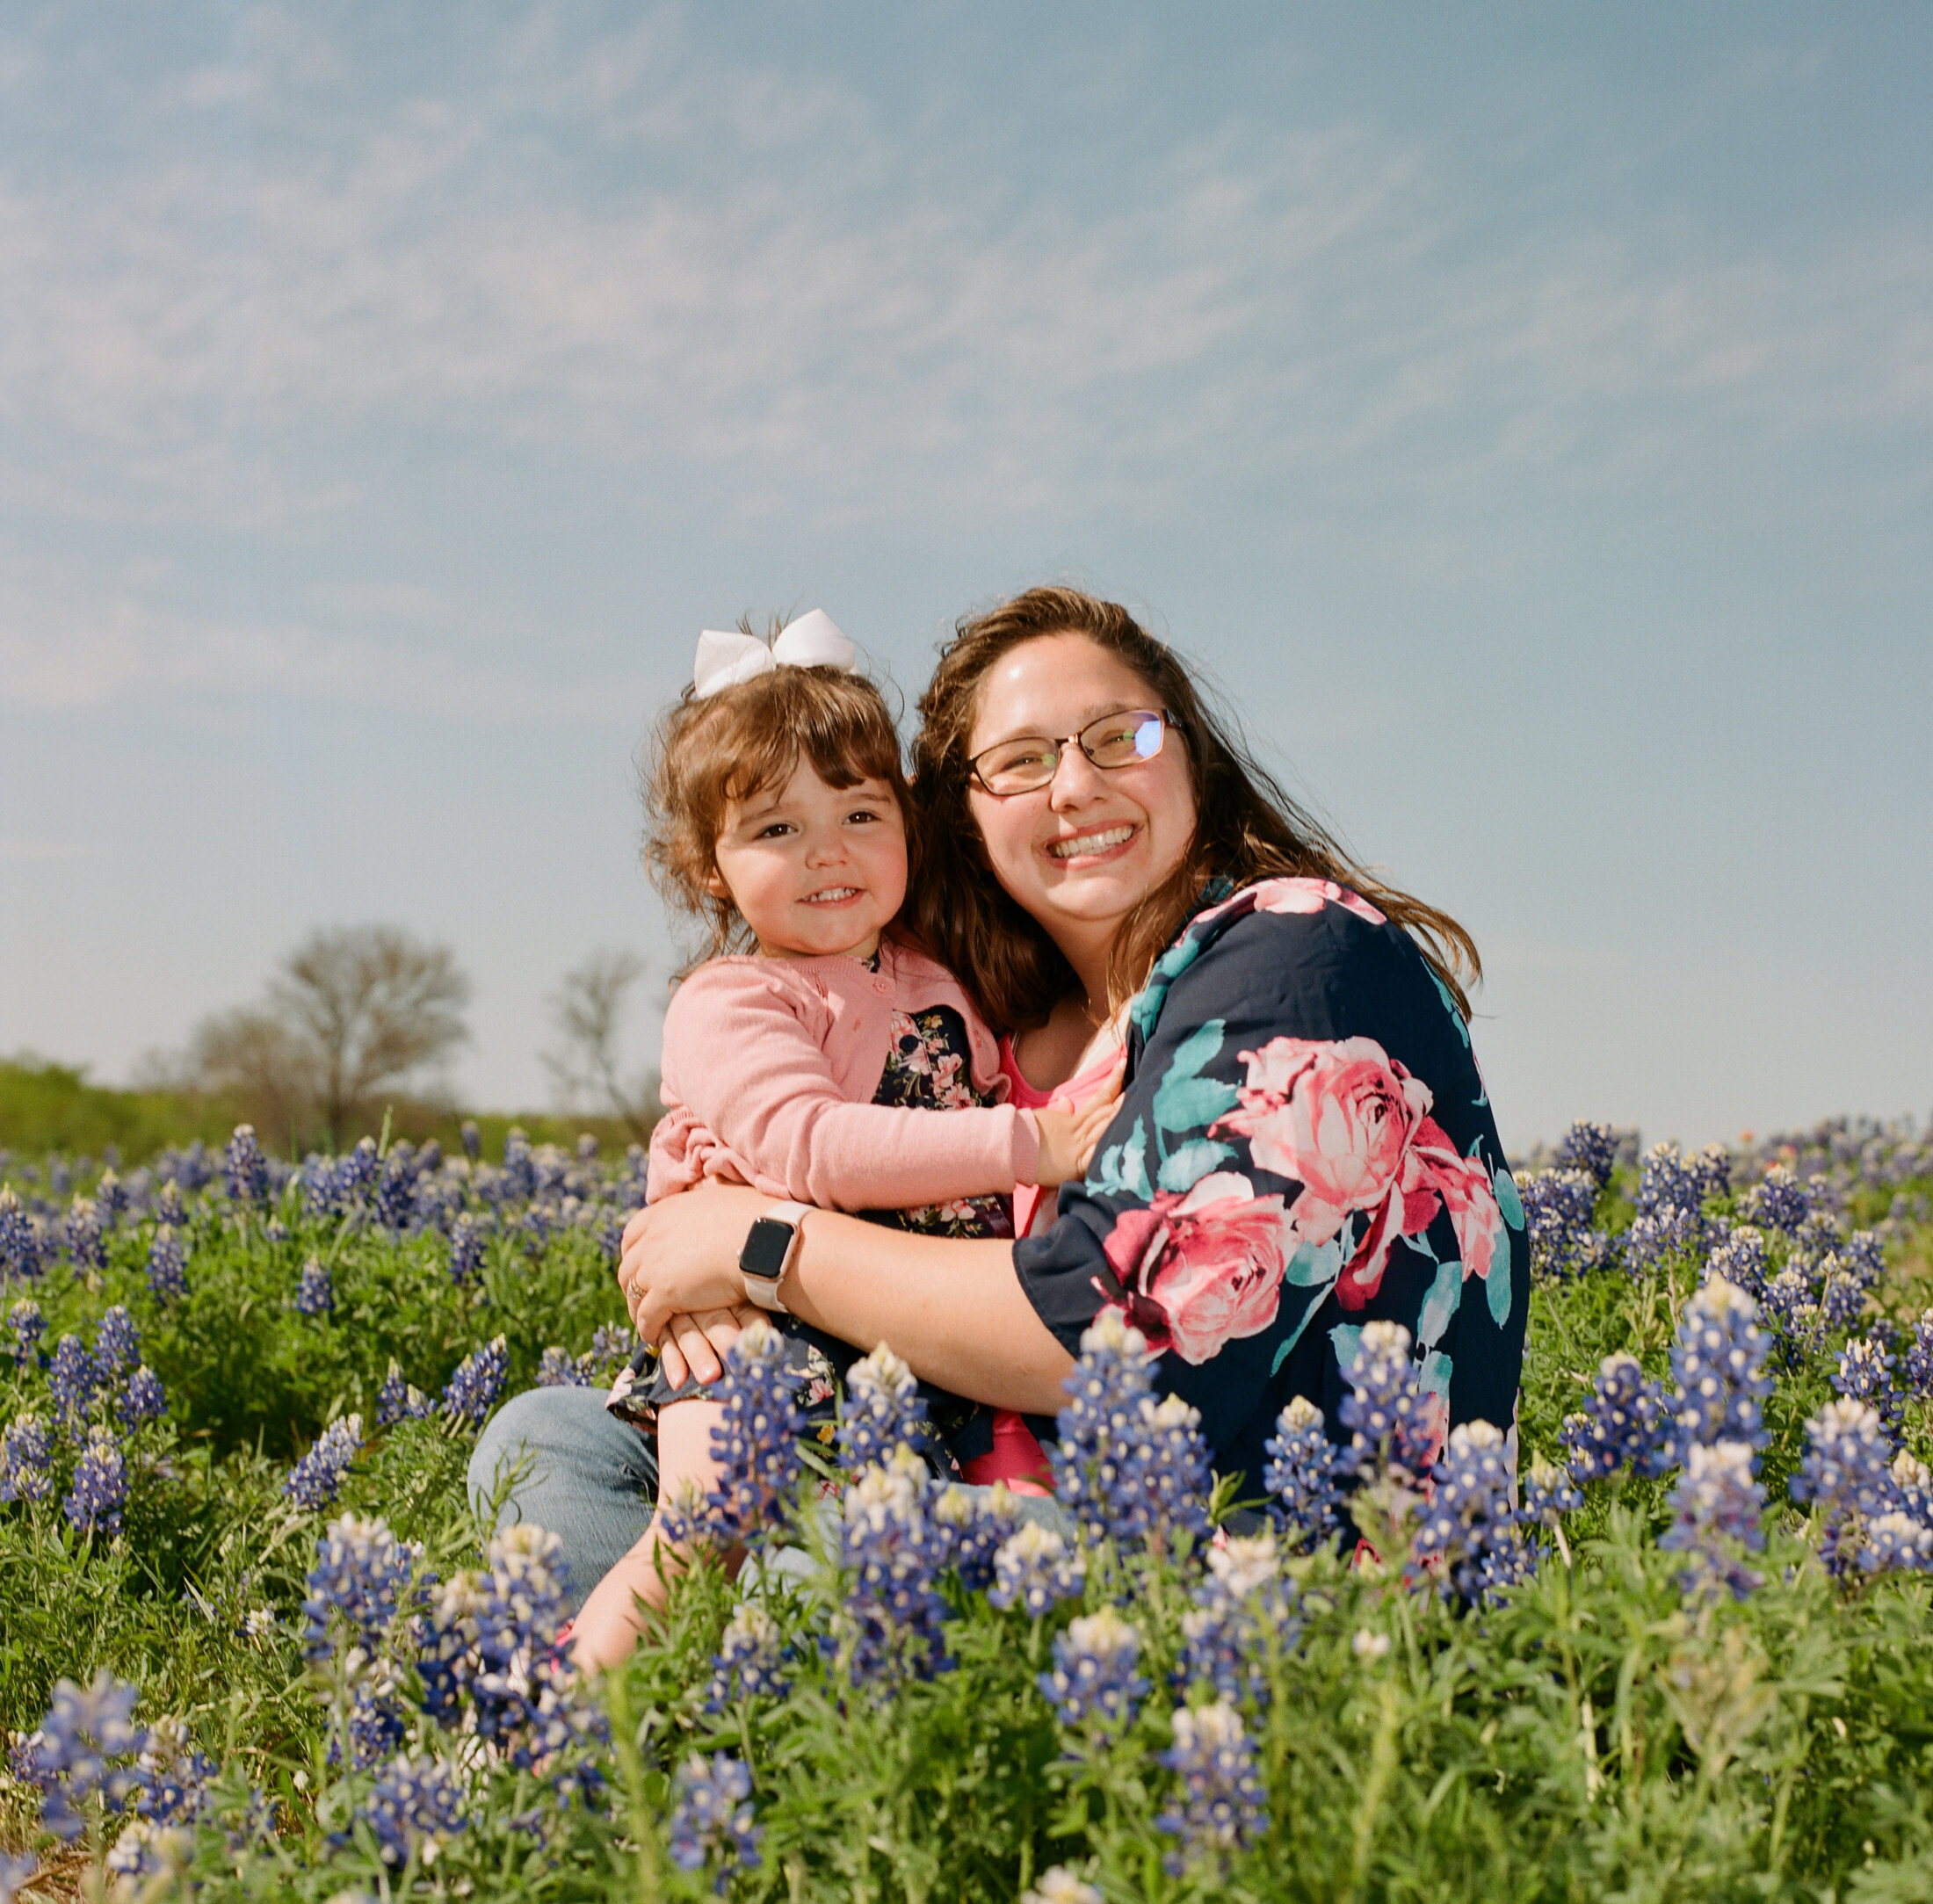
With out further delay, here are our Bluebonnet Photos for 2021!
Bluebonnet Pictures


Book Us for Your Bluebonnet Photos!
If you would like photos of yourself or your family in the beautiful Texas bluebonnets, we would be happy to shoot them for you! Our sessions are always flexible, affordable and fun! Click the button below to book your bluebonnet photo session today!

Polaroid Go

What is the Polaroid Go?

The Polaroid Go is an instant camera, made to be much more portable than other Polaroid instant cameras. Copy on their page calls the camera “portable, wearable, and take-anywhere-able” which definitely gives us an idea of Polaroid is going for here. This much smaller camera is 5.9” x 3.3” x 2.4” and weighs-in at a little over a half pound (.53lbs). Here’s a quick glance at the technical specifications:
Polaroid Go Tech Specs
Camera:
Pocket-sized Analog Instant Camera
Dimensions: 5.9 x 3.3 x 2.4 in (105 mm x 83.9 mm x 61.5 mm)
Weight: 0.53 lbs (242 grams) (without film pack)
Color: White
Battery: High performance lithium-ion battery, 750mAh, 3.7V nominal Voltage, 2.7Wh, rechargeable via USB.
15-pack battery life
Outer shell: Polycarbonate + ABS plastics
Lenses: Polycarbonate resin
Shutter speed: 1/125-30sec
Aperture: f/12 and f/52
Focal length: 34 mm (35 mm equivalent)
Field of view: Diagonal 65.1°, Horizontal 48.1°, Vertical 49.1 degrees
Automatic flash (with override)
Flash system: Vacuum discharge tube storage
This camera is plastic with a plastic lens so its definitely designed more for the consumer and younger crowd. The pre-order price, which includes film is only $114 so the lower price point will definitely be attractive for many.
What Kind of Film does the Polaroid Go Use?
It obviously uses a much smaller film, designed to compete with the Fuji Instax line with its smaller camera and smaller film. Polaroid Go film is 2.632” x 2.122”, including the frame. The image size is 1.851” x 1.811”, producing an almost square image. The sensitivity of the film is ASA 640 and takes 10 to 15 minutes to develop, just like its much larger, older sibling Polaroid film. Also like the larger Polaroid instant film, it comes in an 8-pack.
Can the Polaroid Go compete with the Fuji Instax?
That’s a good question and I guess only time will tell. Instax is already very well established brand and format and is beloved by many. The film develops much faster and comes with 10 photos per pack. While the new Polard Go is competitively priced, it is going up against an almost immovable force with the instax brand.
If you’re interested in learning more about instant photographer, go check out some of my previous posts, like this one on Where to Buy Polaroid Film, or this post exploring Polaroid Instant Photography all together.

A Beginners Guide to Kodak Film in 2025
Kodak film has been around for years, but after filing for bankruptcy, is the film they produce today still an industry leading product? The answer is a resounding YES!
Kodak is a company that forever changed the world with its vision of making photography accessible to everyone. While the company has had its ups and downs in the past, they are currently producing some really great products for professionals, hobbyists, and general consumers alike. In today’s post, we are going to take a brief look at all of Kodak’s current film offerings for photography. This short Kodak Film guide will hopefully be helpful to anyone that is new to film and curious about what Kodak has to offer.
Now, just to be clear, Kodak Alaris is currently the company that holds the license to produce and sell Kodak film. Kodak photographic papers and films are still produced by Eastman Kodak, which is a completely different company but sold by Kodak Alaris. All of this came about after Kodak filed for bankruptcy in 2012 and gets very confusing. If it weren’t for the creation of the Kodak Alaris company, we wouldn’t have the Kodak films we have today, especially Kodak Ektachrome which was killed off and then only recently brought back.
Kodak Film
A range of films are produced and sold by Kodak. Kodak produces roll film in 35mm and 120 and sheet film in 4x5 and 8x10 inch sizes. You can even customer order sheet film if you need something sized a little differently. Kodak’s films come in color negative, slide (color positive), and black and white. There are a wide range of speeds of film (ISO’s) available from 100 to 3200. To be successful when shooting with film, you need to know the look you’re going for as well as the lighting you’ll be working with so that you can get the best result. Besides the obvious differences in color and black and white film, each type of film has its own grain structure, contrast, and saturation characteristics that need to be considered.
If you’re a hobbyist or a casual photographer, other factors such as lighting or even pricing might play more of a role in helping you decide which Kodak film stock is right for you.
Kodak Slide Film
A slide film is a film stock that produces a positive image rather than a negative. These used to be loaded into those old carousels and displayed at family parties on projector screens. While we don’t use the carousel projectors any longer (well I mean technically there are a lot of them still around and you can still do that if you choose), slide film still brings some amazing characteristics and colors to play with!
Kodak Professional Ektachrome Film
Color slide film is such a small market, Kodak only produces one film stock. Commonly just referred to as Ektachrome or E100, Kodak’s slide film produces vibrant and punchy greens and lots of contrasts. Rated at ISO 100, it loves daylight. In my experience, the more light, the better for this film stock.

Remember the Alamo! I didn’t roll my 120 Ektachrome up tight enough and so I got a light leak across this shot. Ironically, you can see the Kodak branding from the paper in the light leak!
Processing your Ektachrome film requires a different chemistry than color negative film. Kodak Ektachrome has to be processed in E-6 chemistry. While most photographers have no problems tackling home development of their CN-41 film, most film photographers are a little more hesitant to tackle E-6. There are a lot of great labs out there that will handle your Kodak Ektachrome film developing for you however!

A rare self portrait of me. The focus is really soft on this photo, but its because I was using a really cheap range finder that was not terribly accurate.

Beautiful and rich blues and higher contrast shadows are the basic characteristics of Ektachrome E100 film.
Kodak Color Negative Film
Kodak has a much broader selection of color negative films for you to choose from. From some inexpensive consumer films, which I talk specifically about HERE, to some really great professional quality films with different contrast and saturation levels. Before you choose a color negative film from Kodak, you really need to have an idea of the look you are going for as well as how the film behaves. Below you will find all of the Kodak Professional Film available to purchase.
Kodak Professional Ektar 100 Film

Ektar is an amazing daylight color negative film. It has good contrast and more vibrant colors. The grain is fine and great for scanning and darkroom printing. Rated at 100 ISO and balanced for daylight, Ektar produces rich looking images with colorful highlights and still holds lots of information in the shadows. I’ve used Ektar in both daylight and with strobes in the studio and gotten some really great results! Very early on, Ektar was my absolute favorite film type and I used it for everything. I learned very quickly that it does have its limitations. It is not as versatile as Portra and in low light, it does not perform or push as well as some of Kodak’s other films do.
Ektar has been around for a while and there are a lot of great tips and tricks out there for Ektar users. If you’d like to take a look at the technical specs for Kodak Ektar, click HERE to check out or to download the pdf. Everything you need to know about the film is contained in that .pdf.
| Film | ISO | Format |
|---|---|---|
| Kodak Professional Ektar 100 | 100 | 35mm |
| Kodak Professional Ektar 100 | 100 | 120 |
| Kodak Professional Ektar 100 | 100 | 4x5 |

Kodak Professional Portra Film

Kodak Portra 400 Self-Portrait
Portra is Kodak’s most popular color negative film and a favorite for most photographers. This film comes in three different speed ratings and is a much more flexible film that can be pushed and pulled beyond the box speed. Portra is also less saturated and offers less contrast than Ektar, but is no slouch when it comes to image quality. You can get an amazing light and airy look by shooting Portra film one stop under box speed (shoot 400 at 200 and overexpose). From using Portra Film for years I can tell you that it can produce a wide range of results and is more flexible in scanning and printing than Ektar. The grain is fine and this film scans beautifully!

While I originally thought that Kodak Ektar film was the greatest thing ever made, I have since shifted pretty dramatically to team Portra. Primarily, the skin tones are what caused me to switch but since I’ve been shooting a lot more Portra film of all sorts, I’ve really come to love it for a lot of other reasons. One of the secondary reasons I’ve grown to love it more is that its a lot more forgiving that Ektar if you over or under expose. To date, I used this film in every kind of situation imaginable and I’ve been consistently pleased with its results. There is still a pretty decent learning curve with this film, especially if you’re looking for some very specific results, but if you’re picking up a Kodak Professional Film to start with, I’d begin with Portra, specifically Portra 400 in the format of your choice. I’ve gotten some really amazing images out of this film! If you’d like to take a look at the technical specs for this film - click HERE to see or download the pdf!
I could have honestly divided Portra film up into its three different speeds and have done a comparison of each, because each of them do have different characteristics. But I was hoping to avoid getting too very technical in this post. I will be saving that for a future post!
| Film | ISO | Format |
|---|---|---|
| Kodak Professional Portra | 160 | 35mm |
| Kodak Professional Portra | 160 | 120 |
| Kodak Professional Portra | 160 | 4x5 |
| Kodak Professional Portra | 160 | 8x10 |
| Kodak Professional Portra | 400 | 35mm |
| Kodak Professional Portra | 400 | 120 |
| Kodak Professional Portra | 400 | 4x5 |
| Kodak Professional Portra | 400 | 8x10 |
| Kodak Professional Portra | 800 | 35mm |
| Kodak Professional Portra | 800 | 120 |
| Kodak Professional Portra | Custom |
Kodak Black and White Film
While Ilford black and white film seems to be a lot of people’s go to black and white film, I prefer Kodak’s selection of black and white films over Ilford, any day of the week! Kodak actually offers a nice selection of black and white films, which cover every possible range of your needs. Just like with the color films, you will need to know what sort of look and lighting you are going for to select the right film.
Kodak Professional TrI-X Film

This is my absolute favorite Kodak film. I’ve shot hundreds of rolls of this stuff. To me, it seems to be a little grainier and grungier that the T-Max films. This film can be pushed and pulled like crazy and is really really easy to develop and print at home. Its great in bright light as well as dark rooms and even when you have bright/hot spots from using a flash indoors, it doesn’t totally lose the information from the darker corners in the image. I’ve pushed this stuff to 1600 and gotten really great results in really dark rooms. Tri-X has a more editorial/documentary kind of look to it, it doesn’t have as artsy of a look to it.
If you’re looking to use Tri-X, you basically get one speed, but the film can be pushed and pulled so easily that you don’t really need any other speeds. If you’re using 35mm or 120, you get the film in 400 but if you’re using 4x5 or 8x10 sheet film, the speed is 320 (not a real difference). You can also purchase Kodak Tri-X 400 in 35mm in 100 foot rolls, just in case you want to roll your own!
| Film | ISO | Format |
|---|---|---|
| Kodak Professional Tri-X | 400 | 35mm |
| Kodak Professional Tri-X | 400 | 120 |
| Kodak Professional Tri-X | 320 | 4x5 |
| Kodak Professional Tri-X | 320 | 5x7 |
| Kodak Professional Tri-X | 320 | 8x10 |

Kodak Professional T-Max Film
The final Kodak Photographic film we are going to talk about in this post is Kodak T-Max film. The T-Max film family boasts a really fine and very scannable grain. The images have slightly less contrast and are not as punchy as Tri-X films. You get beautiful prints and scans out of T-Max with a lot of range. T-Max comes in a wide range of sensitivities also. Ranging from 100 to 3200, you can do a lot with T-Max. I’ve only used it occasionally but the results have always been pleasing. I’ve shot about 3 rolls of 3200 and the results from those rolls have been spectacular considering the super low light conditions I was shooting in. With the P3200, you are actually pushing the film, so there’s a few things to take into consideration when using that particular speed, but its not hard to use at all.
| Film | ISO | Format |
|---|---|---|
| Kodak Professional T-Max | 100 | 35mm |
| Kodak Professional T-Max | 100 | 120 |
| Kodak Professional T-Max | 100 | 4x5 |
| Kodak Professional T-Max | 400 | 35mm |
| Kodak Professional T-Max | 400 | 120 |
| Kodak Professional T-Max | 400 | 4x5 |
| Kodak Professional T-Max | P3200 | 35mm |
Where can I buy Kodak Film?
If you’re looking for Kodak’s cheaper consumer films, then I’ve got a blog post for you! You can pick up most of this affordable consumer film at Walmart.com, Target, as well as at Amazon. If you’re looking for the good stuff, Kodak Professional film, when then you’re going to have to more than likely ordering it online. B&H Photo, Adorama, several other online retailers carry it. Amazon carries it too. Unless I find a retailer that’s having a sale, I normally just buy all of mine from the same place as the pricing does not vary much from one retailer to the next.
Where Can I Buy Kodak Film Locally?
You should definitely check around to see if there are any camera/film stores near you. Some major cities have retailers that keep stock on Kodak professional film. If you’re in the Dallas/Fort Worth or East Texas area and want to pick up some Kodak Film to try out - contact me and see if I have any extra in stock - I do sometimes keep stock on a lot of different professional Kodak films that I do not advertise on my online store.
Remember friends, life is short - shoot film!

Why are Wedding Photographers So Expensive?
While the sticker-shock can be intense, there’s actually a lot of value provided by your wedding photographer that makes the price well worth the investment!
You’ve just spent $8,000 on the venue, $2000 on the cake, $2800 on the wedding dress, the flower cost is going up every minute, you’re thinking about serving chicken nuggets and kool-aid at the wedding reception to save money and then you start getting pricing information back from the photographers you reached out to…
Why are wedding photographers so expensive?

Just like the cake and the dress and the catering and the flowers, the wedding photos require skill, specialized equipment, time, and expertise to create. While most couples only see the photographer working the day of the wedding, the photographer actually spends significant time prepping their equipment, loading and unloading, photographing, paying assistants and second shooters, before the ceremony even starts. After the happy couple has departed, the photographer has to sort and cull images, edit and touch-up the keepers, create galleries, upload images, communicate constantly and keep the process moving. Outside of the wedding day, a photographer might spend 40 to 120 additional hours working on photos for each wedding.
Here are a few things to consider when asking yourself “why do wedding photographers charge so much?”
A professional camera is usually around $4000
Lenses run around $2000 to $3000 each
Data cards to hold pictures often cost $100 to $150 each
Flashes and transmitters can cost as much as $1000-$2000 each
Batteries for all of this equipment isn’t cheap either - usually costing around $100 per battery
Photographers need higher end computers to edit, as well as lots of storage space for photos
There are several software services that photographers have to use to manage projects and communicate with clients. These often run anywhere from $20 to $100 per month
The software the photographer uses costs between $20 to $50 per month
8 hours to shoot the wedding, 2 hours minimum prep, at least 40 hours to edit and sort. Photographers spend anywhere from 50 to 120 hours per wedding in labor.
Assistants and second shooters cost hundreds of dollars per day to hire and are completely necessary for medium to large weddings.
This is not an exhaustive list of expenses, but it does give you an idea of the investment in equipment and time that each photographer makes when booking a wedding.
Let’s Approach Wedding Photography Sticker Shock Differently

As a photographer myself, I knew what to expect when it came to pricing for my wedding a few years ago. But I still found myself begrudging the photographer because we had already spent so much money on everything else. One more expense in the thousands of dollars range was the last thing I needed. But once I began to think of things a little differently.
Besides the Rings, the Wedding Photos are the Only Things That are Going to Last

The cake will be eaten, the flowers will die, you’ll never wear that wedding dress again, and once your scheduled time is up at the venue, you’ll never be allowed to have the run of the place again. But those photos are going to last forever! You’ll see them for the rest of your life and its worth investing more and being happy about knowing that the photography is going to bless you for years and years to come. Think about it, when you die, people will be looking at these wedding photos are your funeral! In 2173, your descendants will be posting on whatever social media exists at the time “look at my great great great grandparents on their wedding day!”. You shouldn’t question the necessity to spend some money on these photos!
Don’t Be Wowed by the Portfolio, Determine what Value Your Photographer is Bringing for Their Fees
I had a friend who booked a very popular wedding photographer and paid $10,000 for their services. The pictures were beautiful, but they only got a few prints and a small photo book for their investment. The very popular photographer then upsold them for another $3000 to get more prints and a few digital images. Most of what they paid went to the photographer rather than giving the newlyweds photo products they could actually enjoy.
Part of the value resides in the skill and craft of the photographer, but they should also provide a product. You as the client/customer have to evaluate if you are getting value that equals the photographer’s fees. We paid $3000 to our wedding photographer and we were given prints, a photobook, all of the digitals on a cute custom flash drive, and the images were beautiful. The value we received was definitely worth the price we paid.
How Much Should I Spend on My Wedding Photos?
It is really going to come down to a balancing act. There are a few factors that are going to have a direct effect on the price you are going to end up paying.
The Reputation of/Demand for the Photographer
The Time/Date of Your Wedding
The Size of Your Wedding
The Products You want to Receive (Prints, digitals, photo books, etc)
All photographers are taking these items into account when they determine pricing. Photographers cannot charge more than the market will bear, so often they decrease products if they are more in demand. Less popular/in demand photographers will often offer more products for a similar price. If you’re absolutely in love with a certain photographer, understand that you may not receive as many prints or copies of the digitals. Or that you might have to buy those after the fact. If you’re more interested in the quantity or products you receive, don’t try to compare a prestigious photographer’s pricing and products with someone who is trying to be in a similar price range by providing more value in their products they offer.

Wedding season gets crazy and the date and time of your wedding might come at a premium if you don’t book in advance. An intimate 10 person wedding is also not going to be as much work as a wedding with 250 guests. There is significantly more work involved in larger weddings, so don’t be surprised if you are having a large wedding and ask for a discount and don’t receive one.
It also helps to know what products you’re wanting once the photographer is done with their work. Most couples just take what the photographer is offering but it can be very helpful to have an idea of what kinds of prints you want, how many copies of the photo book you want. You can often negotiate those extras upfront and possibly get them cheaper than purchasing them after the fact. If you know what you want, communicate that to your photographer and negotiate the price at the beginning. It might save you quite a bit of money!
Photos are Forever

Don’t be a grump about the price you have to pay for your wedding photos! Take charge and know what style of photos you want, the products you want, and the coverage you’ll need and shop around just like you did for the cake and the dress and the catering and everything else. And once you decide, just remember that those images are going to be around for a long time. Probably longer than you will be so rather than begrudging the amount you have to pay for pictures, celebrate the fact you have secured a professional to document your beautiful day and that you will be left with beautiful images to last for generations to come!
Shameless Plug Time
If you’re in the Northeast Texas area and looking for a wedding photographer, check out our Wedding Photography Price List and contact us to see if we can help you with your big day!